
DJOldguy

1547

15

4

025
I started glueing it up. Being careful, I did one side and the center squares, then after they had set, I glued the other panel. At this point, I saw something that I was doing wrong, and thought about how to change my approach.
I also stopped taking photos, well, missed a few steps. Sorry about that. I glued the other side on, then did the ends. The idea was that I would use the router to create the channels but, typically, tried to do too much at one pass and as you will see, got it wrong, again.

026
The idea was right, but the initial execution was pretty poor. I really made a mess of one side, but was considerably more careful for the rest of it and that made the work go easier.
Once the center panel was complete and glued, I saw something else. Slicing the whole pieces into smaller pieces creates a number of little inconsistencies in the joins. Those inconsistencies are not going to be totally blocked when glued and clamped together. They become too small to notice and tiny gaps are left.
I know some of you will freak now, but my idea was to create a series of channels to pour epoxy resin into. To do that, I cut up a lot of the lengths into smaller squares and then routed the edge. It wasn't a bad Idea, but it did mean I was setting myself up for a whole lot of extra work.
I missed taking shots of the next step, that was glueing the glued up panel to a substrate. I used the second last piece of the filmed plywood. I roughed the surface up with a sander and glued it on. Wasn't sure if it would hold, glue on plastic, but it did. I added a set of screws just in case though.

027
At this point I was thinking I had better be a lot more careful and began prepping the edge banding.
I thought about it a bit and saw that the corners would be sharp. Sharp corners and five year olds don't always mix. I nipped off the corners by cutting diagonally across the corner squares, but given they were not the same size, neither were the cuts, as you will see. Oh well, designing on the run always looks better in your head than in reality.
But so far, so good, a great learning experience.

028
I thought I'd experiment a little and stained the center square then glued the long side edge bands on. That worked, but the stain was not looking good, didn't survive through the last sanding before filling the channels, so I got away with it.
I then did the ends.

029
I held the ends in place with a bit of painter's tape, set up pipe clamps I made years ago, then noted there was no clamping pressure on the middle of the edgeband, so I improvised.
And yes, the clamps are from Aldi. I saw them in the center aisle of a store I was visiting for something completely unrelated. I was needing some clamps, and they were affordable. They've given me good service for the last- a long time ago anyway. Pretty good quality for what I paid for them.

030
I trimmed the side and end edgeband to be flush with the trimmed corners, then glued the angled corner edgeband on. Crazy number and angles of clamps, surprised it actually worked.

031 and 032
So the edgeband is on allround. The routing is complete, and you should be able to spot the next big issue. (Missed the next image here) There it is, after the last sanding. Started at 80 grit, then worked through the grits to 320 grit. (Maybe a bit of overkill, but I wet the surface of the timber, let it dry, then rubbed down with 400 grit, silken smooth surface.) The stain I put on was totally removed, and now time to seal it.

033
I went totally overboard with a polyurethane paint. This does two things. First, it seals the wood from being stained by the tinted epoxy. The other thing is, it revealed a couple of small gaps in the joins and edge banding.
There is always discussion about sealing wood when pouring epoxy. The issue for me was that wood pores are open to holding air. This means that as the epoxy bonds with the raw wood, those pores with the air in them, have it forced out. That air appears as small bubbles in the epoxy. Sometimes you can get lucky and the bubbles will rise to the surface and pop naturally, but most often they can get trapped in the epoxy. To clear those air bubbles, the surface of the pour is heated with a blow torch or a heat gun, which heats the epoxy, forcing the air bubbles to the surface. Not an ideal approach, but it works. I sealed it with a polyurethane paint, then after it dried, gave it a light rub down with 120 grit sand paper to help the epoxy to grip the poly.
Another problem with epoxy is that it needs to flow, therefore it is relatively thin. This means it will seek out the tiniest of those gaps I mentioned and leak out of whatever you're trying to pour. I've seen enough Blacktail Studio, (hi Cam), Foureyes Furniture (hi Chris), Bourbon Moth (hi Jason) and Sean Boyd Makes (hi Sean) YouTube vids to know this happens, and even the best and most careful workmanship can miss these little gaps.
Epoxy is too expensive to let run out of your project, so I carefully went over every join, every glue seam and filled anything suspicious with a mix of glue and sawdust. Some gaps I used a mix of sawdust and CA glue, (super glue, or Kragel if you know what I mean). This leaves a black line but given the channels would be filled with black tinted epoxy, it wouldn't be noticed.

034
Feeling really confident I got every gap, and was sealed so nothing would go seriously wrong, I went ahead and poured. My first ever epoxy pour. You may notice the blue painter's tape.

035
Done! My very first ever epoxy pour and it went like a dream. I wrapped the base in plastic, which doesn't stick to epoxy, and then sealed it with painter's tape. I could have used some caulking around the edges of the channels, but I doubt it would be cheap, so used the plastic.
Watching Chris of Foureyes Furniture, he has, essentially, given up on building forms for his expoy pours. It is an expensive and time consuming practice that I didn't want. Chris has started using painter's ground sheets under his projects, they're cheap and easier to wrap your project in than making a form, caulking it, etc, etc. And as long as you have your project on a flat surface, leaks can actually be kept to a minimum.
Then paranoia set in. Did I get every hole? Every gap?

036
Ever notice how YouTubers never discuss cleaning up after an epoxy pour? Or maybe they did, once, and have never gone back to it, or it's so obvious that things need to be cleaned up. It's like a sunrise, so repetitive, hardly anyone ever talks about it.
I found there are two chemicals that really make the cleanup easier. The first is acetone, (nail polish remover), that really does clean up both the epoxy resin and the mixed hardener.
Oh, sorry, missed a bit. The epoxy comes in two parts, the resin and a hardener. Too much hardener, or too little, causes different kinds of problems, so you have to mix it in the right proportions. I cheated and got a 2 to 1 mixture of resin and hardener so I didn't have to do much calculation to work out what I needed. To color the mixed epoxy, I put in about 6 drops of black India ink. (I got some red ink too somewhere, so might give that a try on, say, a chess board.)
Without doubt the acetone is really handy, but as I have used polyurethane to seal the wood, I also used turpentine, (turps for us heathens).

036
Did I get every gap? No I didn't. I missed one, but it was a small one. You may not see it, there is a lot of painter's tape and some plastic there where the leak is. I missed taking photos of that before I poured.
I had a plastic furniture cover so used a piece of that, and with the blue painter's tape wrapping the whole thing, as you can see, has capped the leak. Just how bad it is, we shall see. But I am going to have to clean it up, even after it has cured. Good luck me!

036a
I put those clamps on to hold the work while I was pouring, and that was where the leak was. Maybe there is a connection, but I only tightened the clamps to stop it from moving, so not tight at all. Perhaps that caused a shift, or buckle at a point where there wasn't sufficient glue to hold, who knows?

037
It's only a small leak, but it is annoying. Oh well, as someone once said, perfection is easy, when you get it right.

038
It is holding, haven't lost too much epoxy, I don't think.

039
A couple of close up shots, but please, don't be too critical, it really doesn't look that bad. The plastic coat is holding it, and hopefully, it will cure sufficiently well, and quickly enough, to seal the leak.
I will have to sand it back a little anyway, clean it up a lot, then another polyurethane coat and finish the top with another layer of clear epoxy. Gotta leave it for a couple of days to cure properly.
But first, I have a nice piece of cypress around here somewhere. Ahh, here it is.

040
My cypress log. Gotta cut it on the floor, well just above it anyway.

041
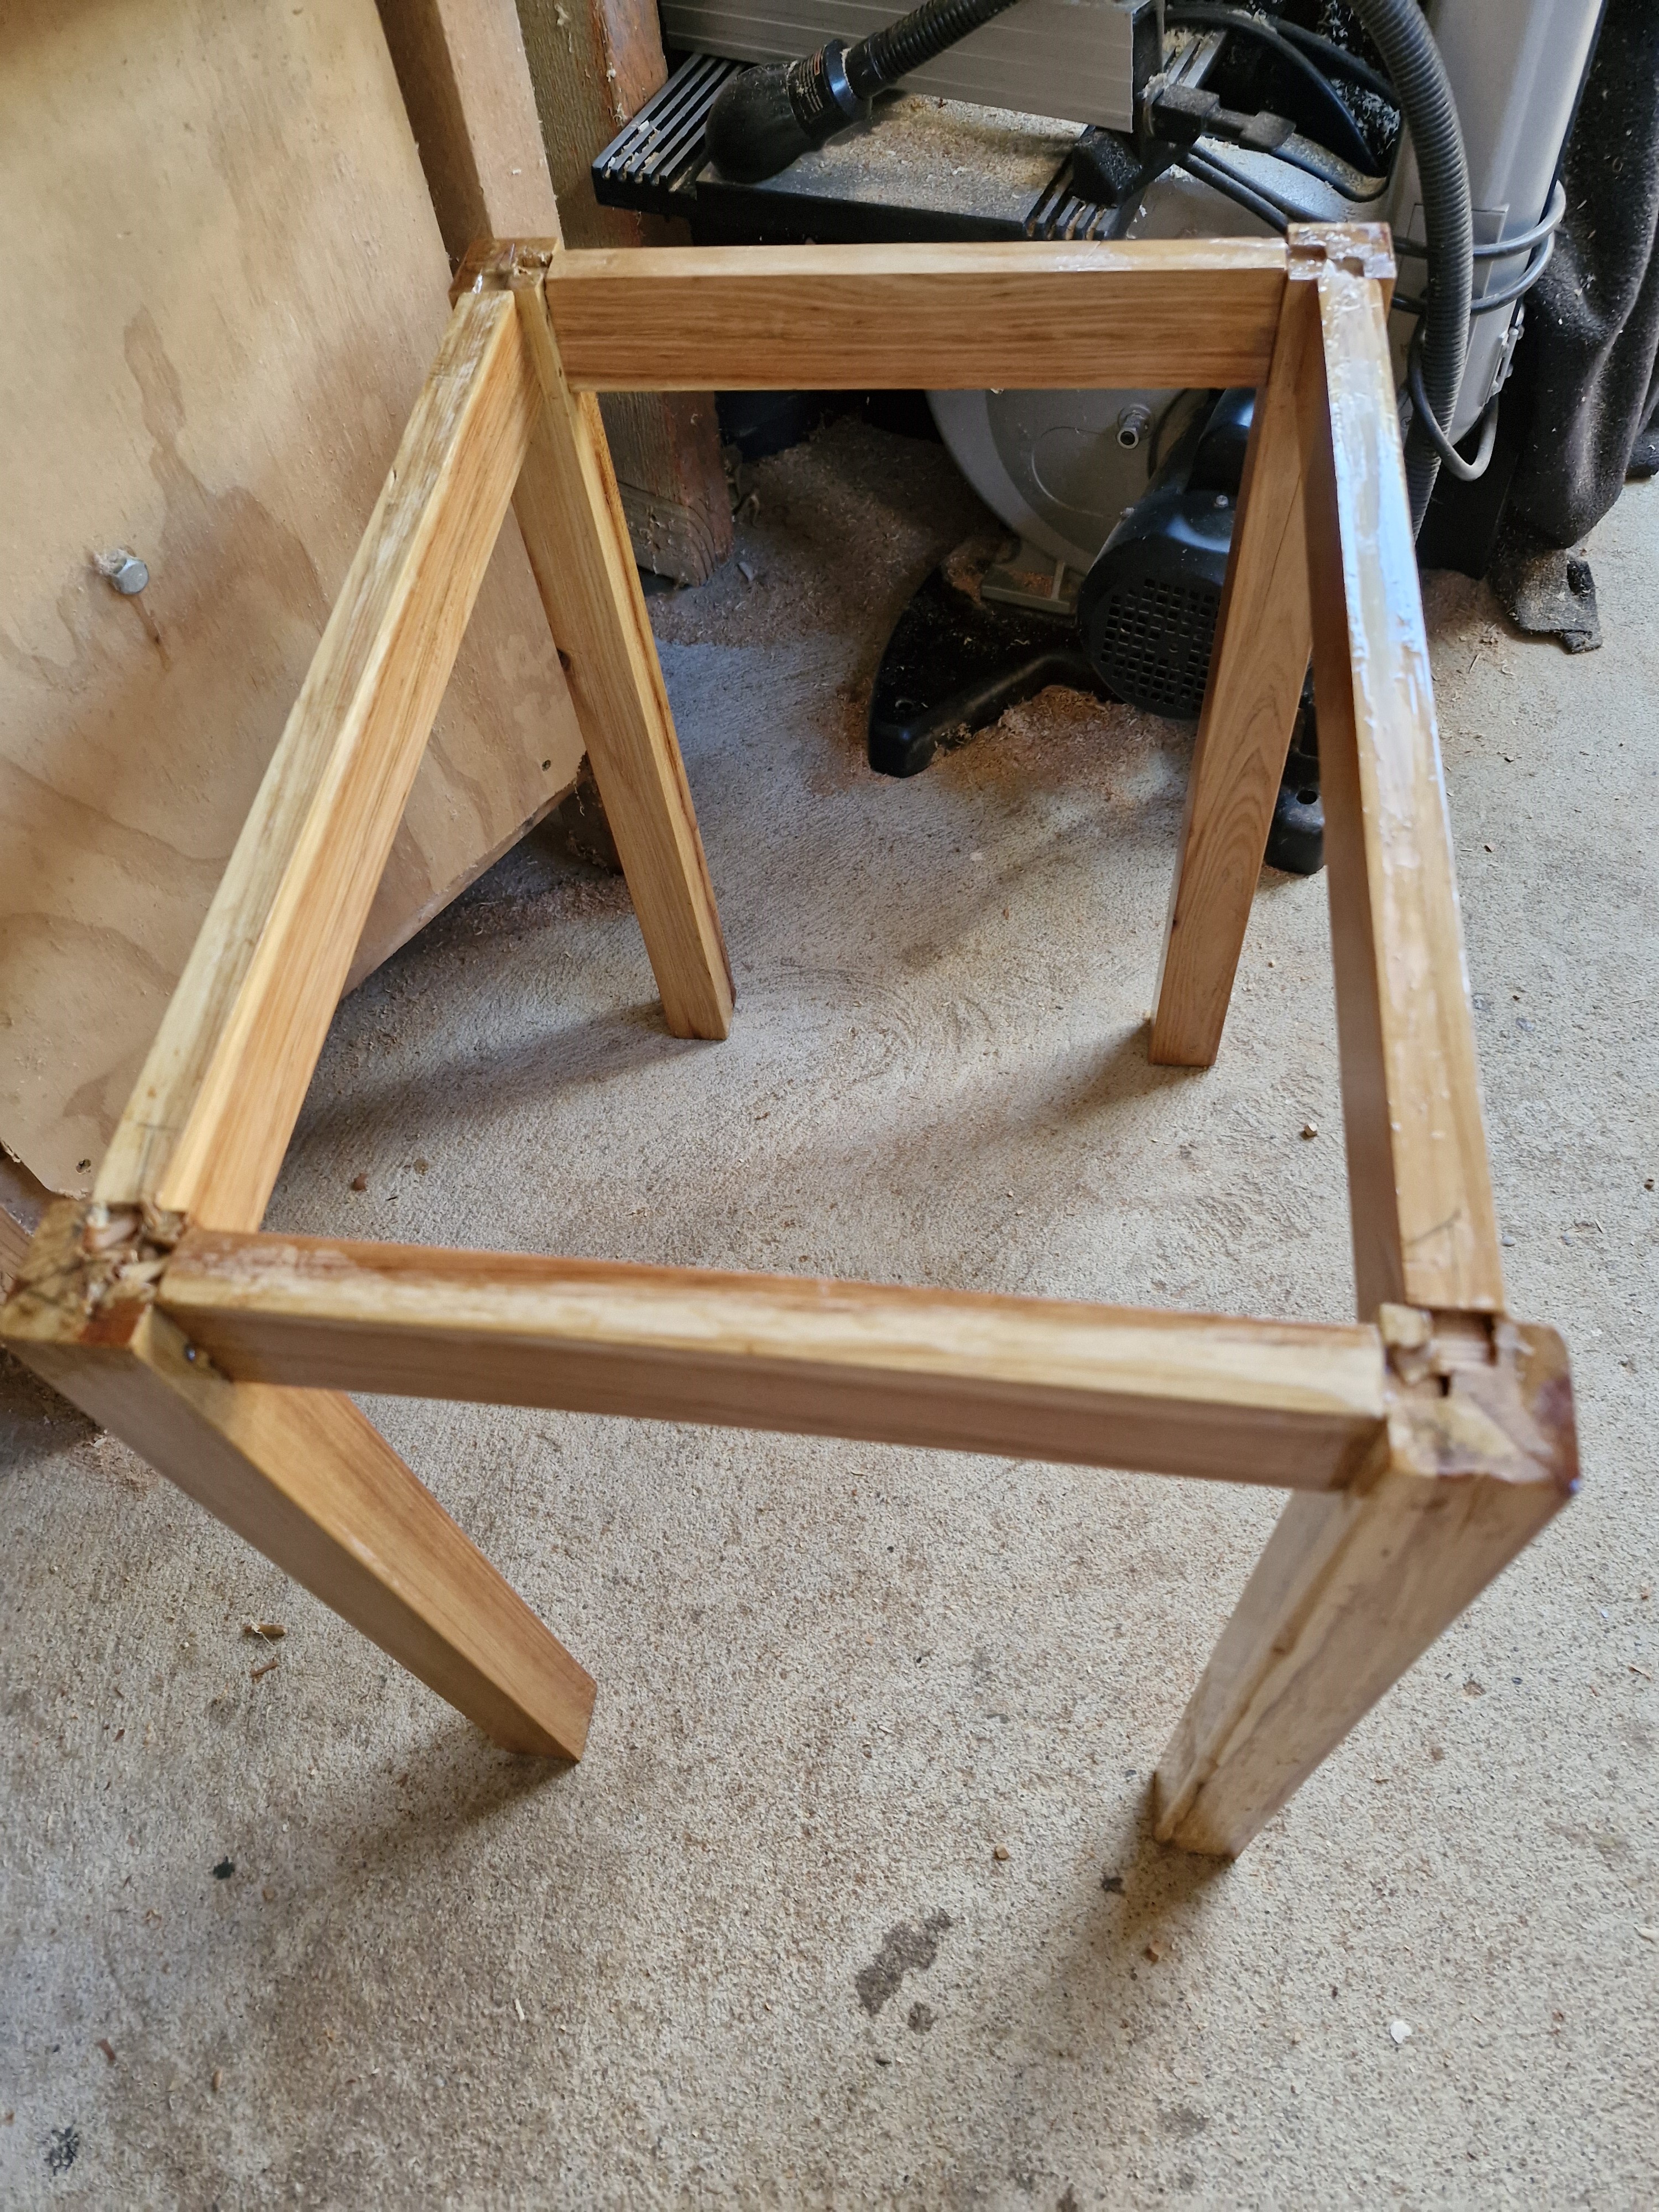
Sliced and diced, there are four legs there and an apron that I am going to make mortise joints into for the legs. You can see the saw marks so there's a bit of cleanup to be done.
042
Then managed to miss taking photos of the process. Okay, have to remember to do it better.
Not sure how well that went. Cut everything to an equal size, made the tenons then started cutting the mortises with a router and a template. Big mistake that was. I really need to spend more time using a router. Seems that having wood on both sides of the bit can lead to a lot of problems, especially if you really don't know what you're doing. Who knew, right?
Split the wood at the end, I guess it was insufficient timber between the mortise and the end of the leg. Could have foreseen that, but aggghhh, too late to worry about it.

043
Another shot and again, made a few decisions and didn't take photos of the process.

044
Cured and now prepping for the second epoxy pour. That too went well, so left it for two days and then stripped the plastic off, turned it over to see this.

045
Okay, the leak was bigger than I thought it was, but it was contained by the plastic. This and the clamps, ( presume) was sufficient to keep the leak relatively small, and a chance to cure before it leaked all over my workshop floor.

046
The plastic held the leak and fortunately, I did put polyurethane paint over the edge banding, but it didn't stop the epoxy from curing over it. I spent a lot of time carefully sanding the edgebanding, to get the black off it. but perhaps if I had been a bit braver, I could have saved myself some time by using a router and a straight edge bit.

047
Using a Dremel, I cut some slots into the apron and fixed these catches. I don't know what they are called, but they hold pretty tight.

048
Sanded a lot of the spill out, but never going to get rid of it all.

049
All together and ready for finishing wax. Took it inside as it was a little chilly for applying the wax coating.

050
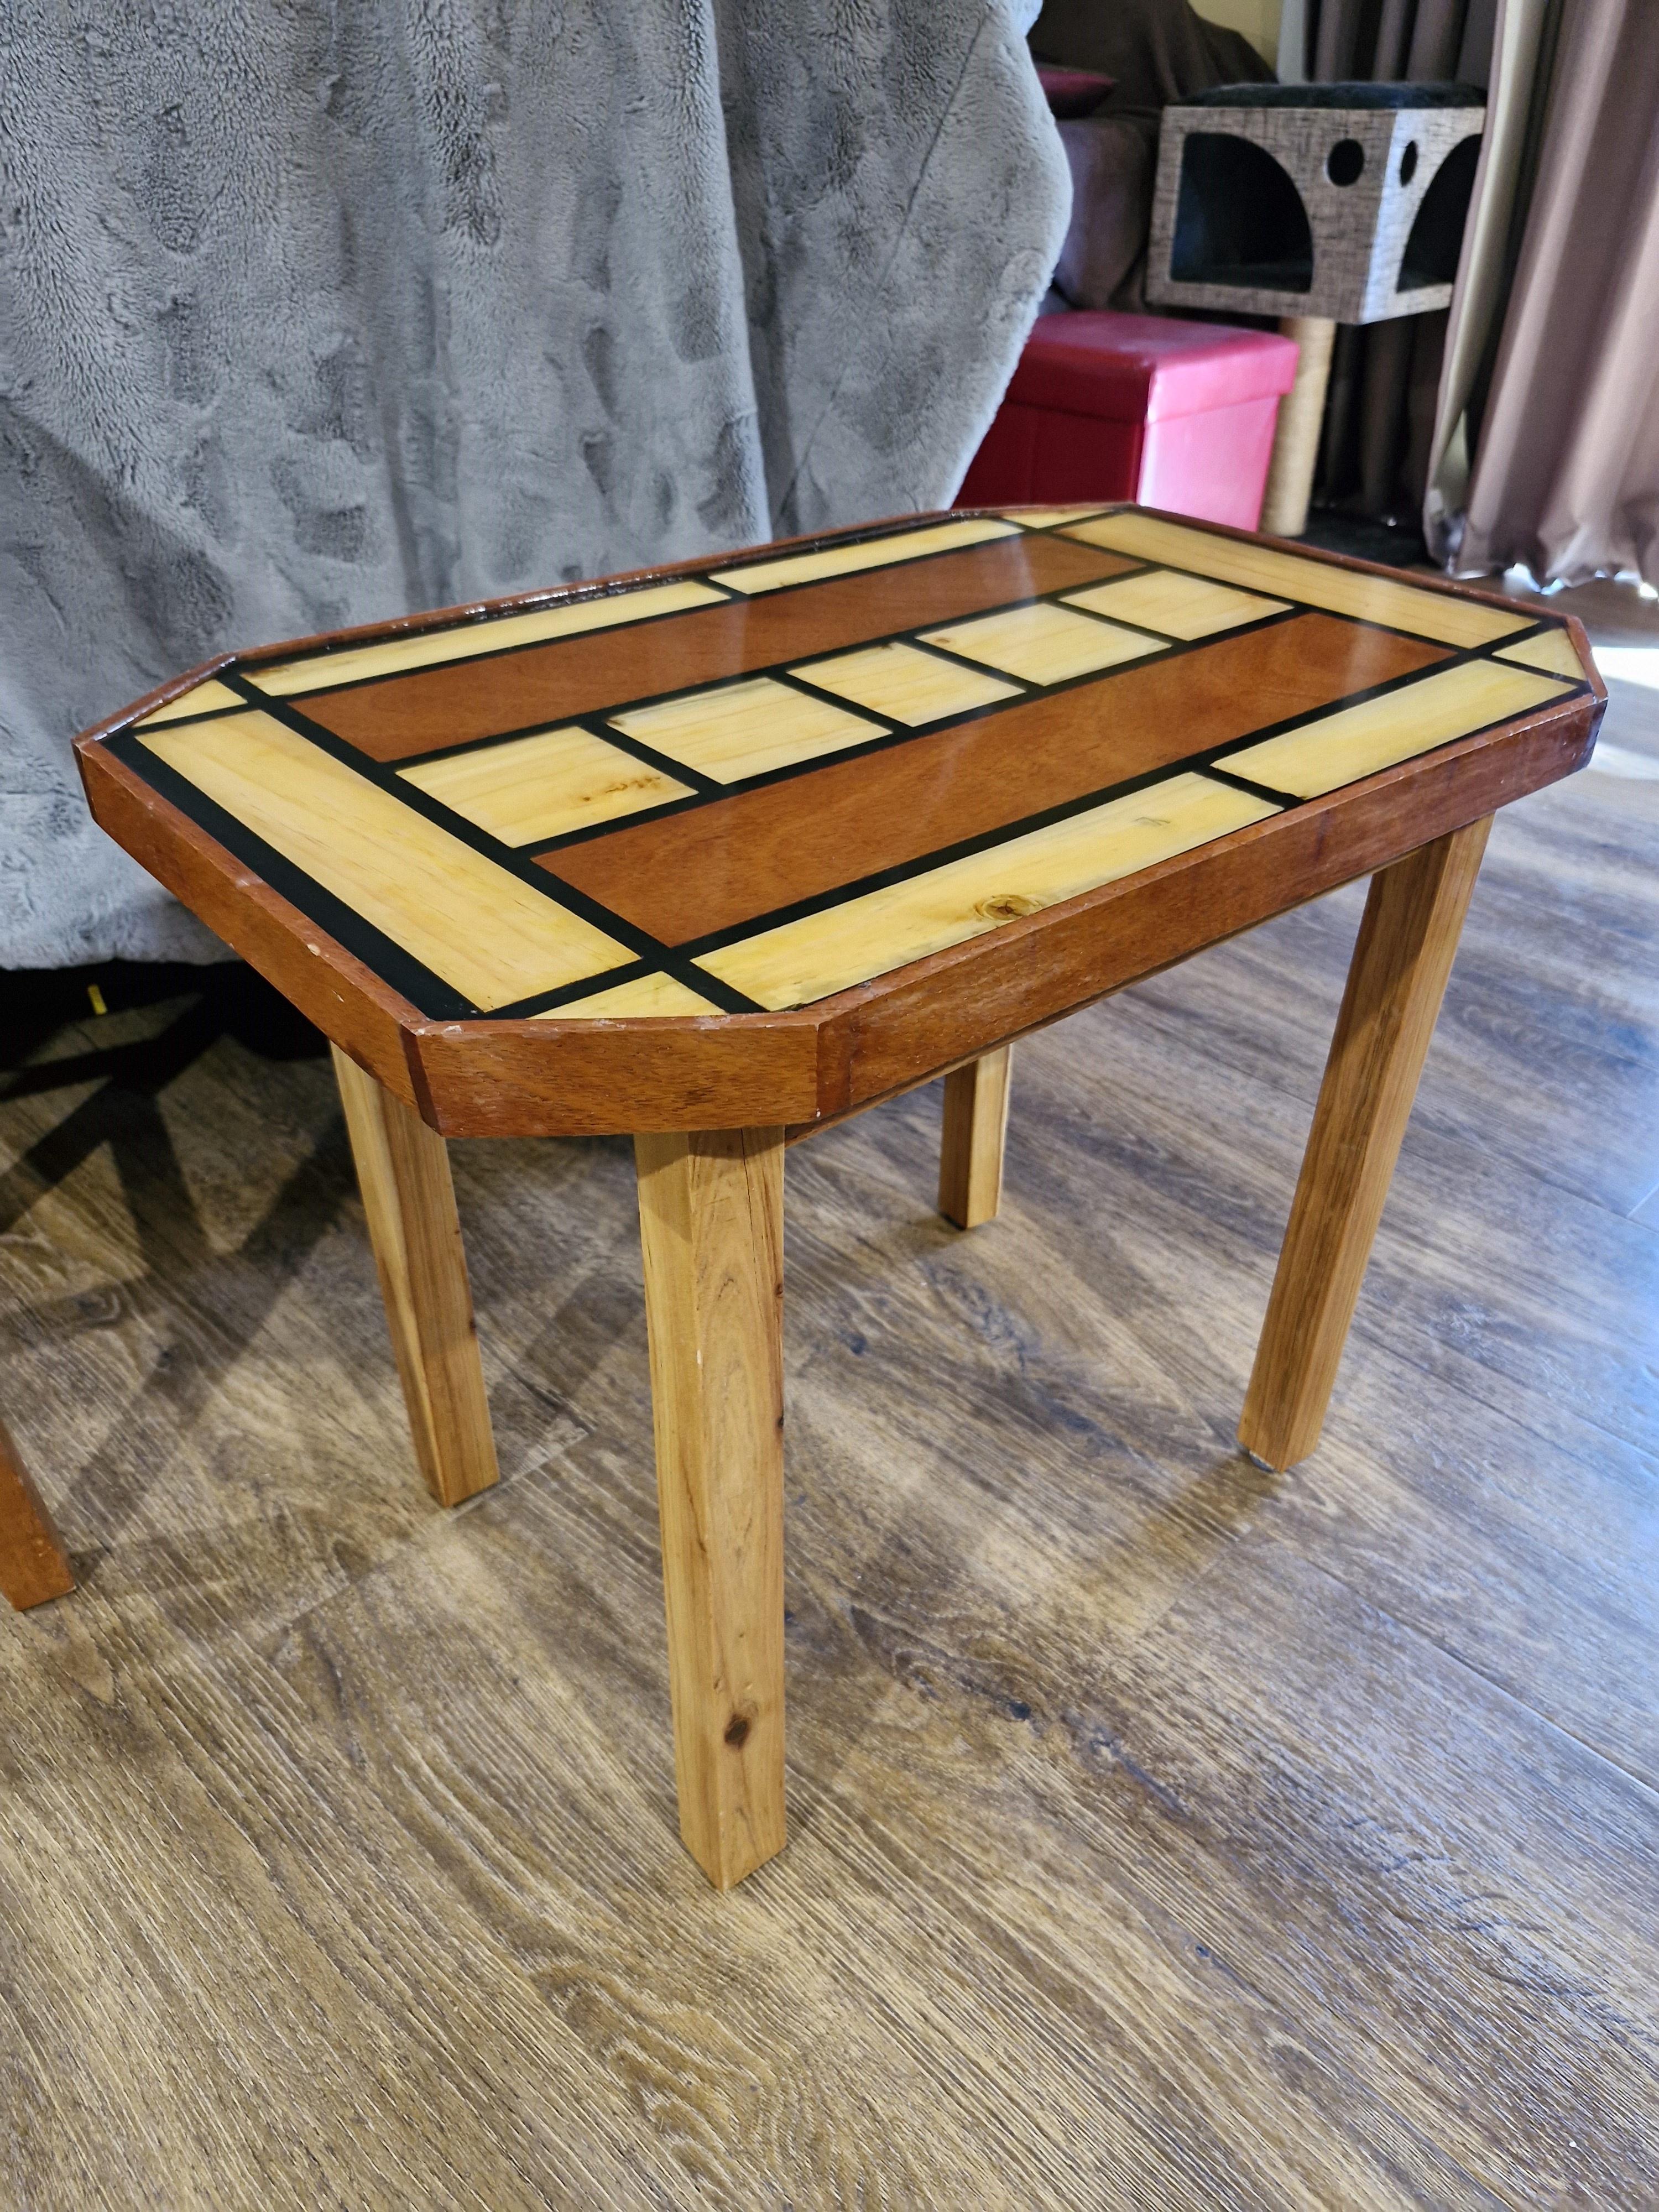
A final waxing and that was it. The wax was a hard wax oil, easy to apply with a microfibre cloth and a bit of elbow grease.
051
All done. Now to give it to the birthday girl.
And she loved it.
CalvinMcFly
Gorgeous!
DJOldguy
Very kind of you to say so, thank you.