
WhiskeyRiver2

1712

24

5

The old SMLE No1 Mk3* rifle my dad gave me about two weeks back. Not sure when or where it was made (those markings are either rubbed off or hidden under the wood), but it's still an awesome rifle. Best guess I have for production is somewhere between 1916 and 1953 (aka the entire time this model was in service/production), leaning towards an earlier production rather than later due to the serial number(s), which are all five-digit with no prefix. If my sources (about a days' work on Google) are accurate, the serial number system was five digit runs of 1 to 99,999 (so 100,000 guns per run), with every run after the initial 100k having a letter prefix starting at A, though RSA Enfield only had four-digit numbers, with the same prefix rule (the prefixes only start after the initial serial block is done).
The wire wrap was done on the rifles that were issued with grenade launcher cups (which I also have, see other pics), as a way of reinforcing the wood to keep it from cracking or breaking from the massive force involved in launching the then-standard Mills bomb down-range.
Also, total weight for this old badass is right around nine pounds empty (8 pounds 10 ounces plus whatever the wire wrap weighs, I'm guessing 4-6 ounces), with the launcher cup adding another two and a half pounds (40 ounces exactly) to that. It's big, it's heavy, and it was Britain's "go to war" rifle for close to 20 years. There are still hunting rifles being made with this exact action (reworked slightly for the .308 Winchester/7.62x51 NATO) cartridge today, and from what I've read they're fairly popular, with good reason.

Rifle and launcher cup, with 12 ounce soda can for scale. Sadly, the launcher is maybe a quarter-inch too narrow to work with cans, though a tennis ball fits perfectly. Even if soda cans fit, not sure how the concave bottom would fare against the gasses from a .303 blank... that could get messy.

The only easily-visible marking on the rifle aside from the serial number(s). From what research I've done this is actually on the wrong side of the wristguard (it's supposed to be on the right, on my rifle it's on the left). Not sure what the "F.R" mark stands for - closest I've found is an F.T.R marking for "Factory Through Repair", stamped on guns that were completely overhauled in the factory after getting used and abused in the field.

Safety lever (disengaged), the currently decocked striker, and a decent view of the wristguard. The striker is resting on the sear (which is just the back face of the trigger, you'll see that further down) in this picture. The Lee-Enfield is a "cock on close" action, which is part of why this action is so fast and smooth to cycle. From there the bolt moves forward about a half-inch, compressing the firing pin spring and pushing the striker back into position to fire the rifle.

Striker at half-cock. The brown crap visible on it is old grease, dirt, and probably a bit of rust. Need to either order or make the tool needed to get the firing pin out so I can give this a proper cleaning. That chunk of metal towards the bottom of the picture is the charger bridge. Interesting note, the Lee-Endfield's safety CAN NOT be engaged when the striker is at half-cock like this. You also can't open the bolt or pull the trigger - you have to manually bring it back to full cock by just grabbing the cocking piece and pulling back until the second sear engagement catches.

Striker at full cock, ready to fire. Half-cock notch visible towards the back there.

Magazine, trigger guard, and what used to be the chain attachment loop on the very early Lee-Enfield rifles. Some sources say that loop could be used as a sling mount, but I seriously doubt that claim. Note the hole in the bottom of the magazine, that's where the chain would've been attached to the magazine itself.
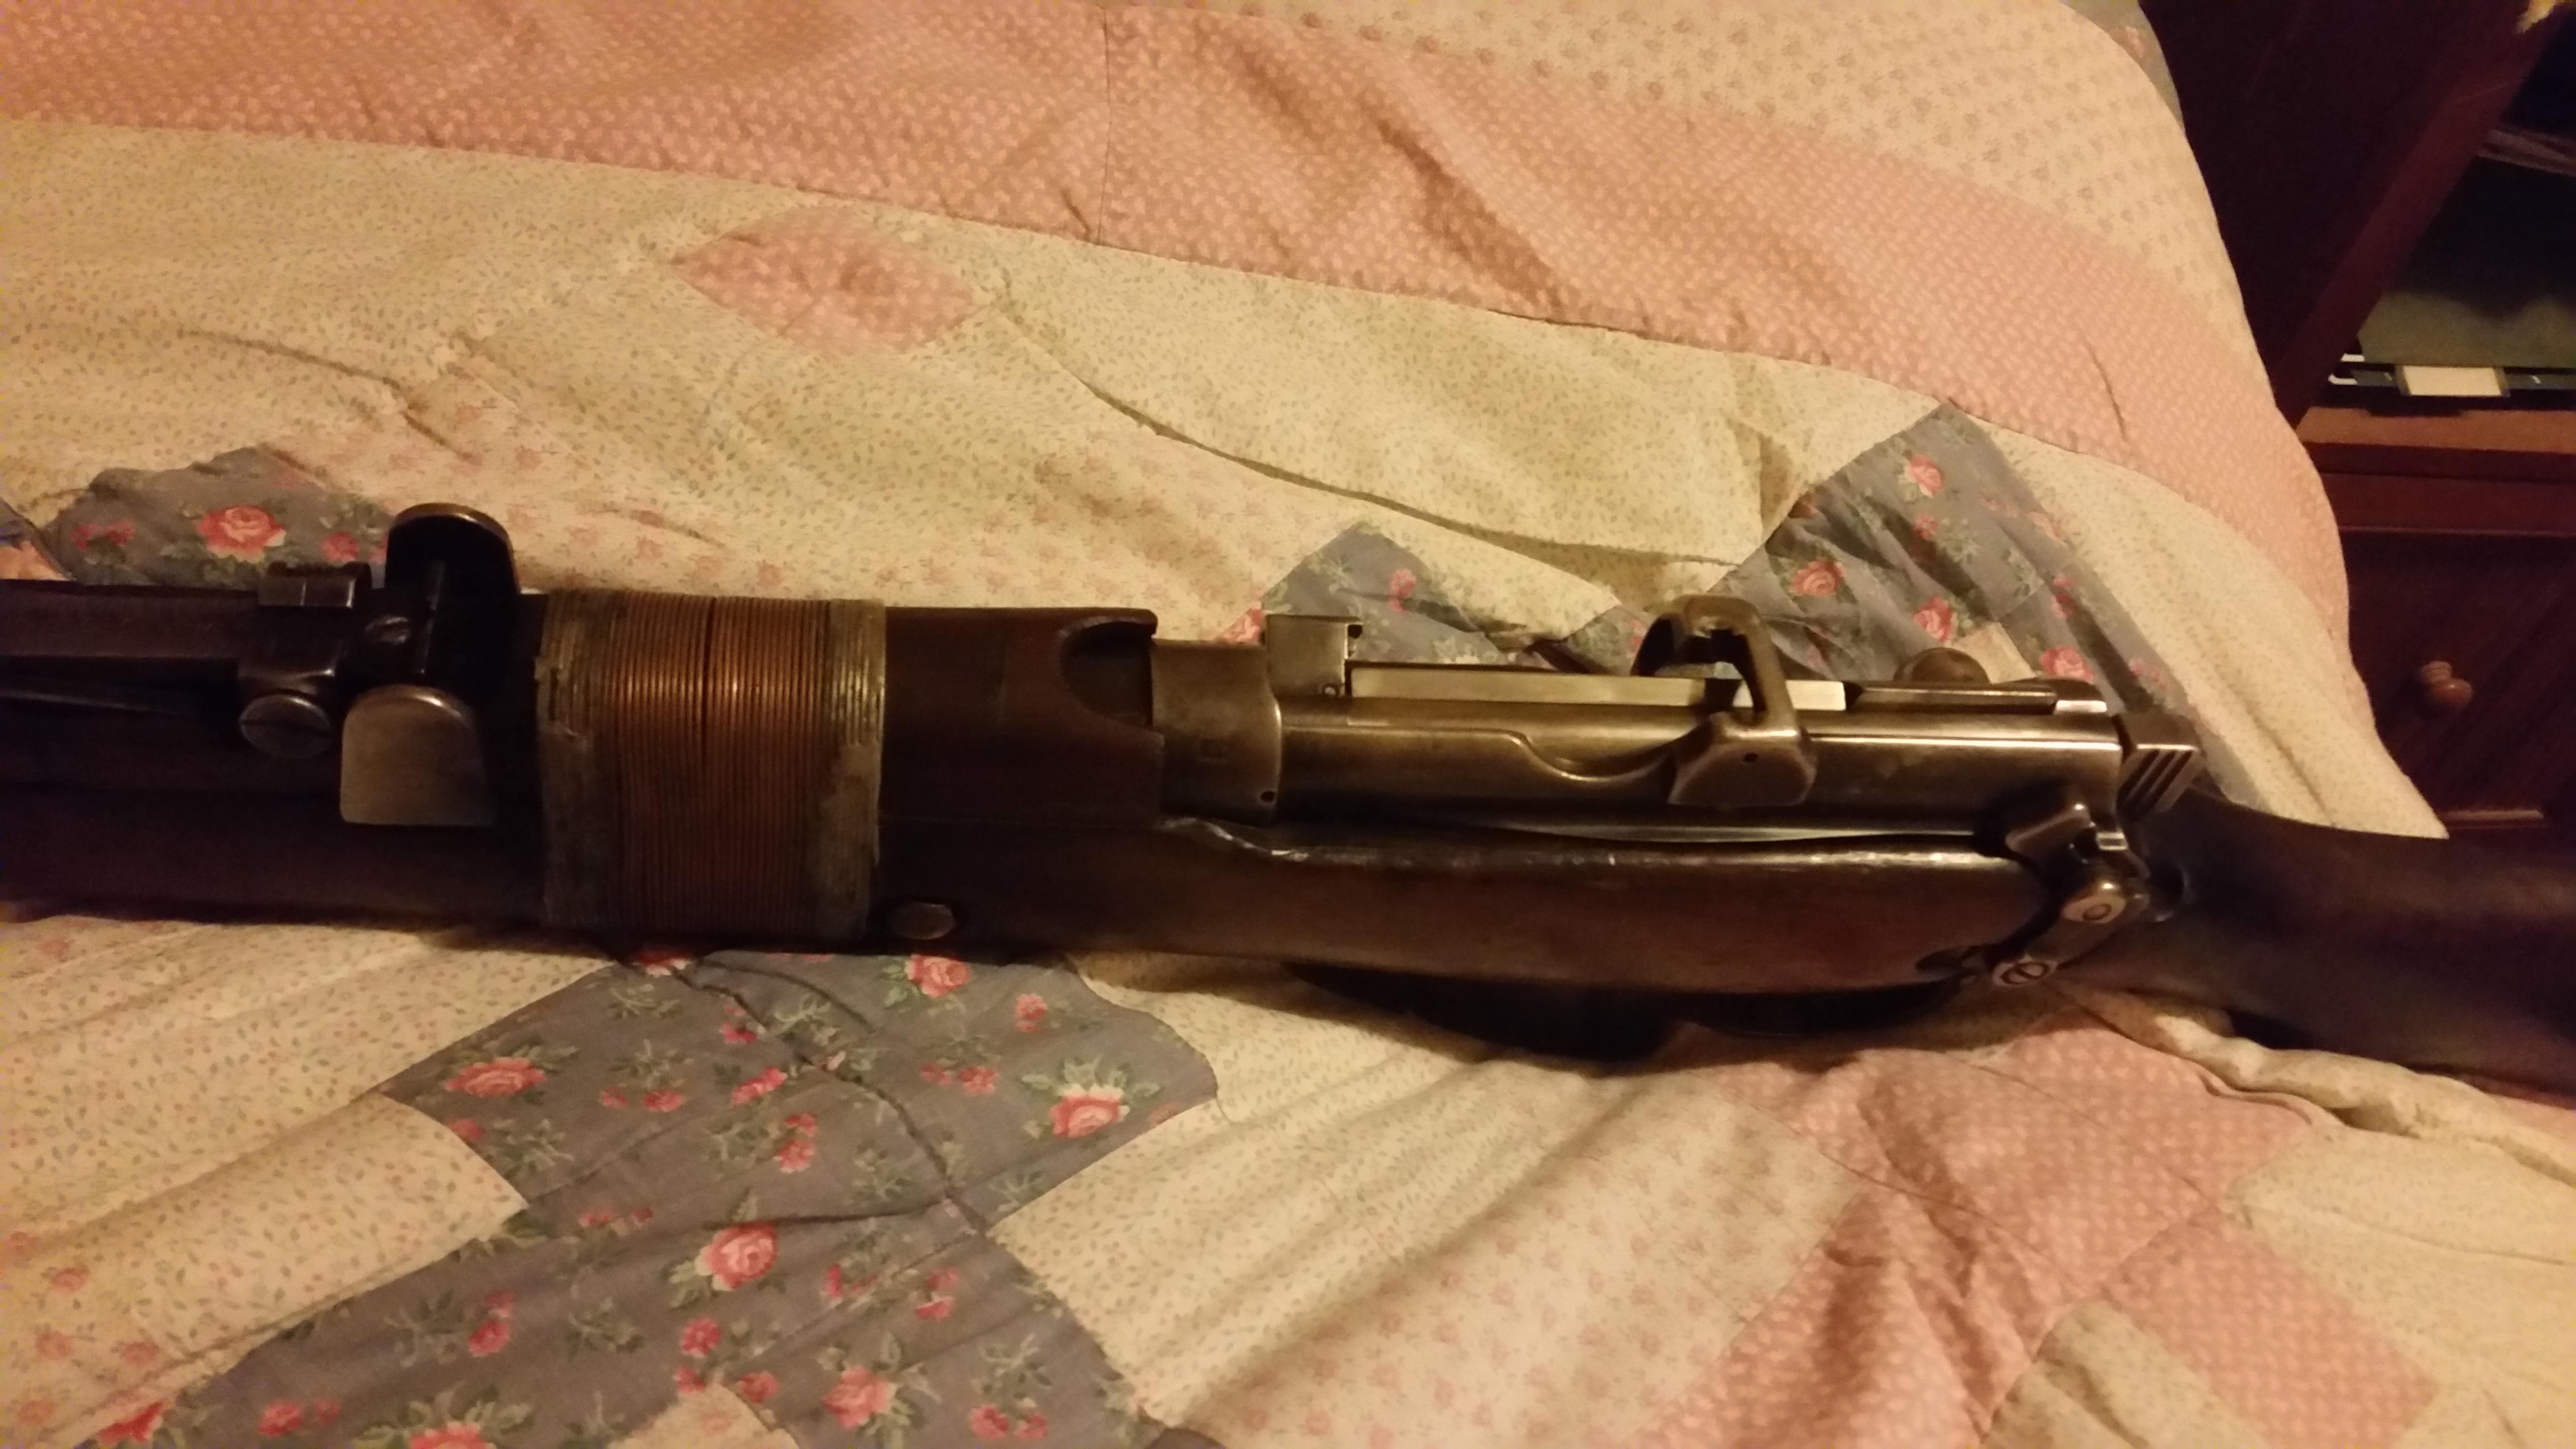
Action, rear sight (note the two massive protective "wings"), and the rearmost section of wire reinforcing wrap. The first and last six full loops of wire are soldered in place, presumably to make them less likely to work loose and provide a little extra support.

Right side of the receiver/action. Serial numbers on the receiver, bolt, and rear sight are all matching, though the rear sight is a replacement. Might be hard to see here, but on the bolt head there's a pair of crossed flags. If anyone knows what that or some of the other markings visible here mean, let me know in the comments (and please, provide sources if you can).

Back of the bolt and striker/cocking piece. Same markings here as on the receiver and bolt head, plus what looks like a 23D stamping. Not sure what that means, more research is required.

Went ahead and pulled the bolt. Note the massive locking lug on the top/right side, and its much smaller brother on the bottom/left side. To pull the bolt out on an SMLE, open it all the way, then find the sweet spot where the bolt head will pop up off of its rail/guide in the receiver and turn so it's in line with the locking lug, then just pull it straight back out. Pretty simple and fast to do, though finding that sweet spot can be tricky.

Close-up of the cocking piece. Note the two sear engagement notches - the one closest to the end is the full-cock one, other is half-cock.

Opened action, looking down into the magazine. Feed ramp barely visible towards the front of the receiver there, plus the follower in the magazine, and the charger bridge (where you'd insert one of the 5-round stripper clips to load the magazine).
While the magazine on the SMLE *is* detachable, that's not supposed to be done in the field unless you need to knock some debris or fouling out. In fact, when the original Lee-Enfield rifle was first issued (going back to the MLE and possibly the Lee-Metford as well), the magazines were physically chained to the gun so that even if they were removed, they weren't likely to be lost. The No1 Mk3 still retains the little loop that would've been used for that chain, though that practice ended fairly soon after the introduction of the gun.

Action with bolt and magazine removed, good view of the breech face, feed ramp and chamber mouth.

Back of the action, attempting to show the sear and safety mechanism. Safety disengaged, sear ready to engage the cocking piece.

Safety engaged, sear dropped (holding the trigger back with the pen). The actual safety is just a simple nub that locks the striker/cocking piece and trigger in place and prevents them from moving far enough to disengage, and also locks the bolt in place for extra safety.

Side view of the magazine - doesn't look like it'll hold ten rounds, does it? Remember, the .303 British is a rimmed cartridge, so there's a fair bit of curve in that stack, which is why the bottom is angled so sharply.

Feed lips and follower, because why not. The spring in this mag is still nice and strong, I don't expect any trouble with it when I finally get the chance to put some rounds down-range.

Rear sight, graduated from 200 to 2,000 yards. Oddly, the alignment mark on the rear sight itself can end up roughly one mark (~100 yards) past the designated markers on either end of travel. Not sure if that's a flaw with this specific gun or a feature, nor do I really care.

Underside of the rear sight. Note that of the two serial numbers, one is crossed out, thus cancelling it. Fairly sure this was done by an armorer at some point, or possibly the factory that built/rebuilt the rifle. Not sure what the little F or the X/cross stamp are for, though that X/cross appears a few more times on other parts of the gun. Marking for a rifle that was surplussed out at some point, maybe?

Serial number on the magazine, four digits with a letter prefix tells us that this specific magazine was made by RSA Enfield, since they were the only factory to use four-digit blocks of serial numbers. Since it's kinda hard to read, the serial on the mag (including prefix) is B1303, not entirely sure what that Y means. I've seen some sites that say the Y was on guns intended for "emergency use", though if that were the case it *should* be an EY marking rather than just a Y.

Close-up of the nosecap/muzzle end of the gun. Note the bayonet lug, bayonet stud, and the ovoid cut-out. Those last two are important for how the launcher cup mounts, as you'll see further down.
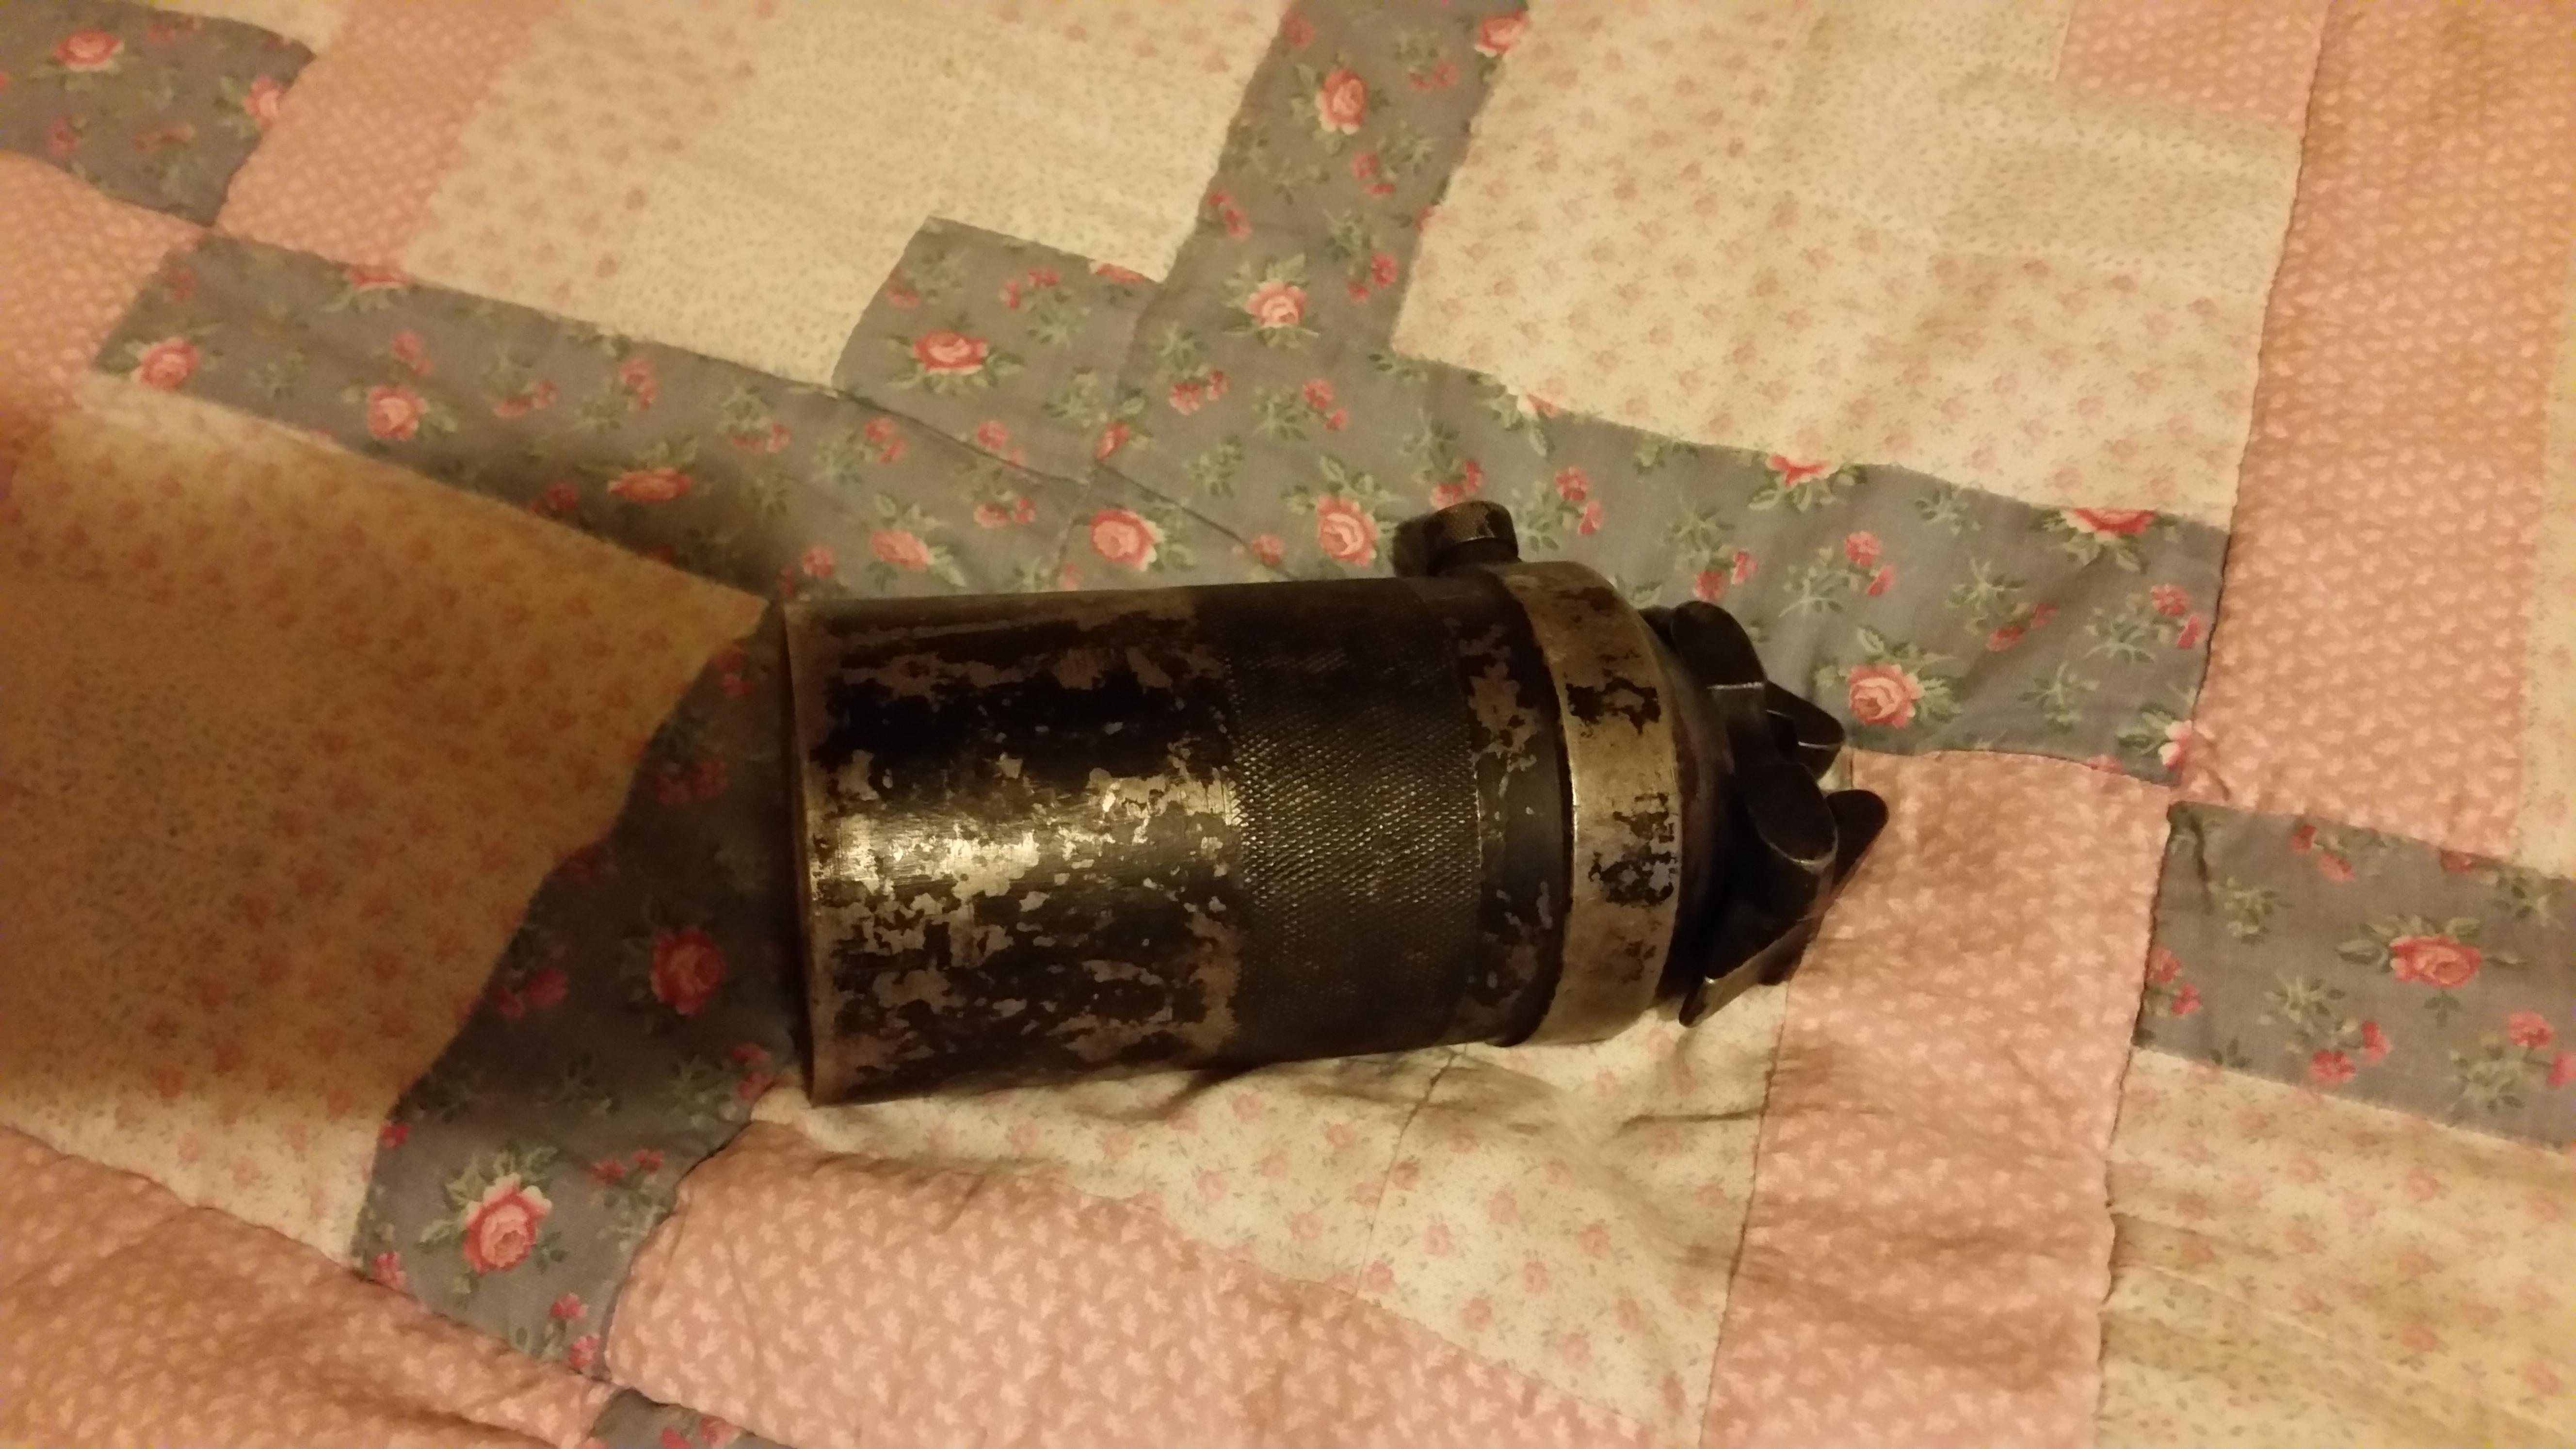
Close-up of the launcher cup. Note the knurled section on the lower third of the cup, that's where you grip the thing to screw it on or off the mounting hardware.

This here is the gas port, used to determine how much of the gas from the .303 blank you're hopefully firing will be used to propel the payload. Simple thumbscrew-tightened slider here, nothing too fancy about it. IIRC the manual had range estimates for 1/4, 1/2, and 3/4 open, with the total range being anywhere from 60 to 200 yards with the port all the way open or closed respectively.

Close-up of the mounting hardware, cranked all the way down. Those little protrusions on the wedges/legs lock into the front of that oval cut-out on the nose-cap of the rifle, then you screw it down nice and tight, with that U-shaped notch in the middle there fitting over the bayonet stud to ensure that the center of the cup is actually in line with the bore of the rifle.

Back end of the cup, can see the depression where the crown of the barrel sits when this is actually mounted.

Went ahead and unscrewed the actual mount, but my camera (relatively crappy S6) didn't want to focus on the threads. As you can still tell though, it's a coarse pitch.

The inside "face" of the mounting hardware, because why the hell not. That weird stain on the quilt is from when I pulled the bolt head off yesterday to try and get the firing pin out (forgot you need a special tool for that, which I don't have), still need to go in and clean that properly since it's obviously full of old, nasty-ass oil and fouling.

Inside view of the launcher cup with the mount removed. Those two little cylinders on the left there are just to keep the gas port cover from falling out of place, the slightly smaller steel ring there is what the base of the original rifle grenade (basically a Mills bomb stuck onto a disc of wood or steel) would sit on.

Rifle with launcher cup mounted.

Close-up of how the launcher cup mounts to the rifle. The two "arms" on the side lock into the cut-outs on either side of the nosecap, with a U-shaped notch fitting over the bayonet stud to help center the cup over the actual muzzle of the rifle.

Front sight and launcher cup. Note where the thumbscrew is for the launcher's gas port. Instruction on actually using the launcher is to jam the butt of the rifle into the ground at about a 45 degree angle, with the trigger guard facing you (so the top of the stock/buttplate is actually pressed into the dirt), in order to reduce the chance of the stock getting damaged by the force of firing. I'm assuming you'd want the gas port faced *AWAY* from you for this, hence this alignment.

View down the muzzle with the launcher cup attached. Before anyone screams about safety, the magazine was removed, as was the bolt.

Rough view over the sights and charger bridge with the launcher mounted. Surprisingly it's actually sill possible to use the iron sights, though the rifle does get a lot more muzzle-heavy due to the extra 40 ounces of steel hanging way out there on the muzzle.

Full pic of the rifle with launcher mounted, with a bonus M&P 15-22 for some degree of scale and a modern rifle tax.
BeachHappy
Sweet! I love the Smellys. Keeping my eye out for a No.4 Mk 1!