
mathsmartblonde

1706

14

2

Cake balls are quick, moist, delicious, and decadent desserts ideal for your next family get together, day off work, or Christmas party. This is my method, there are many like it, but this one is mine.

This is not what I am going to teach you how to make today. Cake pops are cake baked into a small ball shape and then coated in chocolate. Today we are making cake balls. Cake balls have frosting or cream cheese as a part of the internal components. These balls are too heavy to be on sticks like pops.

The only piece of specialty equipment that you might not already have in your kitchen is a small cookie scoop. I use an Onieda scoop because it is well designed with gears that move the metal piece inside instead of springs. Don't worry if you don't have one; just know that it is infinitely easier to make these with a cookie scoop than without.

The first step is to pick any box cake mix. Seriously. Any flavor of cake they make, you can turn it into a ball. Because cake mix settles, you will need to sift it or whisk it (with a fork or whisk) before adding any wet ingredients. Many cake mixes (especially those with pudding in the mix) have little hard pellets. Those do need to go in with your cake mix.
This is a good time to preheat your oven. Follow the package instructions for cooking times and temperatures, including high altitude instructions.
This is where it gets tricky. Add the oil, water, and eggs as ordered on the back of the package of cake mix. Then, add 2 more eggs and a teaspoon of vanilla extract. I never measure the extract, I just sort of splash a bit in the bowl. The eggs are the important bit. They give your cake a denser texture and make it more ideal for forming balls. Mix the ingredients until incorporated.

If you're using a non-stick pan, there's no need to grease. Cakes will turn out fine. I prefer using a 9x13 pan for cake balls. It reduces the exposed surface area which can brown and get a bit drier. Pour your mixture into the pan and bake as directed on the package until done.

After you take the cake out of the oven, it must cool completely. Warmth will not be your friend during the next step. Sit and do nothing. Seriously.

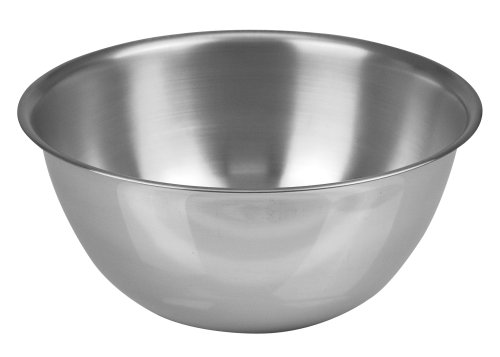
In a clean bowl, break up the cake, and mix with your hands. Crumble it right up. I recommend using the largest bowl you own for this. You'll need the space.

Empty the entire can of frosting into the bowl with the cake and keep mixing with your hands. I often find that I'm almost kneading it like bread. It should be a homogeneous mixture of baked cake and frosting when you're done.
I've recently experimented with fresh, homemade peanut butter buttercream and cream cheese buttercream. The results have been tasty, but those recipes do not belong to me.
https://www.youtube.com/watch?v=2-R-nOMnSTM
https://www.youtube.com/watch?v=Ad1H2guBvVk

If you want to add a little something something to these already decadent treats, you can put chocolate chips, nuts, dried fruit, or even frozen chunks of chocolate ganache into the mix. There's really no wrong way to play with your balls.

Use mini cupcake liners as holding cups for your cake balls. Using the cookie scoop, put a flattened scoop of cake ball mix into each liner. Flattened means that you should attempt to level off the scoop against the side of the bowl. If you're using spoons or your hands to make the balls, round is okay. They'll flatten out over time. Each box of cake mix makes about 75 cake balls with the scoop... Plus a few for taste testing.

You don't have to use the expensive chocolate for your cake balls, but it is better tasting. I've found that almond bark, although not technically chocolate, works fine all the same. Melt several blocks of almond bark and mix in two teaspoons of vegetable oil. This will thin the bark so that it's easier to coat your balls with the warm, often white fluid created when the bark melts. Melting the bark can be done on a stove top or in the microwave with the same result. Do what is easiest.

If you're feeling fancy, you can melt a bit of white almond bark and add coloring. After it's cooled a little bit, put it in a plastic sandwich bag and cut off a corner to add drizzle lines. You can do other patterns, hearts, initials, or just add sprinkles. You can even add a walnut chunk or other topper.

Place your balls in airtight containers in a single layer and let them chill out for a bit. They've had a bit of a rough day, maybe offer them a drink? Just kidding, stick them in the fridge if you've got the time; otherwise, serve as is. They'll be fine. If stored in an airtight container in a fridge, they'll last for at least two weeks. If you freeze them, they are generally okay for up to a year depending on the quality of your storage container and such.

Equipment:
Oven
Large Bowl
Sifter
Fork or Whisk
9x13 Pan
Spoon
Cookie Scoop
Cupcake Liners
Microwave or Double Boiler
Plastic Sandwich BagAirtight Containers
Ingredients:
Box Cake Mix
Vegetable Oil
Water
Eggs
Vanilla Extract
Can of Frosting
Almond Bark
Optional Ingredients:
Nuts
Sprinkles
Chocolate Chips
Dried Fruit
Chocolate Ganache
Blood of the Innocent

The aptly named Lucy Fur Ball.
If you get stuck or need help, feel free to reach out in a PM. I'll do my best to help or answer your questions. Good luck and bon appetit!