
buu342

97287

1899

42

Hello!
In this album I'll be covering the build process of my Isaac Clarke cosplay for Comic Con Lisbon 2019.
The entire build took about three months of work, and a few extra weeks for planning and material gathering.
Materials used:
1cm thick EVA foam
0.5cm thick EVA foam
0.2cm thick EVA foam
1.2cm diameter acrylic tube
0.8cm diameter acrylic tube
Plastic hose connection pieces
Small Magnets
Push button
3 12v batteries
3 blue LED's
12V LED strips
Furniture Cups
Googly Eyes
Electrical Cable
1cm wooden dowel
Small nails
Sewing needles and line
artifical leather
light gray fabric
Velcro strips
Foggy plastic (used to bind books)
Aluminum Foil
Paper
2cm thick styrofoam
Clothing used:
Horseriding boots
Sweatpants
Black gloves
Leather belt
Grey wool jacket
Paints used:
Black Plasti Dip Spray paint
Copper Spray paint
Silver Spray paint
Bronze Spray paint
Gold Spray paint
Dark Orange Spray paint
Black acrylic paint
Red acrylic paint
Tools used:
x-acto knife
lots of x-acto knife blades
Heat Gun
Hot Glue Gun
Wood Glue
Dremel
Handsaw
Various paint brushes, from small to large
Poly Max
Electrical Tape
Painters Tape
Soldering Iron
Pens
Rulers
Software used:
Blender
Paint.Net
Photoshop
Microsoft Word

For starters, you're going to need a reference. Because I'm a nerd, instead of utilizing game screenshots I chose to rip the model from the game's files utilizing a program called Ninja Ripper. This allowed me to load the model and its textures onto Blender, which served two purposes: acting as a reference and providing me with stencils. The same process was done for the Plasma Cutter as well.

Thanks to Blender being a 3D Modeling program, it allowed me to grab UV maps from the model (which sometimes required a bit of model editing). When I had the UV maps, I would estimate their size by measuring against my body with a ruler while using the blender model as a reference. Afterwards, the UV maps were transfered to a program called Paint.Net, where I could then set the pixel to cm ratio to fit my measurements, and then paste the image (sometimes needing to be cut into pieces) into a Word Document to print. This was done because Paint.Net's printing options would stretch the images.
Pictured here is the UV map for the Televisor on Isaac's chest.

Once the stencils were printed and cut out, they were transferred onto 0.5cm EVA foam with a pen, which were then cut out with an x-acto knife by hand. 0.2cm EVA foam was used for some side details. Originally the screen piece (3rd piece on top right) was made of 0.5cm EVA foam as well, but it was then remade in 0.2cm EVA foam because I hadn't realized that it was a much thinner piece.

The televisor piece after being heat formed and glued together. To form the curved shape of the pieces, a heat gun was used. This must be done with care to not melt and/or burn the foam. The pieces were then glued together with Hot Glue. The televisor can rotate on its axis, with the help of two nails. The support foam that is holding the televisor also has nails on the bottom, because I predicted that the weight of the TV wouldn't hold with only hot glue (and my prediction was right!). Later, a hole was cut on the televisor to fit the "hologram". This was done last minute so is not pictured here yet.

Here is the right arm piece together with the stencils. The semi spheres on the front piece are those little rubber cups that are usually glued to furniture to prevent them from scratching surfaces. Strips of 0.2cm EVA foam were used for detailing. Scratches were made on the pieces using an x-acto knife and then they were opened with the help of the heat gun. The more heat you give it, the wider the cut becomes. Depth was given to certain parts of the piece by carefully cutting them out with an x-acto knife, as I did not own a Dremel when I made this piece.
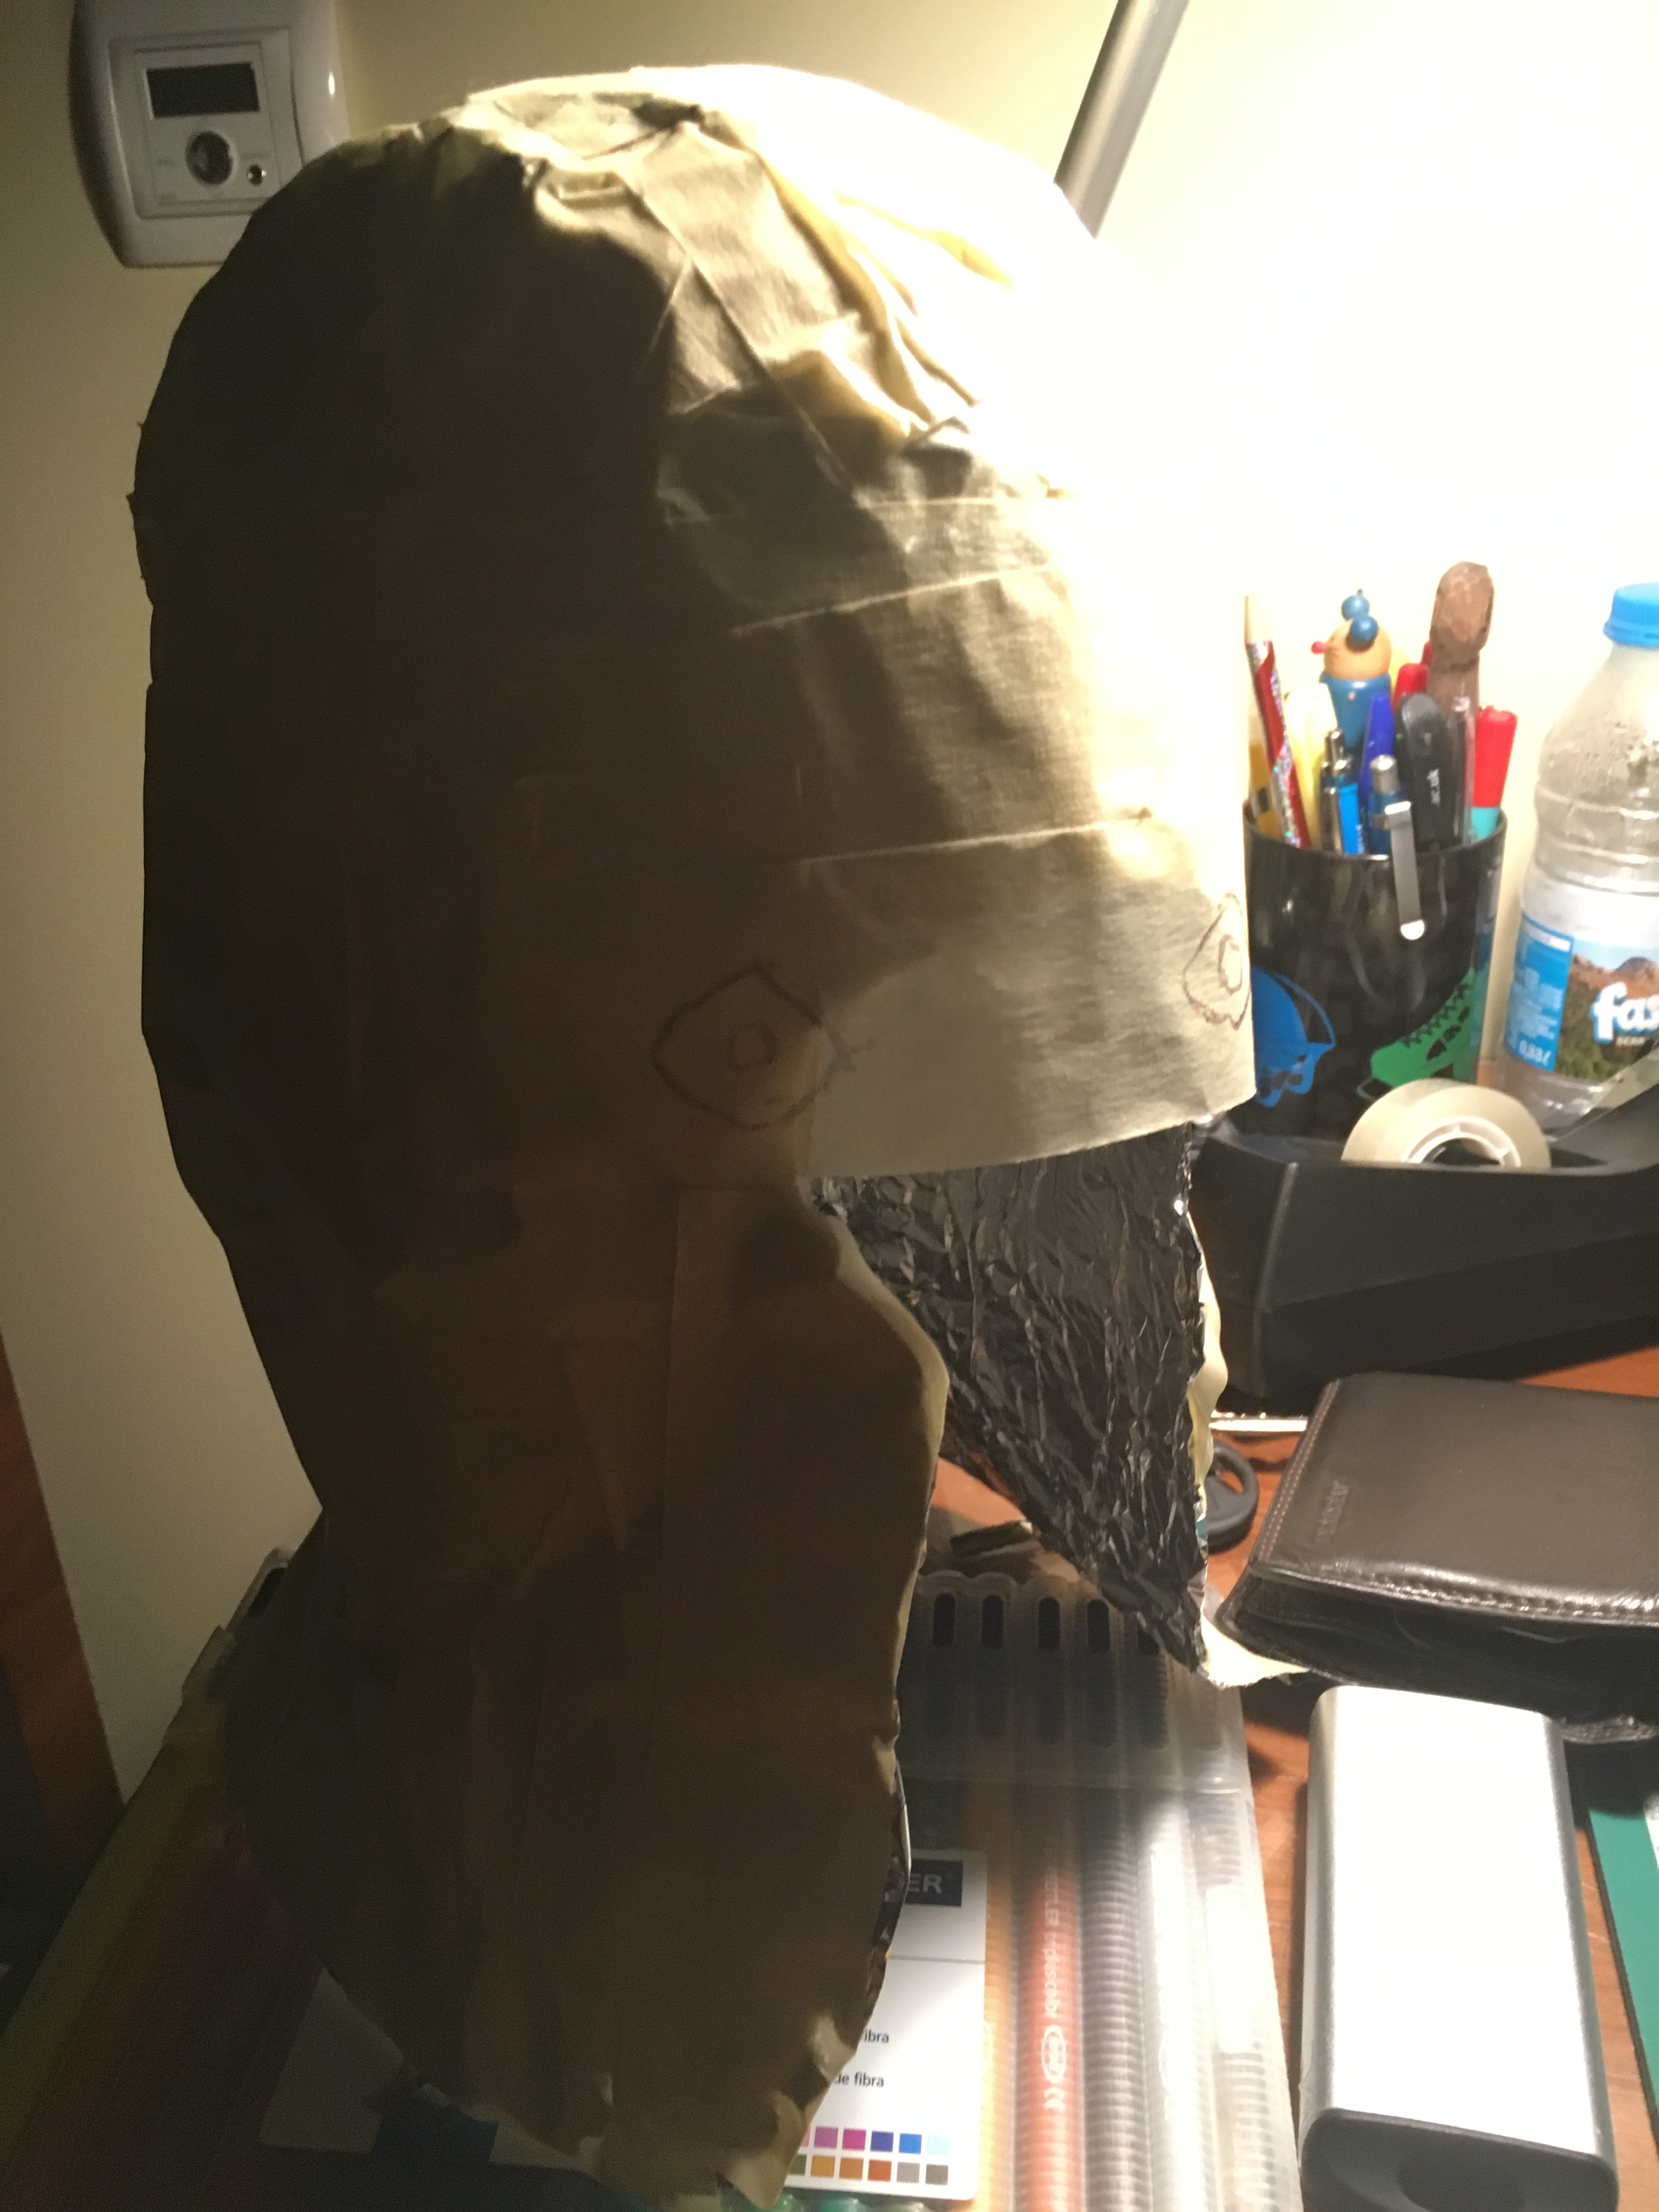
Because the Helmet is not an easy piece to make fit to your head, a mold of my head was made with the help of a friend. My entire head was covered in aluminum foil, and then the aluminum was covered in painters tape to preserve the shape. A small cut was made to the back so I could remove the piece, and little eyes were drawn where my eyes were for reference.

The shape of the piece was refined with a pair of scissors, and the cutting joints were approximated with a pen. Several registration marks were placed to help join the pieces together with the foam later on. These drawings only need to be made to half of the helmet, as the other half can just be mirrored.

The cast was then cut again and each piece received a photo on a cutting board so that I could then properly align the orientation of the photo on Photoshop (and the cutting board helped me figure out the measurements, as each square is 1cm X 1cm). These stencils were not placed directly on the foam because the thickness of the foam will make it so that when the shape is complete, it will no longer fit your head. As a result, when the pieces were digitized, they were all expanded uniformly by 5% (my rule of thumb is one percent per 0.1cm of thickness). Registration marks were also put on the digitized stencils so that they too could be transferred onto the foam for alignment reasons.

All the helmet pieces cut out. You can see the registration marks all over the edges of the pieces. The stencil for the bottom part of the helmet was made longer than the original piece because I realized a bit late that the helmet was longer than I had cut it.

The helmet was glued together, and then the middle section was estimated by hand. This would have come out better if I had done it on the PC, but I was still deciding how I was going to make the piece.

Middle section cut out by hand with the x-acto knife. Part of the helmet's front part was also trimmed as the piece was too long (you can see the pen marks for where I applied the cuts in the previous photo).

The hole was then covered with a foam piece that was measured by hand. The two straight gaps were done in the same way as the scratches on the arm piece, by scoring the foam with an x-acto knife and then passing the heat gun over the cuts. The more heat you give it, the bigger the gap becomes. As I warned before, be very careful not to apply too much heat at once to a single spot as that will melt and or burn your foam permanently.

The front visor pieces were taken from the model's UV map, after having their measurement estimated by hand with the finished helmet. I had also found that the bottom part of the helmet was too long and I had to trim it down. Obviously when it comes to trimming parts of your foam to fit you better, do it in small increments, because it's not easy to put foam back once it's been cut!

All sorts of details were added to the helmet using 0.5cm EVA foam and 1.0cm EVA foam. Bevels were made with an x-acto knife by hand and then sanded by hand as well.
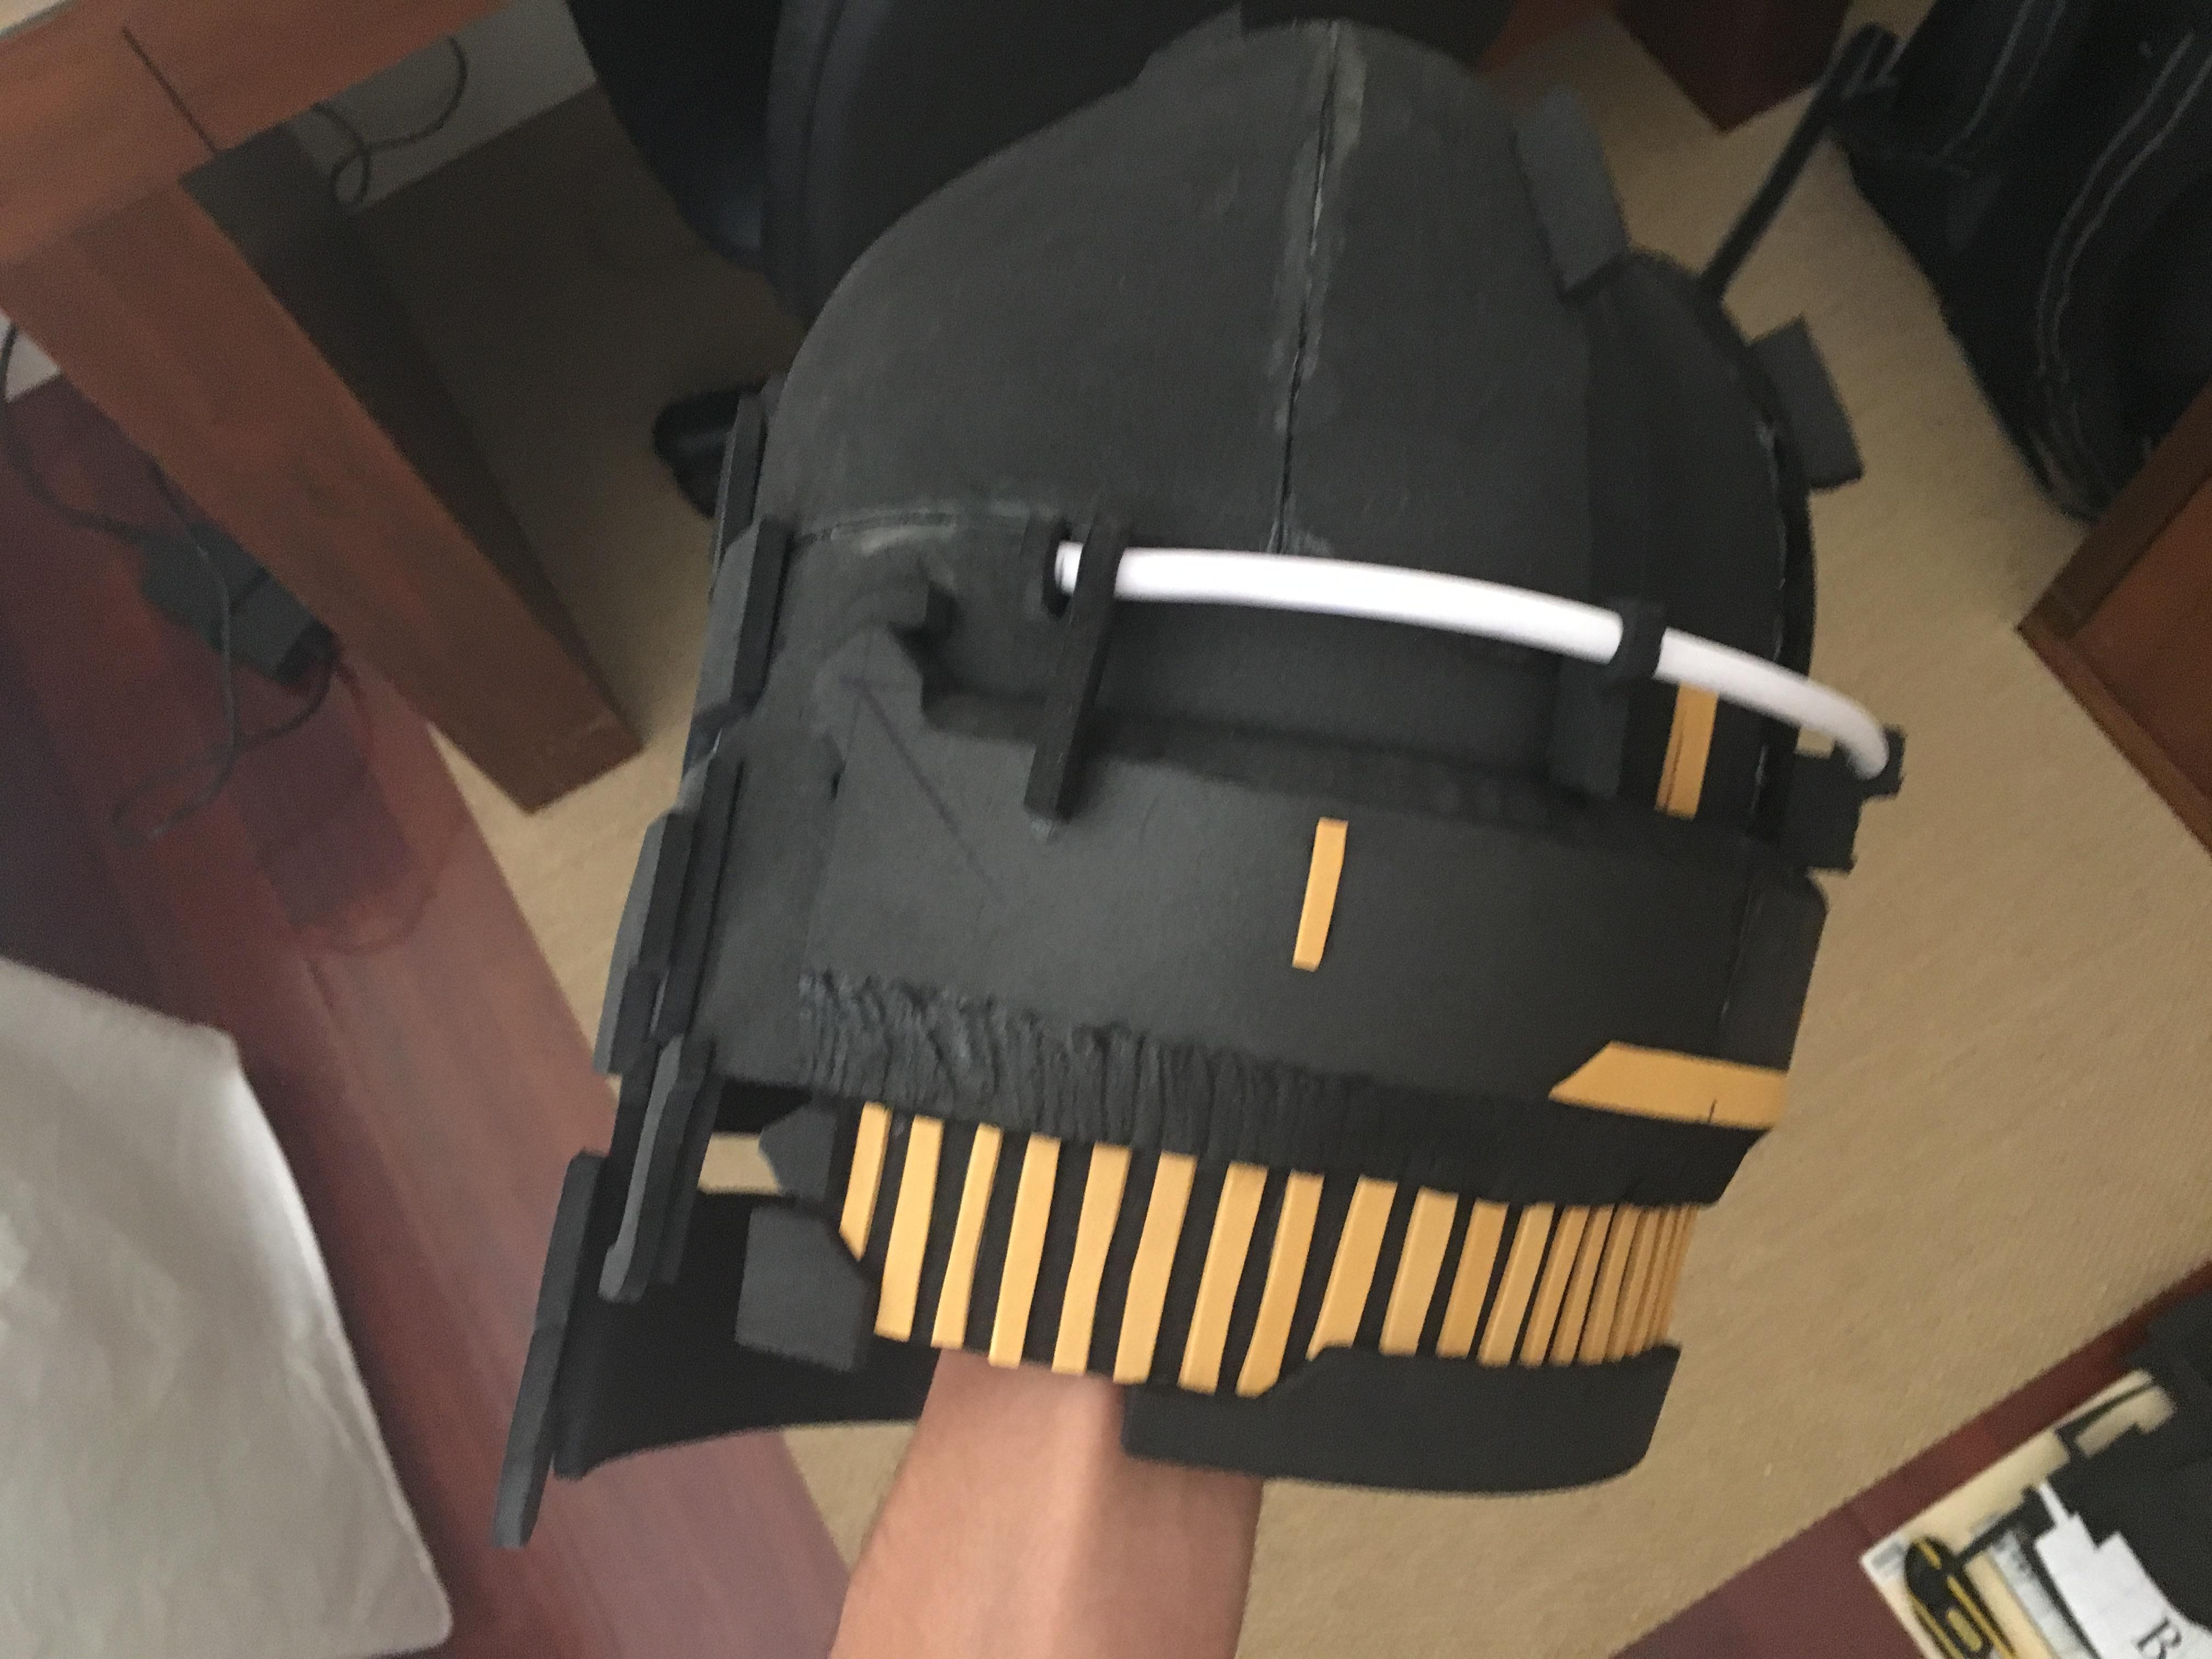
The details on the back were made with 0.2cm EVA foam. The tube on the back of the helmet is actually an electrical cable that was cut by hand and molded into shape with a heat gun.

The Plasma Cutter was done slightly differently from all the other pieces, as it was composed of multiple layers of foam rather than being big pieces. Magnets were placed in two different places so that the magazine could be removed. An extra gap was left for the trigger in order for it to be shootable.
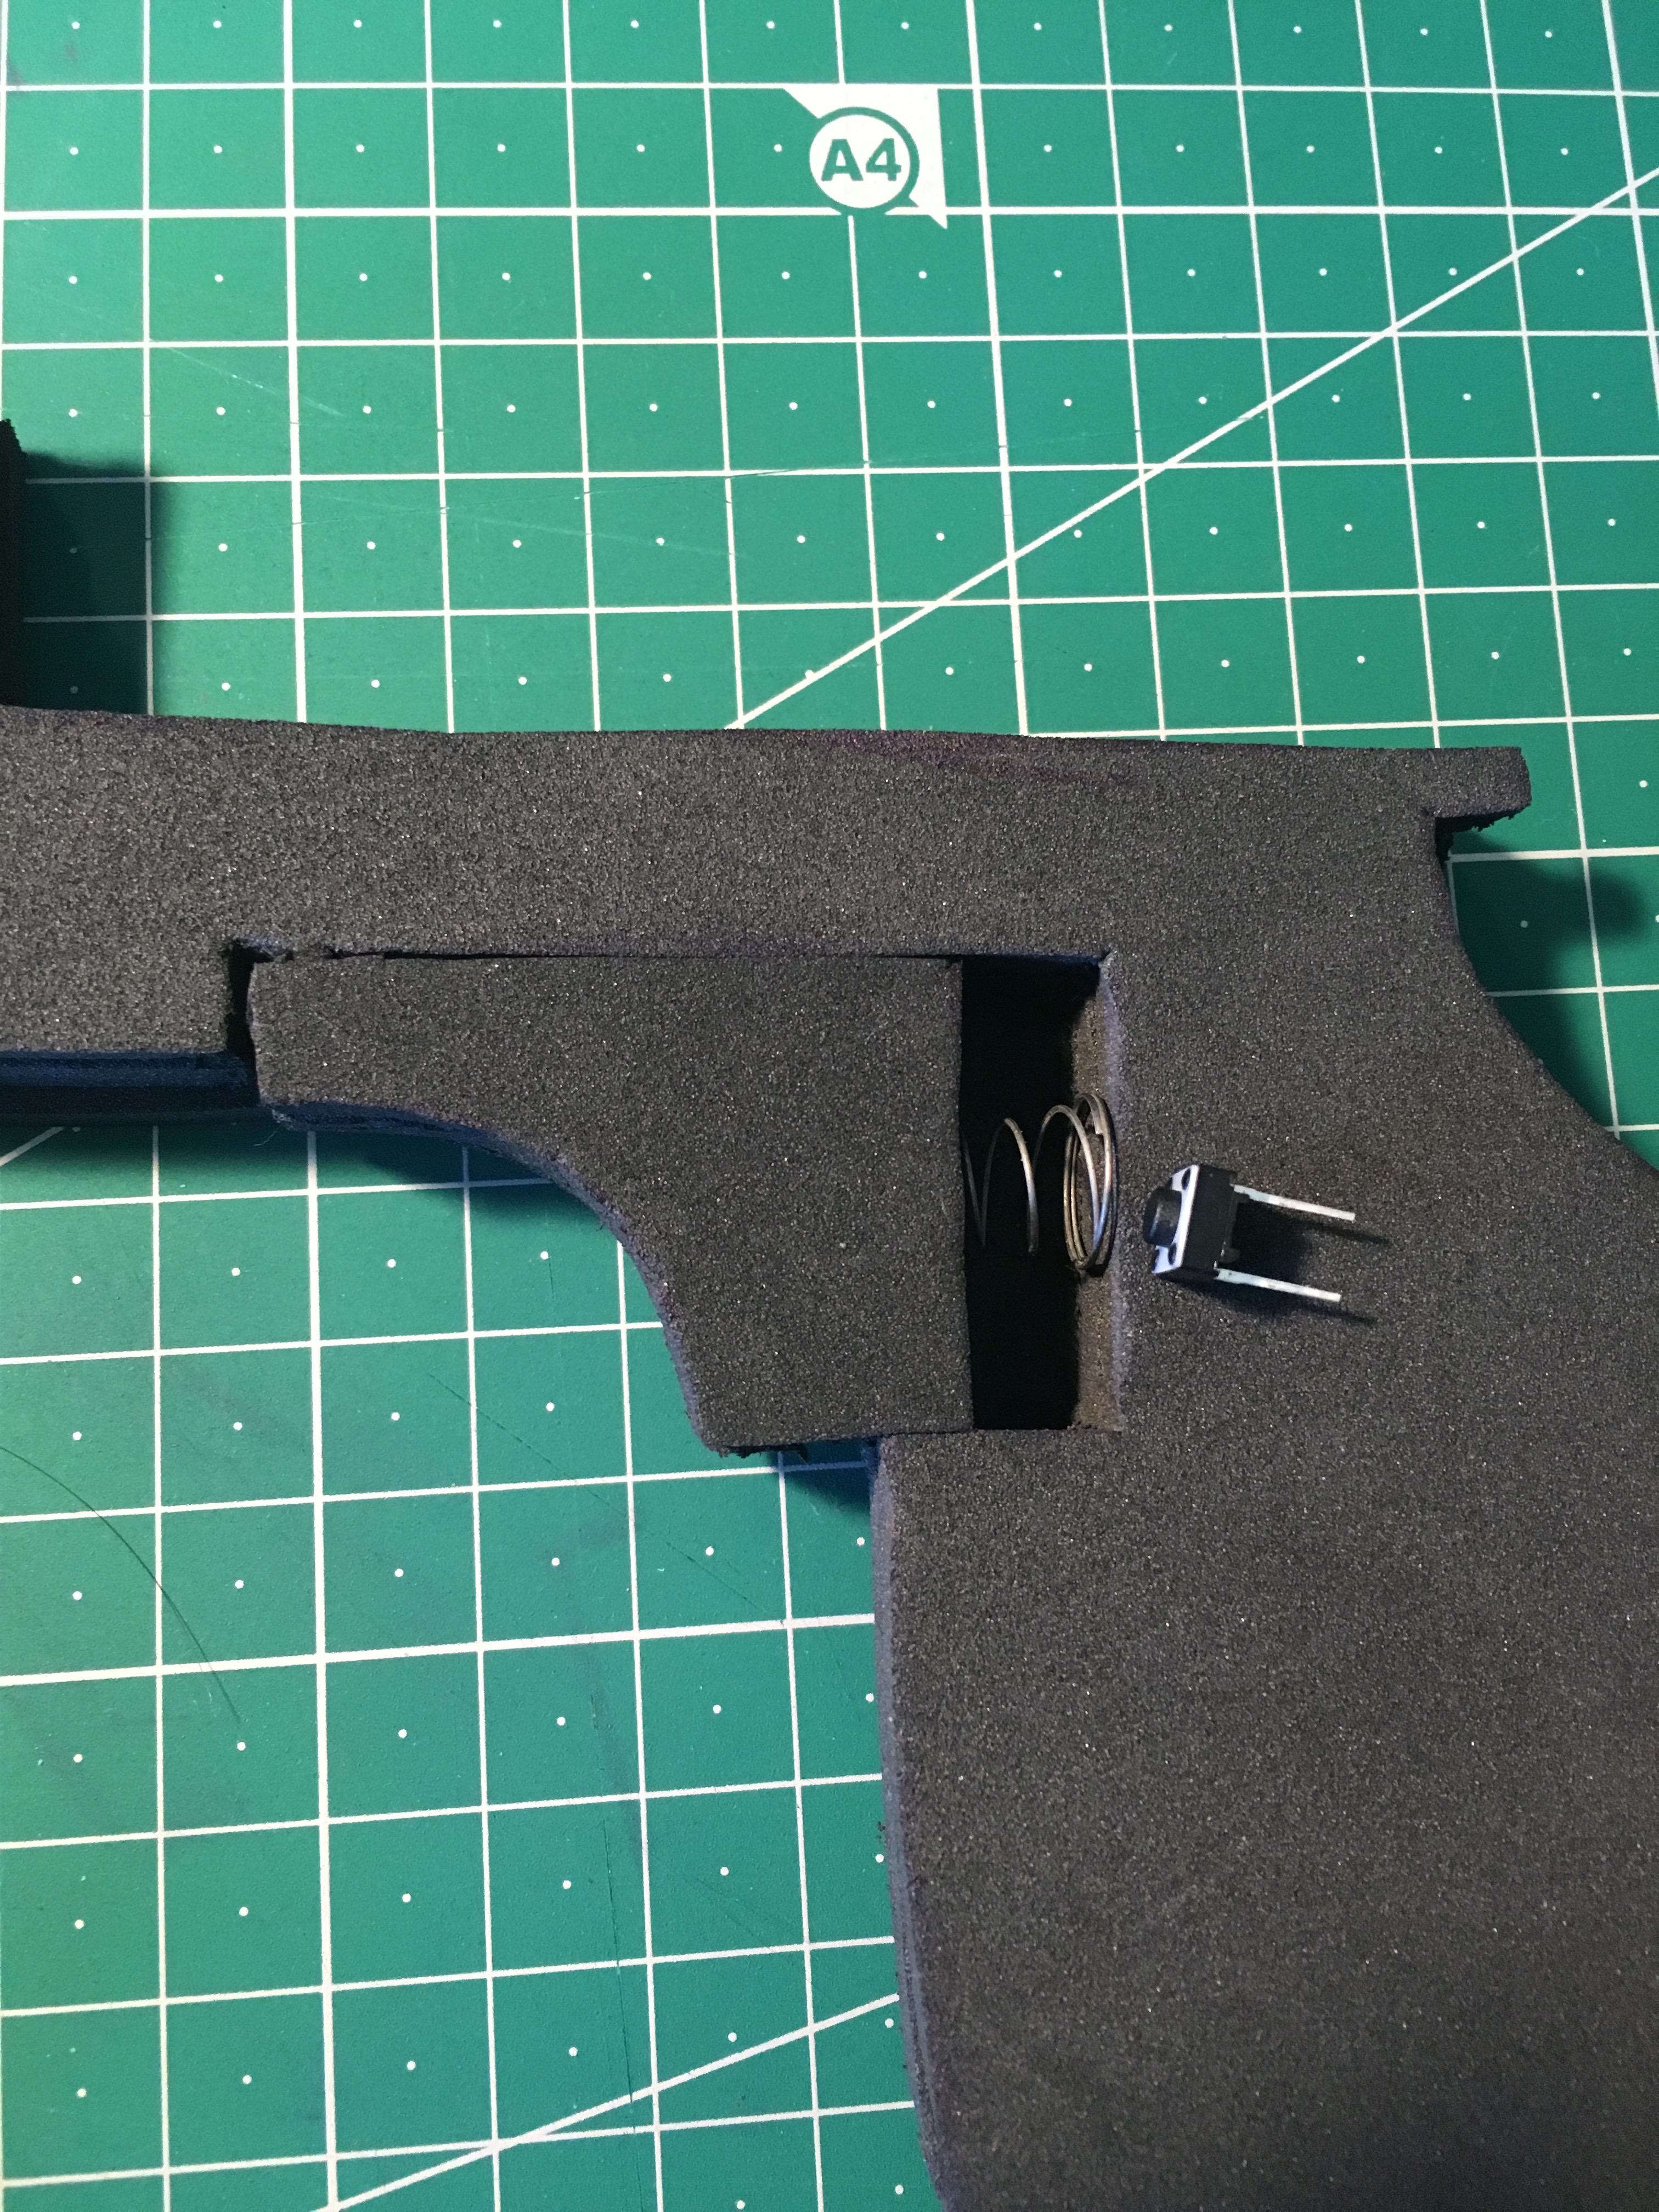
The electronics for the gun were very simple. A push button was wired to three blue LEDs, in series, which were then wired to a 12V battery (which is housed within the gun's grip). The right side of the gun's grip has screws in place to allow for easy access to the battery, should it need to be replaced.
Originally, when testing, I found that the trigger would tend to fold slightly and jump out, so as a result I decided to stick a metal wire through the trigger and gun in a straight line.The wire was held in place by having a nail on opposite ends and bending the wire in a loop around the nails.
I was afraid that the tension of the spring would cause it to dig into the foam, so as a result I broke two used xacto knife blades until they were the size of the back of the trigger. These were then glued to the back of the trigger as well as the back of the hole (on the opposite end of the spring) to ensure the foam wouldn't be damaged from all the clicking.
Fitting all the pieces at the end was no easy task, especially because the magnets took up a lot of space. This is a shame because I wished to have a metal rod inside the gun to provide some extra support and rigidity, but couldn't find a place to fit it..

Showcasing the LEDs of the Plasma Cutter before it was glued together. The spring was placed inside the metal rod that forces the trigger to slide horizontally. You can also (barely) see the location where I stuck the nails which the metal rod then loops around to keep it secure in place.

The plasma cutter after gluing together. The detail on the fins of the Plasma Cutter were done by scoring the foam with an x-acto knife and applying heat to them to open up the cuts (this also caused the thin ends of the fins to crease. Next time I should protect these with aluminum foil.

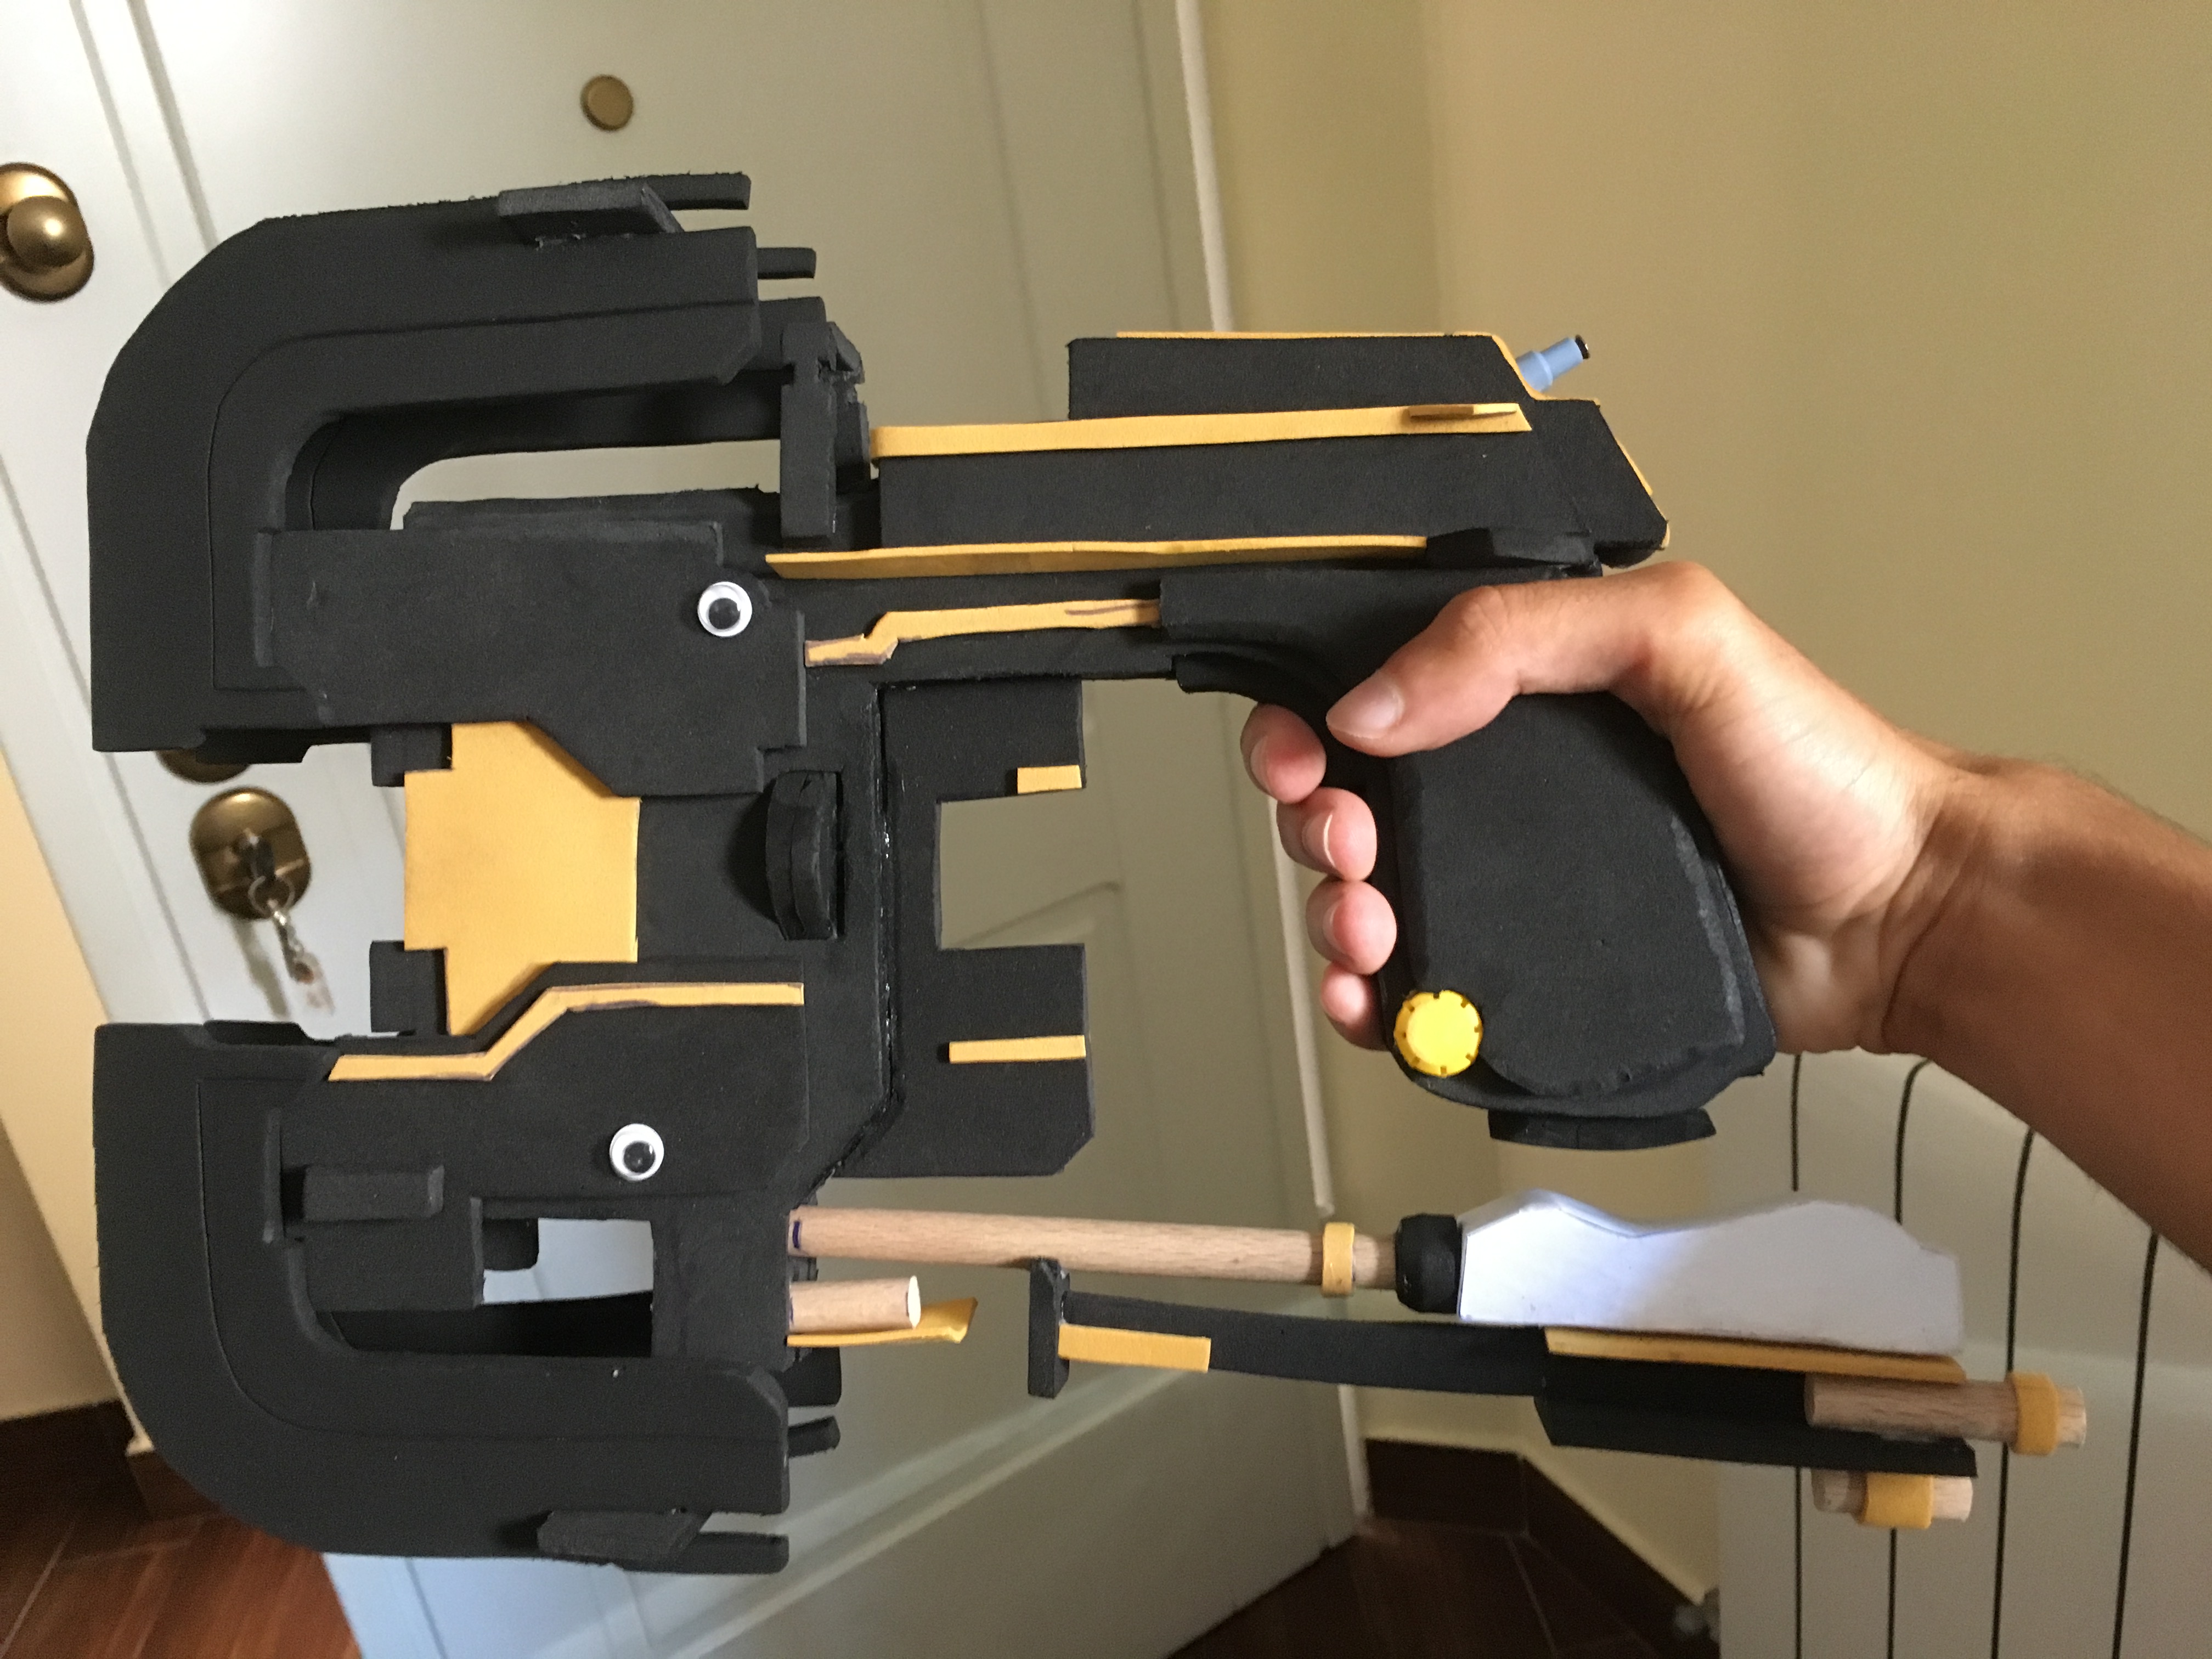
The finished plasma cutter. A 1cm wooden dowel was used for the bottom piece. Googly eyes were used in the place of fake rivets. Some spare pieces of plastic I found lying around and a nail were used as small details for the magazine. The grip was beveled using a Dremel. The little yellow cap on the bottom of the grip were caps used in plastic hoses (which was sawed in half to be at the same height as the grip).
The process for making the end of the antenna (covered in paper in this picture) will be explained shortly.

Pieces for the Kinesis module cut out. Notice the blue pieces on the bottom, these were cut out of 2cm thick Styrofoam rather than EVA foam. This was the same material used to make the end of the antenna of the Plasma Cutter.

This material is awesome because it's very rigid and easy to shape, and with a very tiny amount of sanding becomes really smooth. However, if you spray paint these they WILL melt. As a result, they must be covered in paper, which limits how much of this material I can use on the project (especially since I had a month left until Comic Con at this point of the project!). The paper was applied using wood glue.
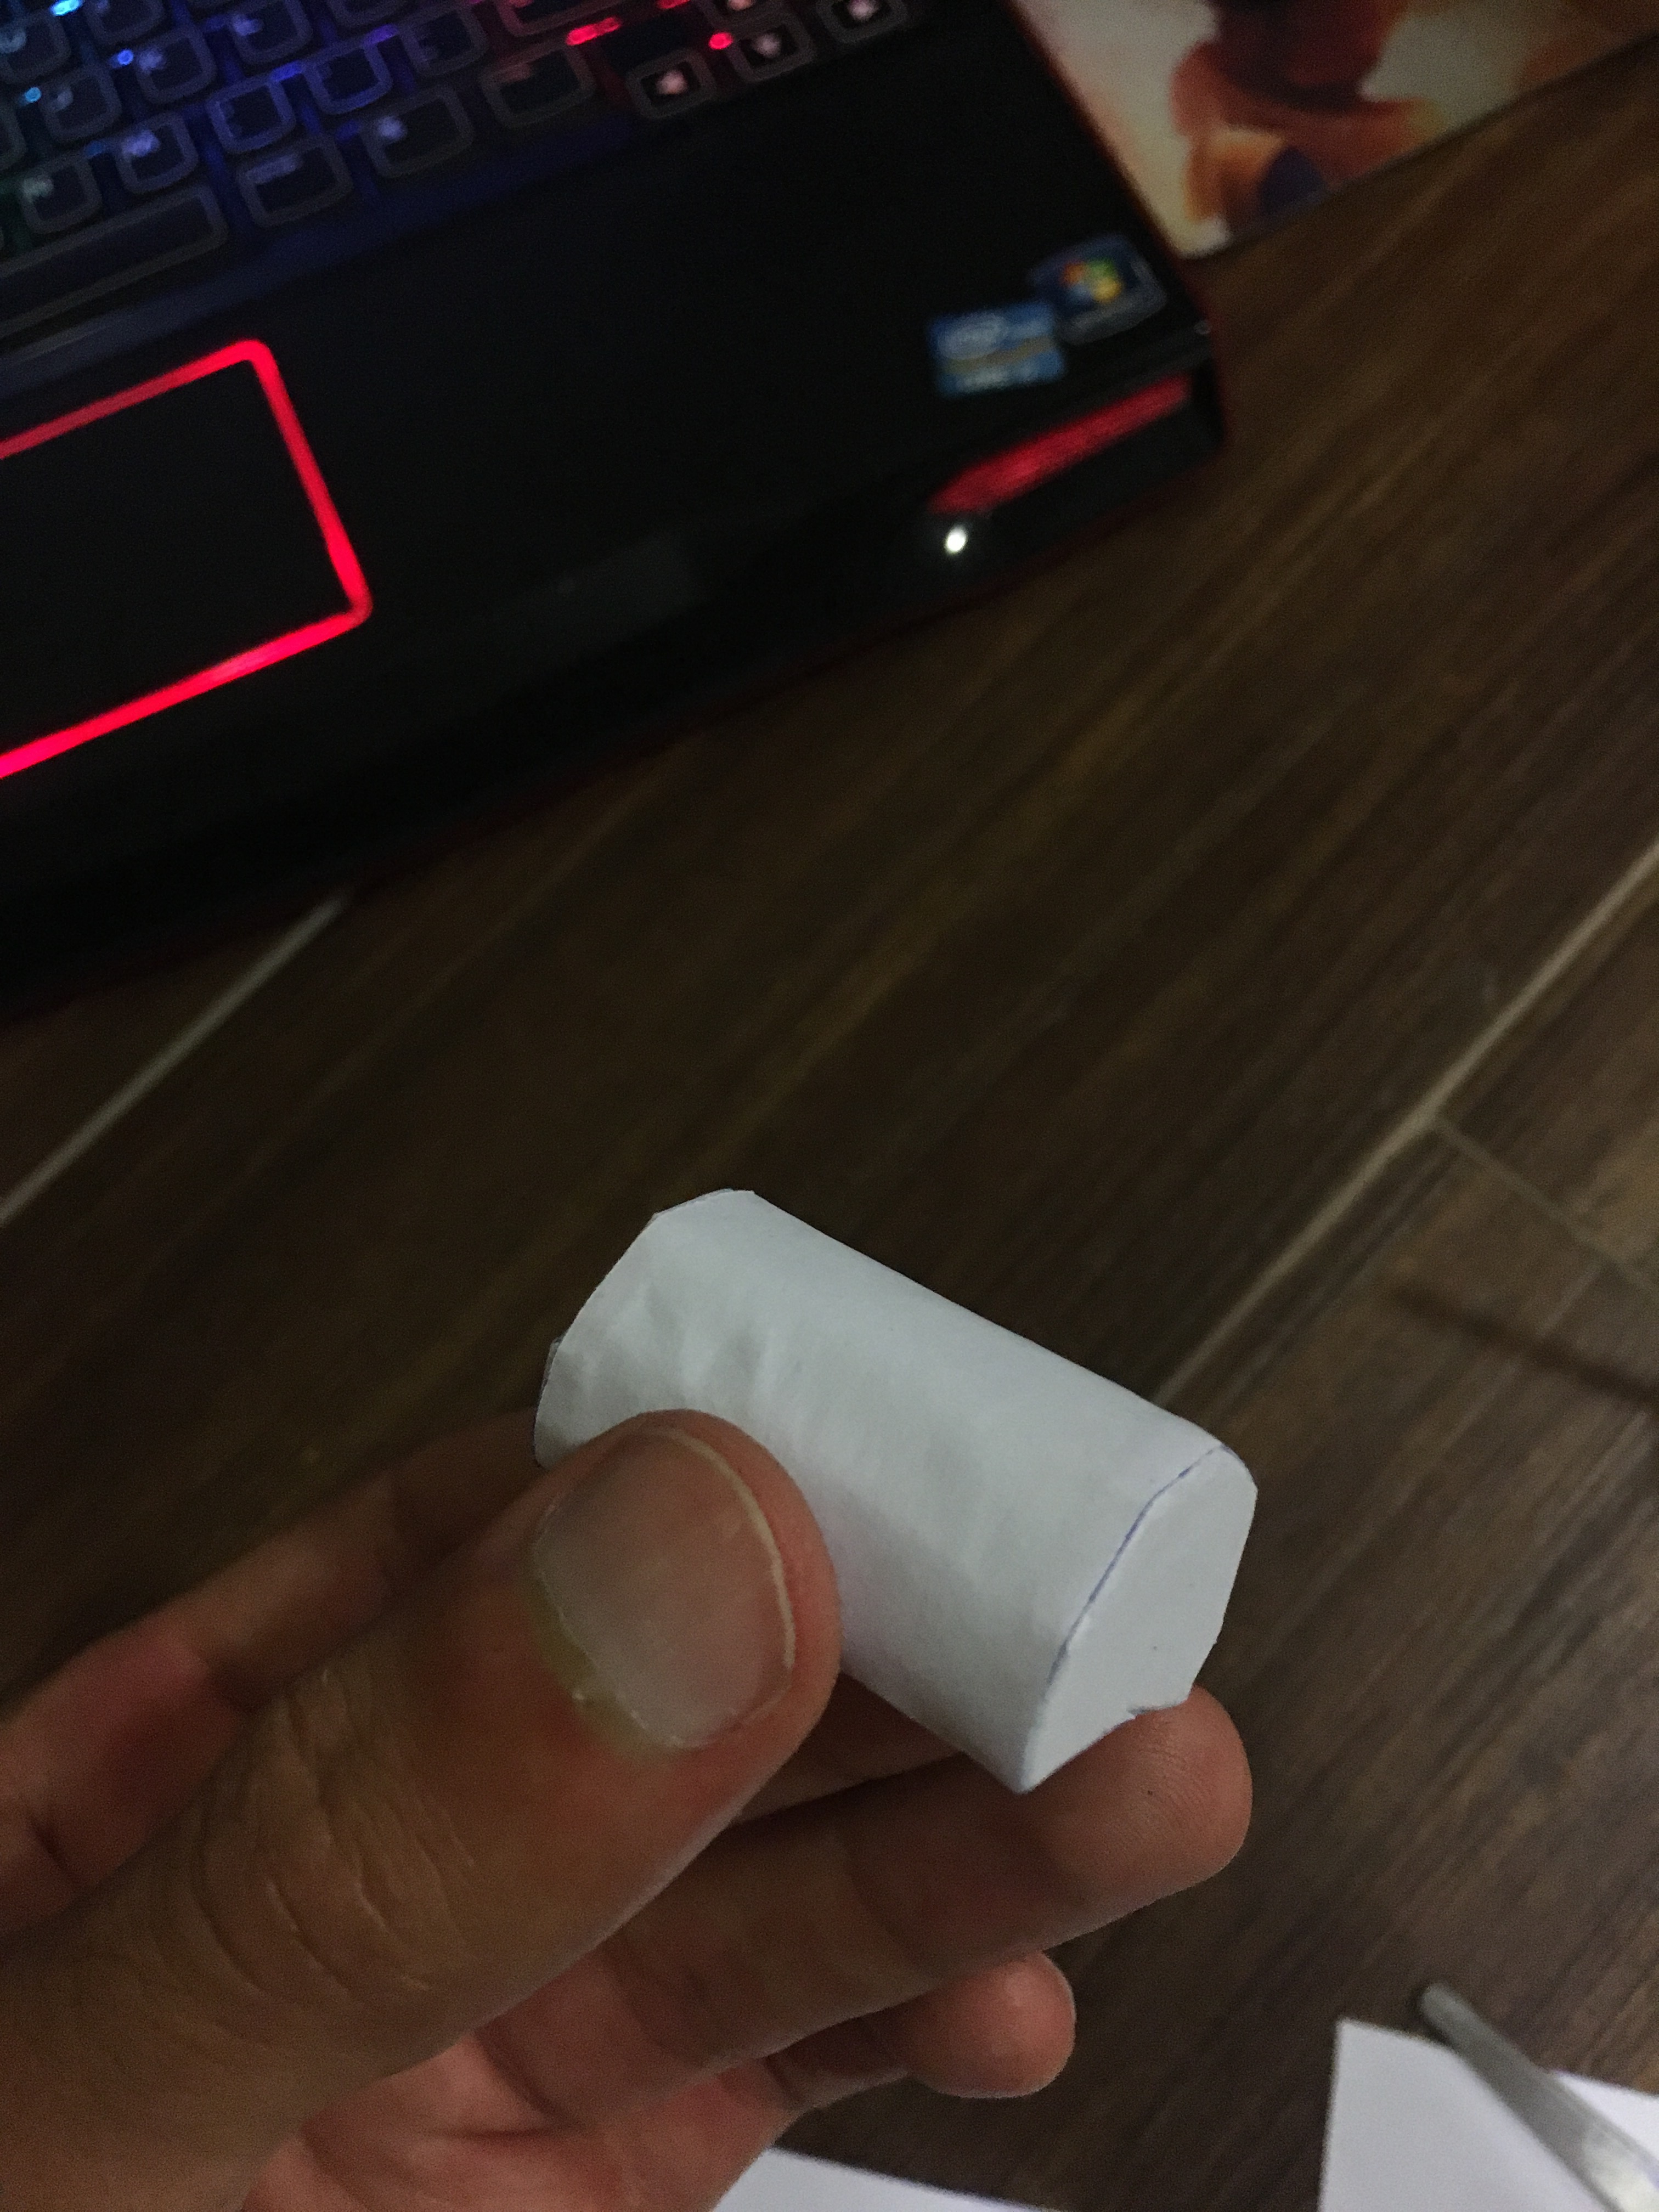
The piece fully covered in paper.

The fully assembled kinesis module. The foam that's below the Styrofoam piece was beveled using a Dremel.
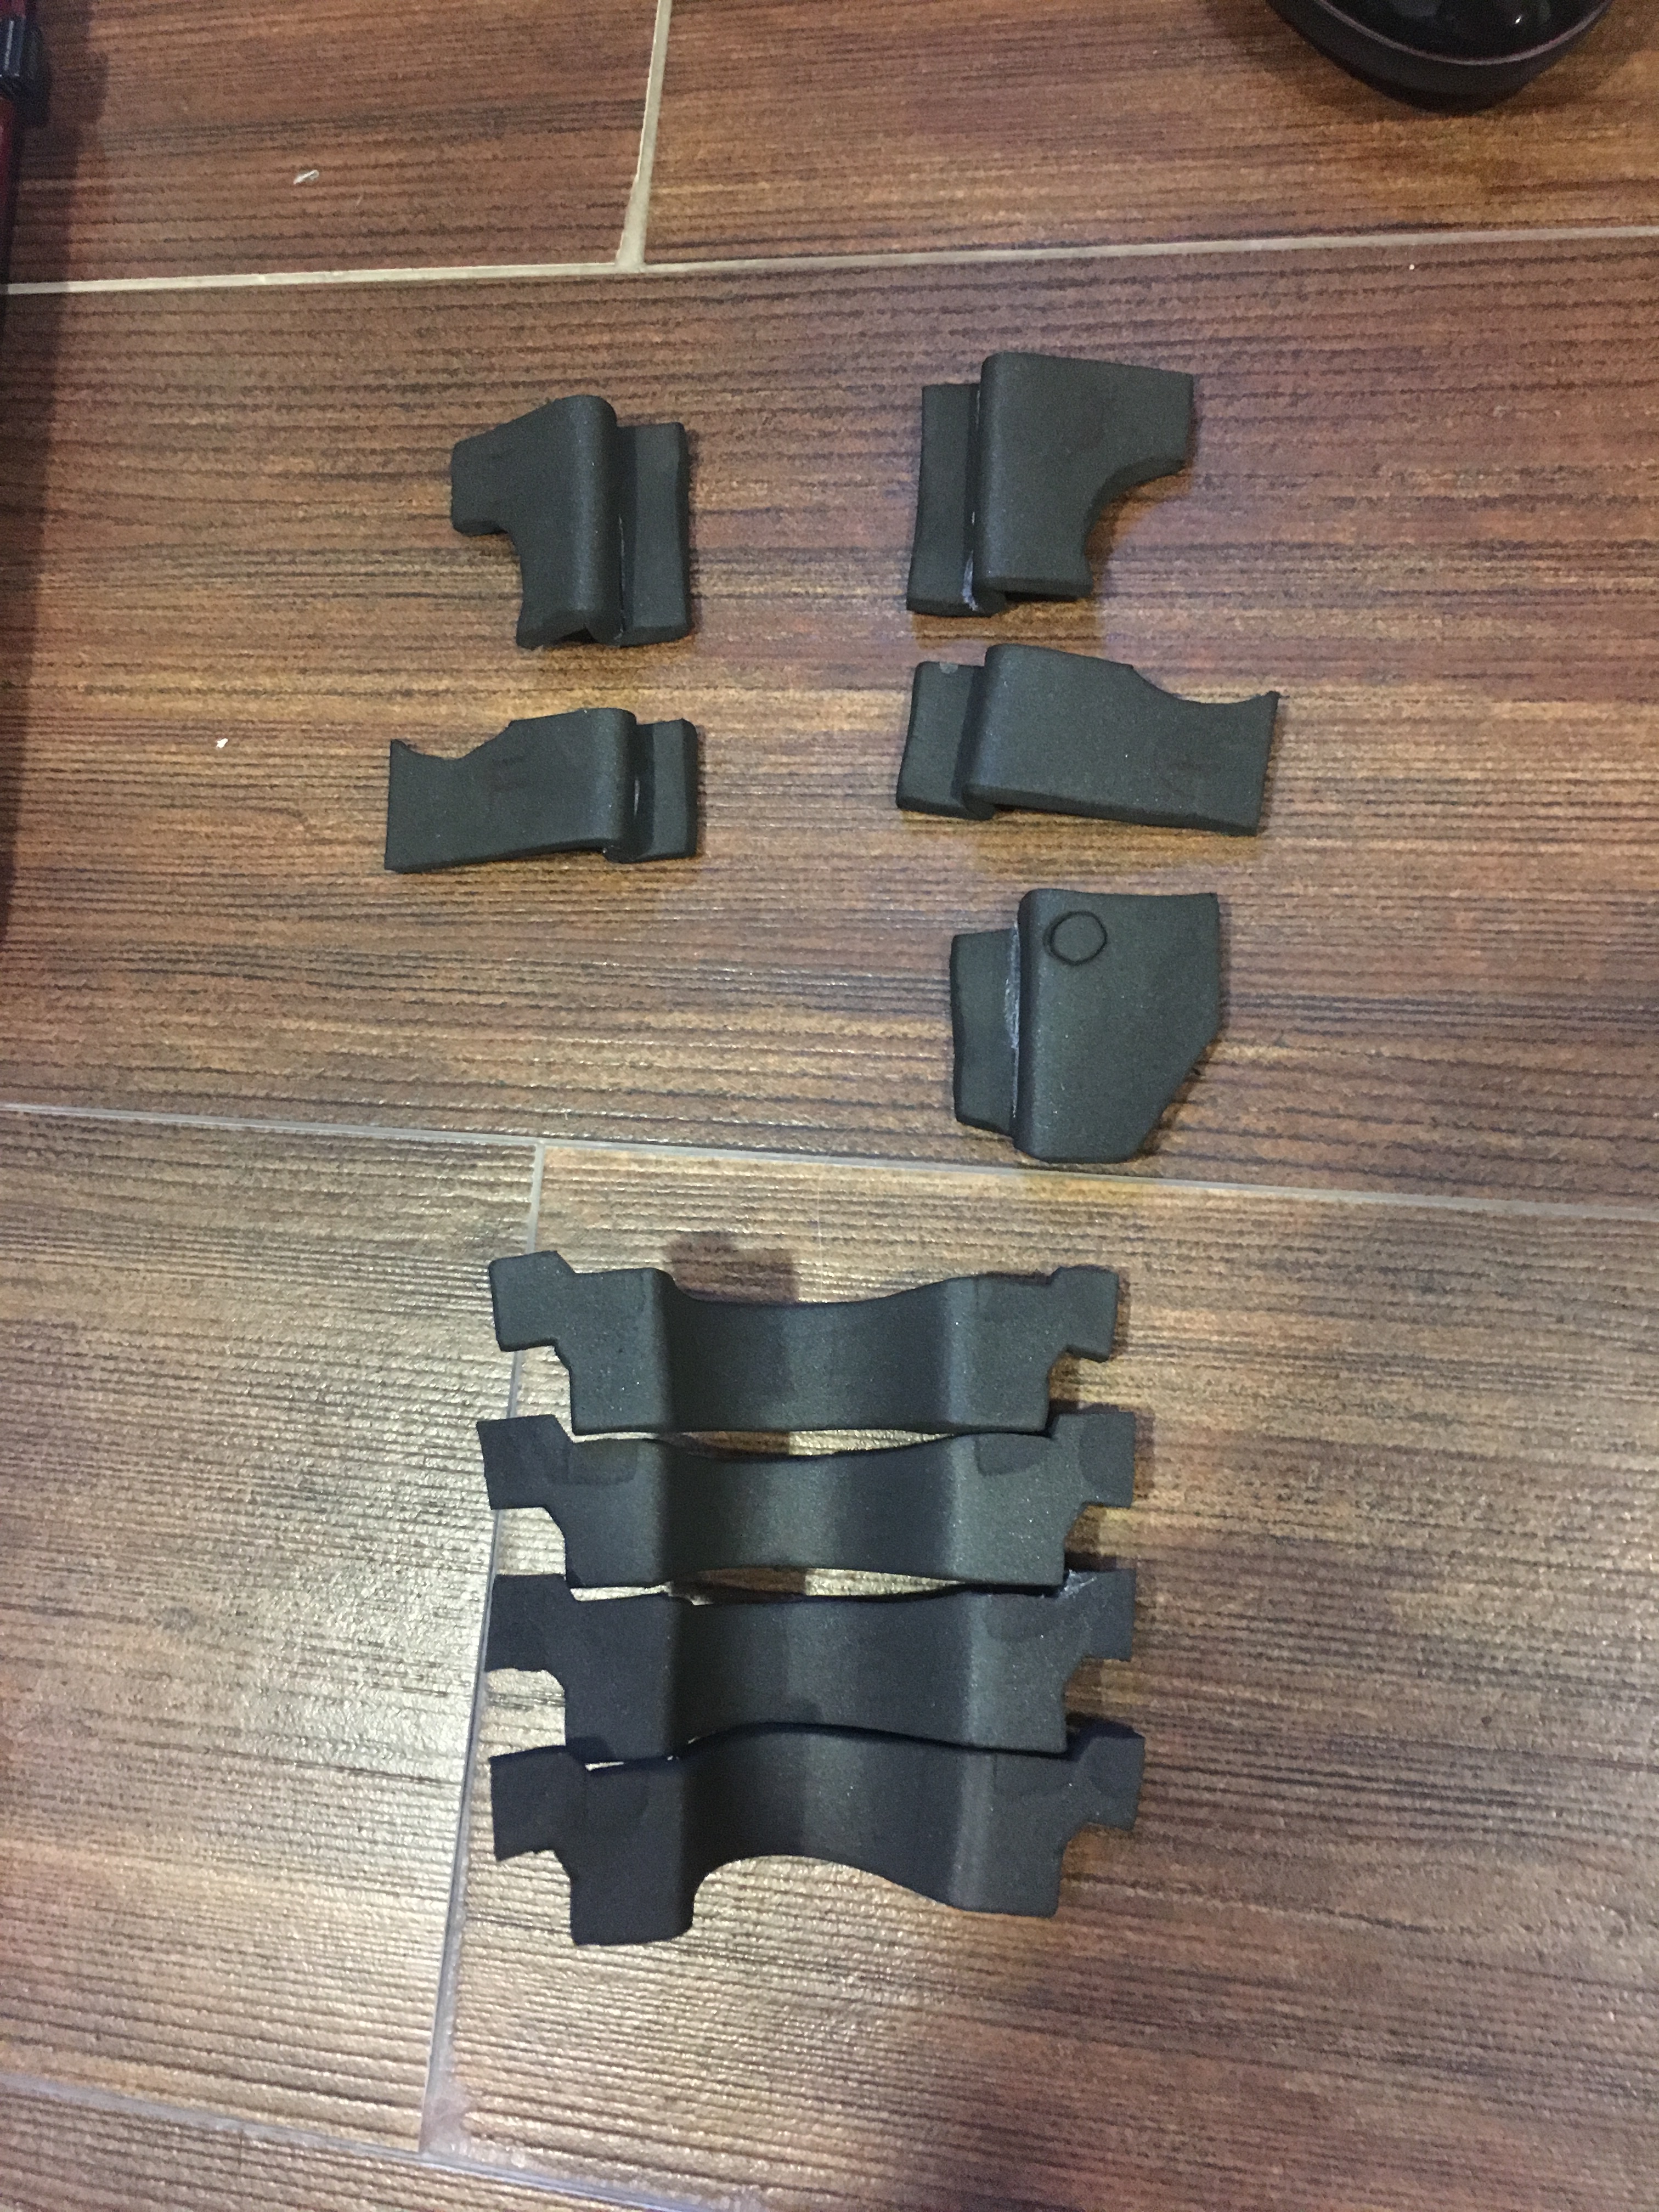
Little pieces of the RIG. Their sharp 90º shapes were possible by cutting out part of the foam at the back, allowing for an easier and tighter fold when heating and gluing.

All of the rig pieces waiting to be molded and glued. Depth was given to the pieces by the use of a Dremel. The plastic caps were from hose caps, and their holes were covered with EVA foam and rubber rings to provide detail. The tube that forms the health gauge was made from 1.2cm acrylic hose.

The inner tube was made from 0.8cm acrylic hose. Its foggy look was made by sanding the piece by hand. The little black strips were made from electrical tape.

The glued together RIG.

52 armor pieces for the chest and back were made from 1cm thick EVA foam. These pices were beveled by hand with an x-acto knife (in hindsight, should have done that with a dremel). Originally I wanted to make these out of the styrofoam, but I ended up using the EVA foam because the deadline for Comic Con made it impossible for me to cover all the pieces in paper by myself.

The shoulder armor pieces are made from 1cm thick EVA foam glued to 0.5cm EVA foam. The pieces were heat formed individually before gluing. After scoring the ends to be able to fold the tips of the shoulder pieces, I estimated by hand 3 straight lines which would then need to be removed for the final shape of the piece.
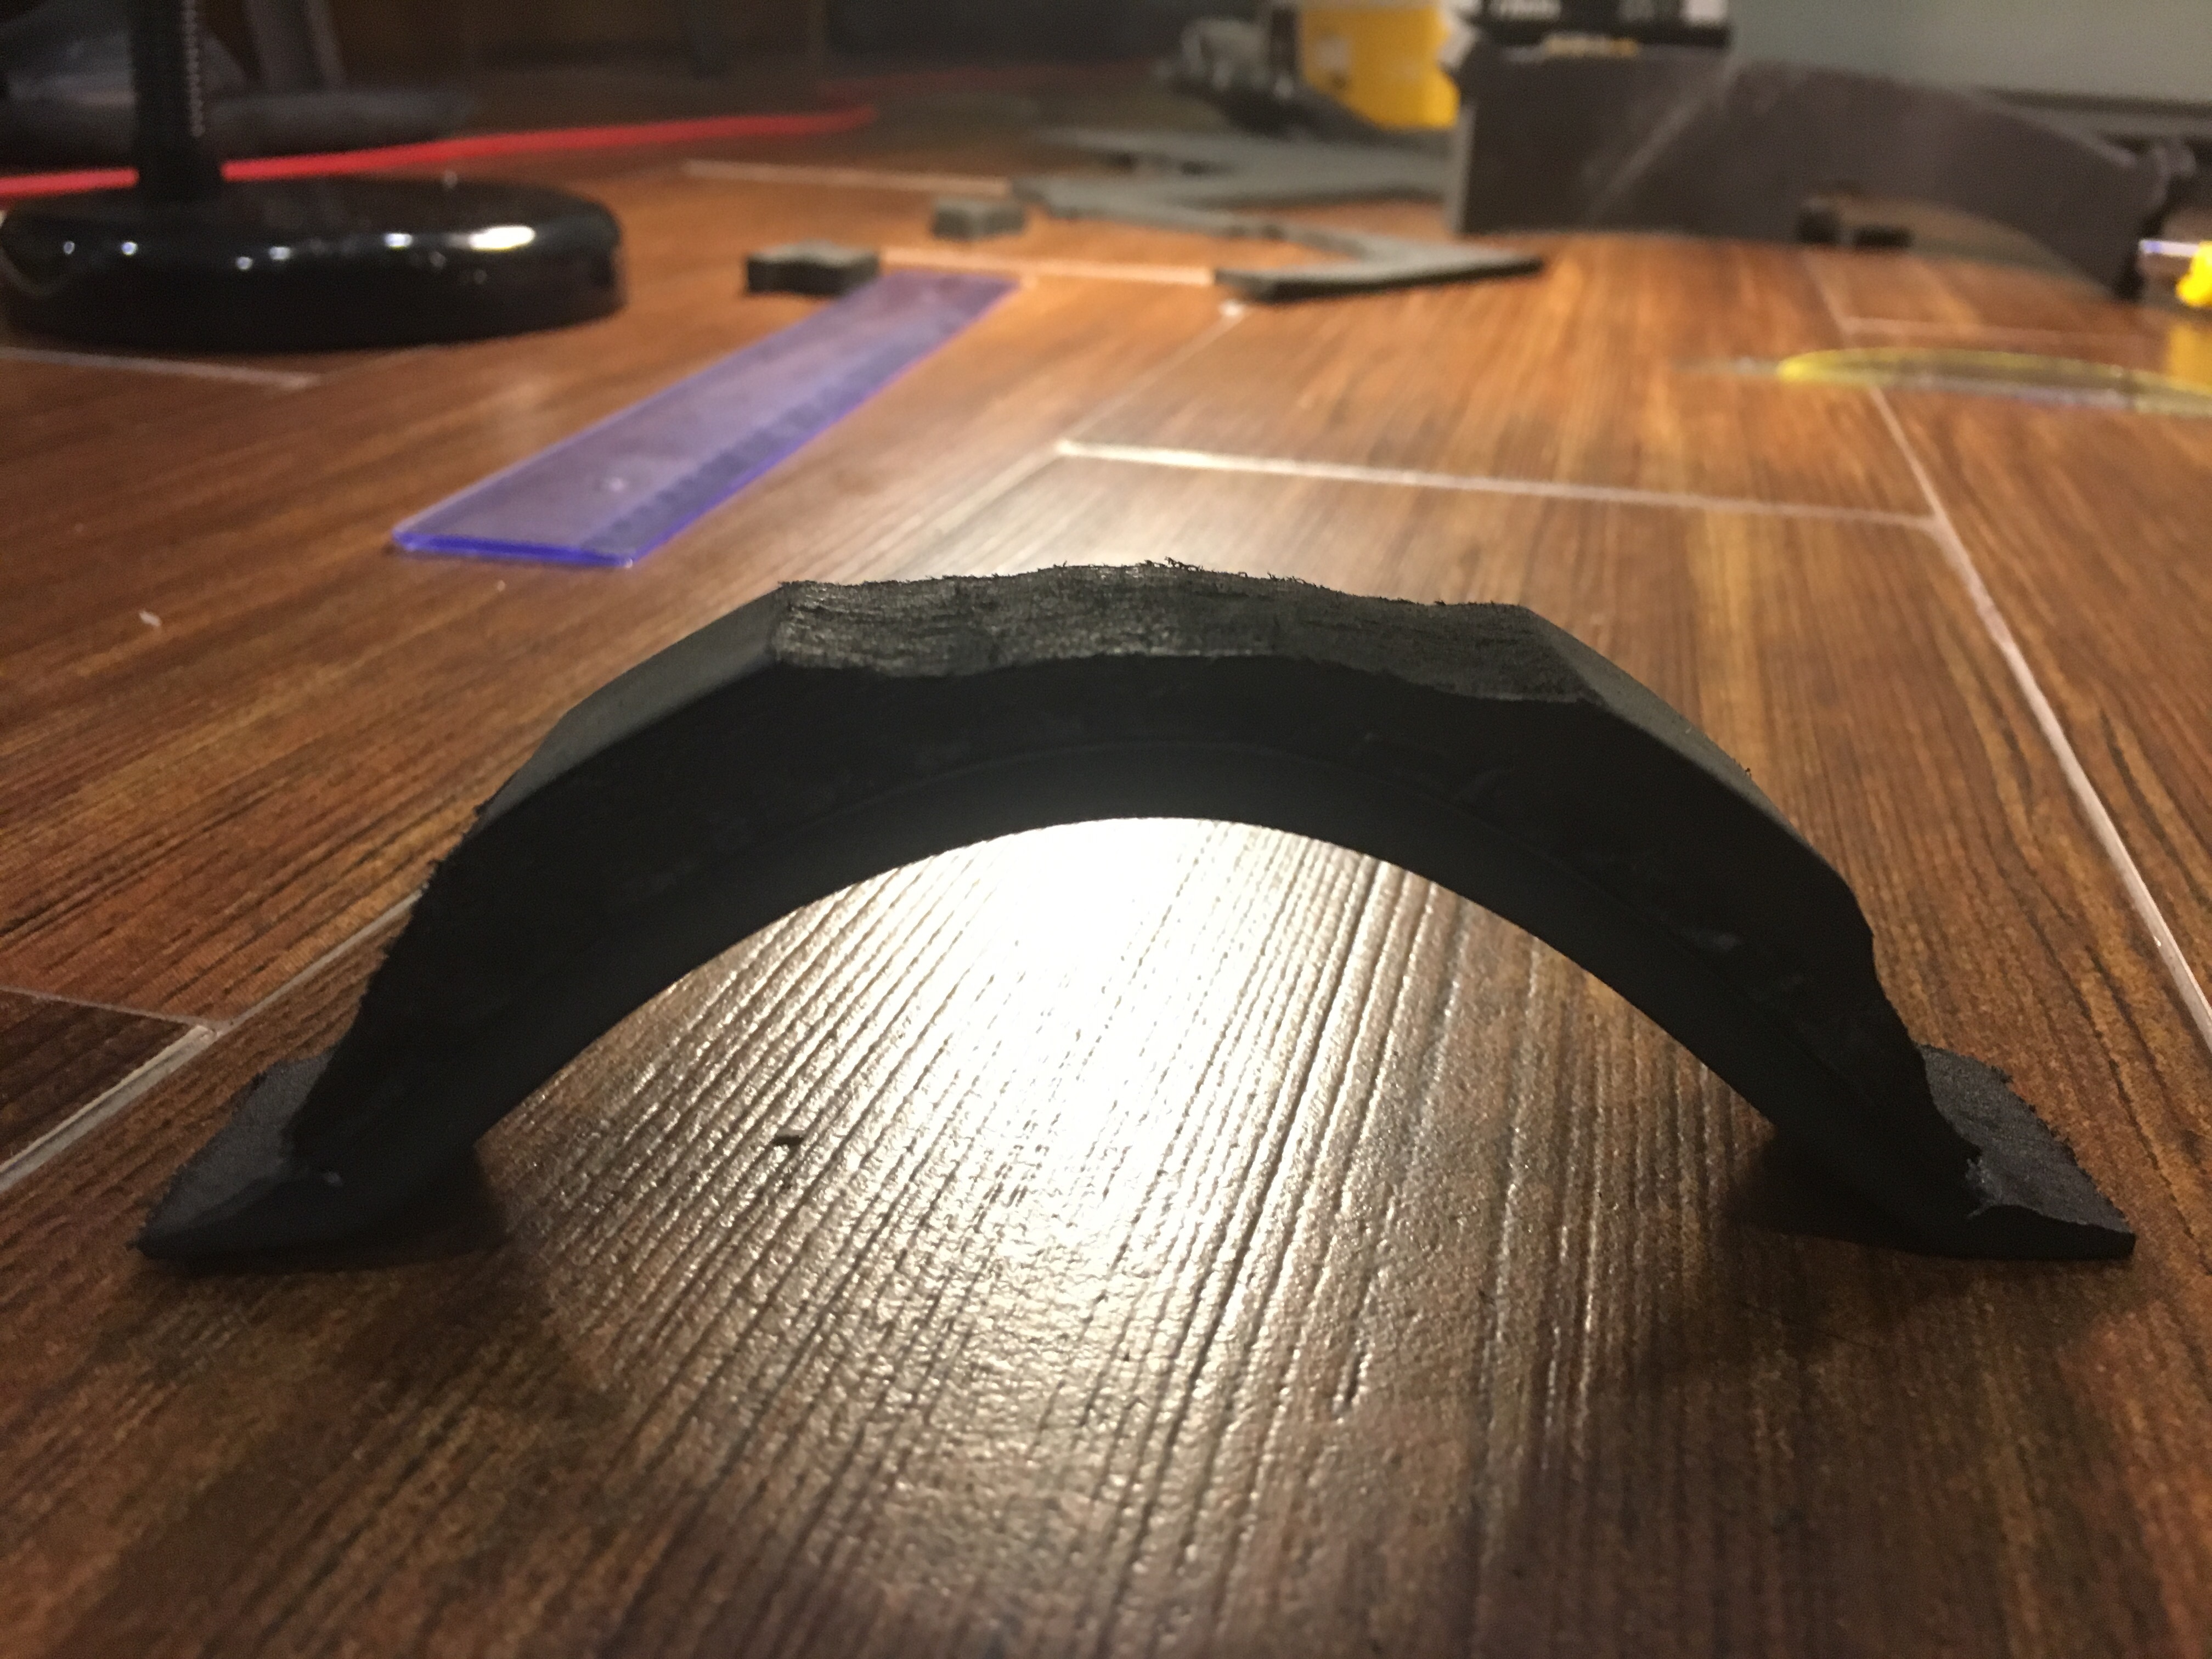
Using the dremel, all 8 shoulder pieces were sanded individually. This would have been much easier and much better done if I owned a sanding belt.

All 8 shoulder pieces glued and detailed.

All the pieces, ready to be battle worn and to have their seams filled.
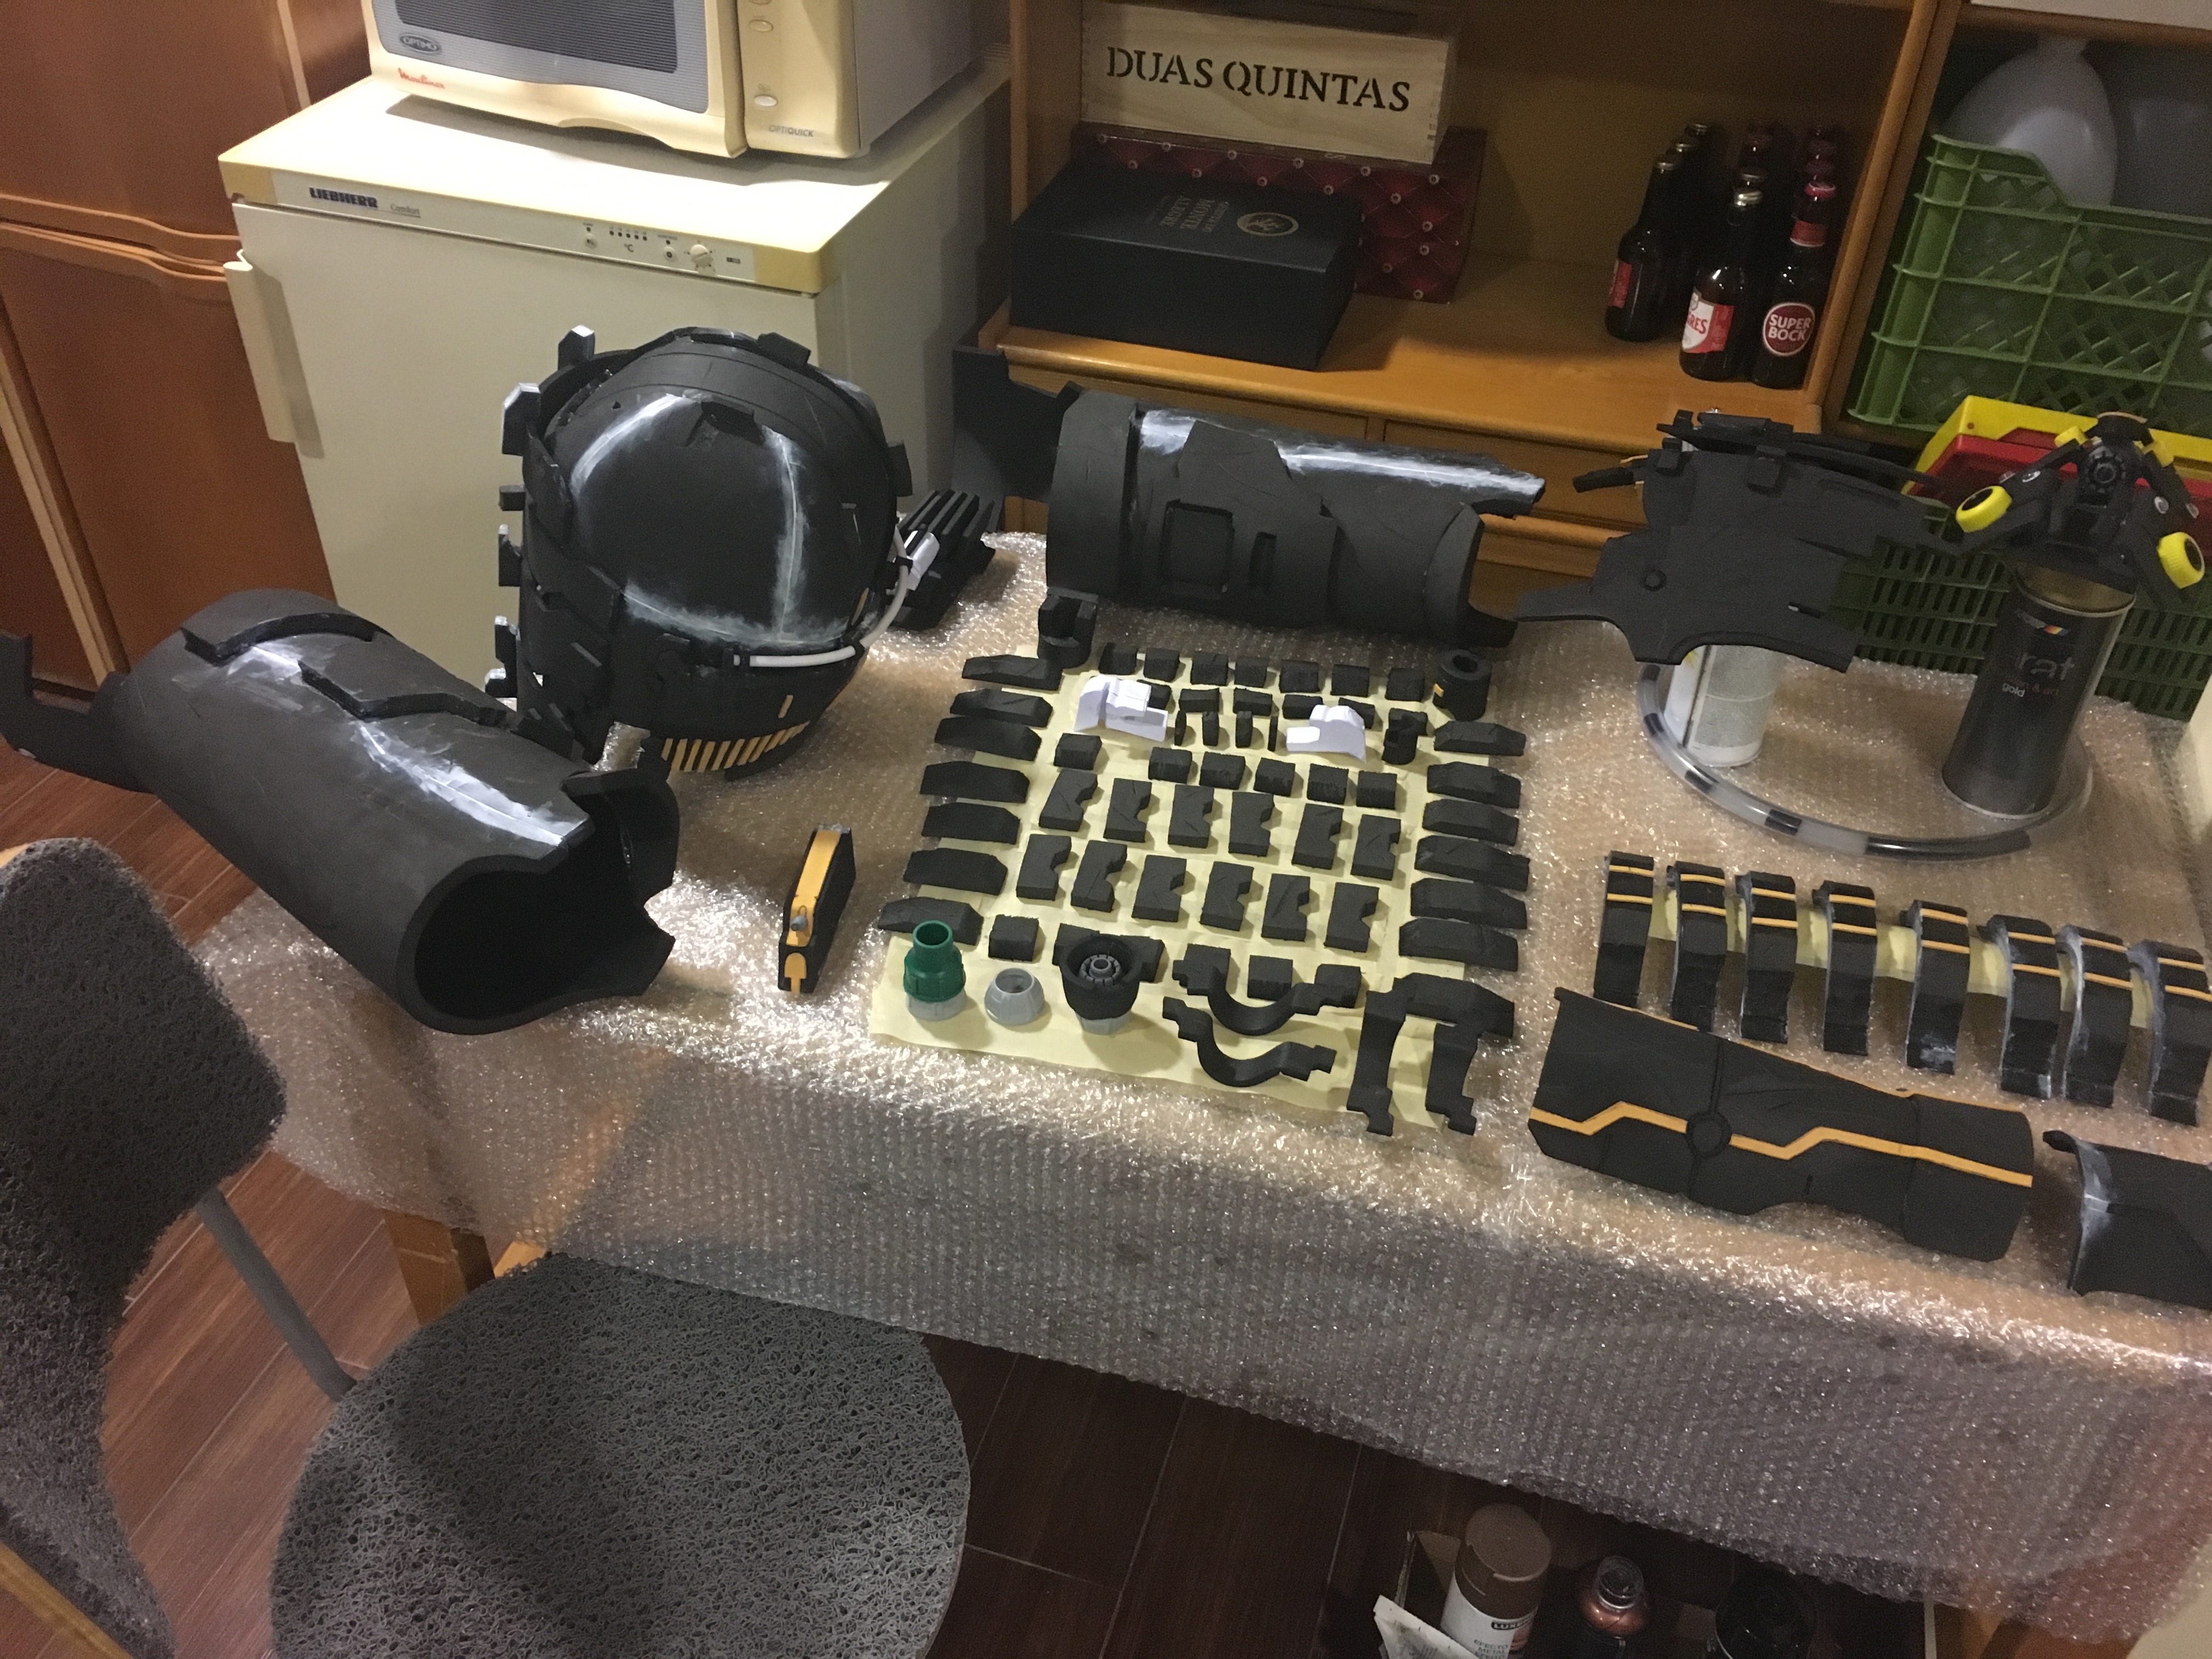
Using a Dremel, I scratched all the pieces up to add battle damage. Afterwards, Poly Max was used to fill all the seams of the pieces, as well as to correct excessive cuts and naturally ocurring holes in the foam. Two layers of Poly Max were applied because the paste shrinks a bit when dried. All small pieces were placed on a flat square layer of painters tape to ensure they wouldn't fly around when spray painted.

All pieces were painted with 3 Coats of black Plasti Dip spray, which is used as the base coat of paint, but also used to hide mistakes and seams on the foam, as Plasti Dip levels when dried. Afterwards, the pieces were given their respective color with spray paint, be it silver, copper, gold, bronze, or dark orange.

Because I did not like the look of the colors (it was too shiny but not reflective, almost like if it was painted metal), I applied a black wash to all the pieces. This was done by covering every single piece with black acrylic paint, and then letting it dry for two minutes (not much longer, we don't want the paint to fully dry or the piece will stay black forever!). Then, the acrylic paint was rubbed off with a paper towel. This created the worn, battle damaged look that I wanted the pieces to have. The cool part about applying a black wash to the pieces is that if you don't try to clean the crevices when you're removing the paint, the black paint stays in the gaps and really brings out the scratches on the costume.
In this picture, half of the pieces were black washed and the other half were not. Really shows how much of a difference it makes.
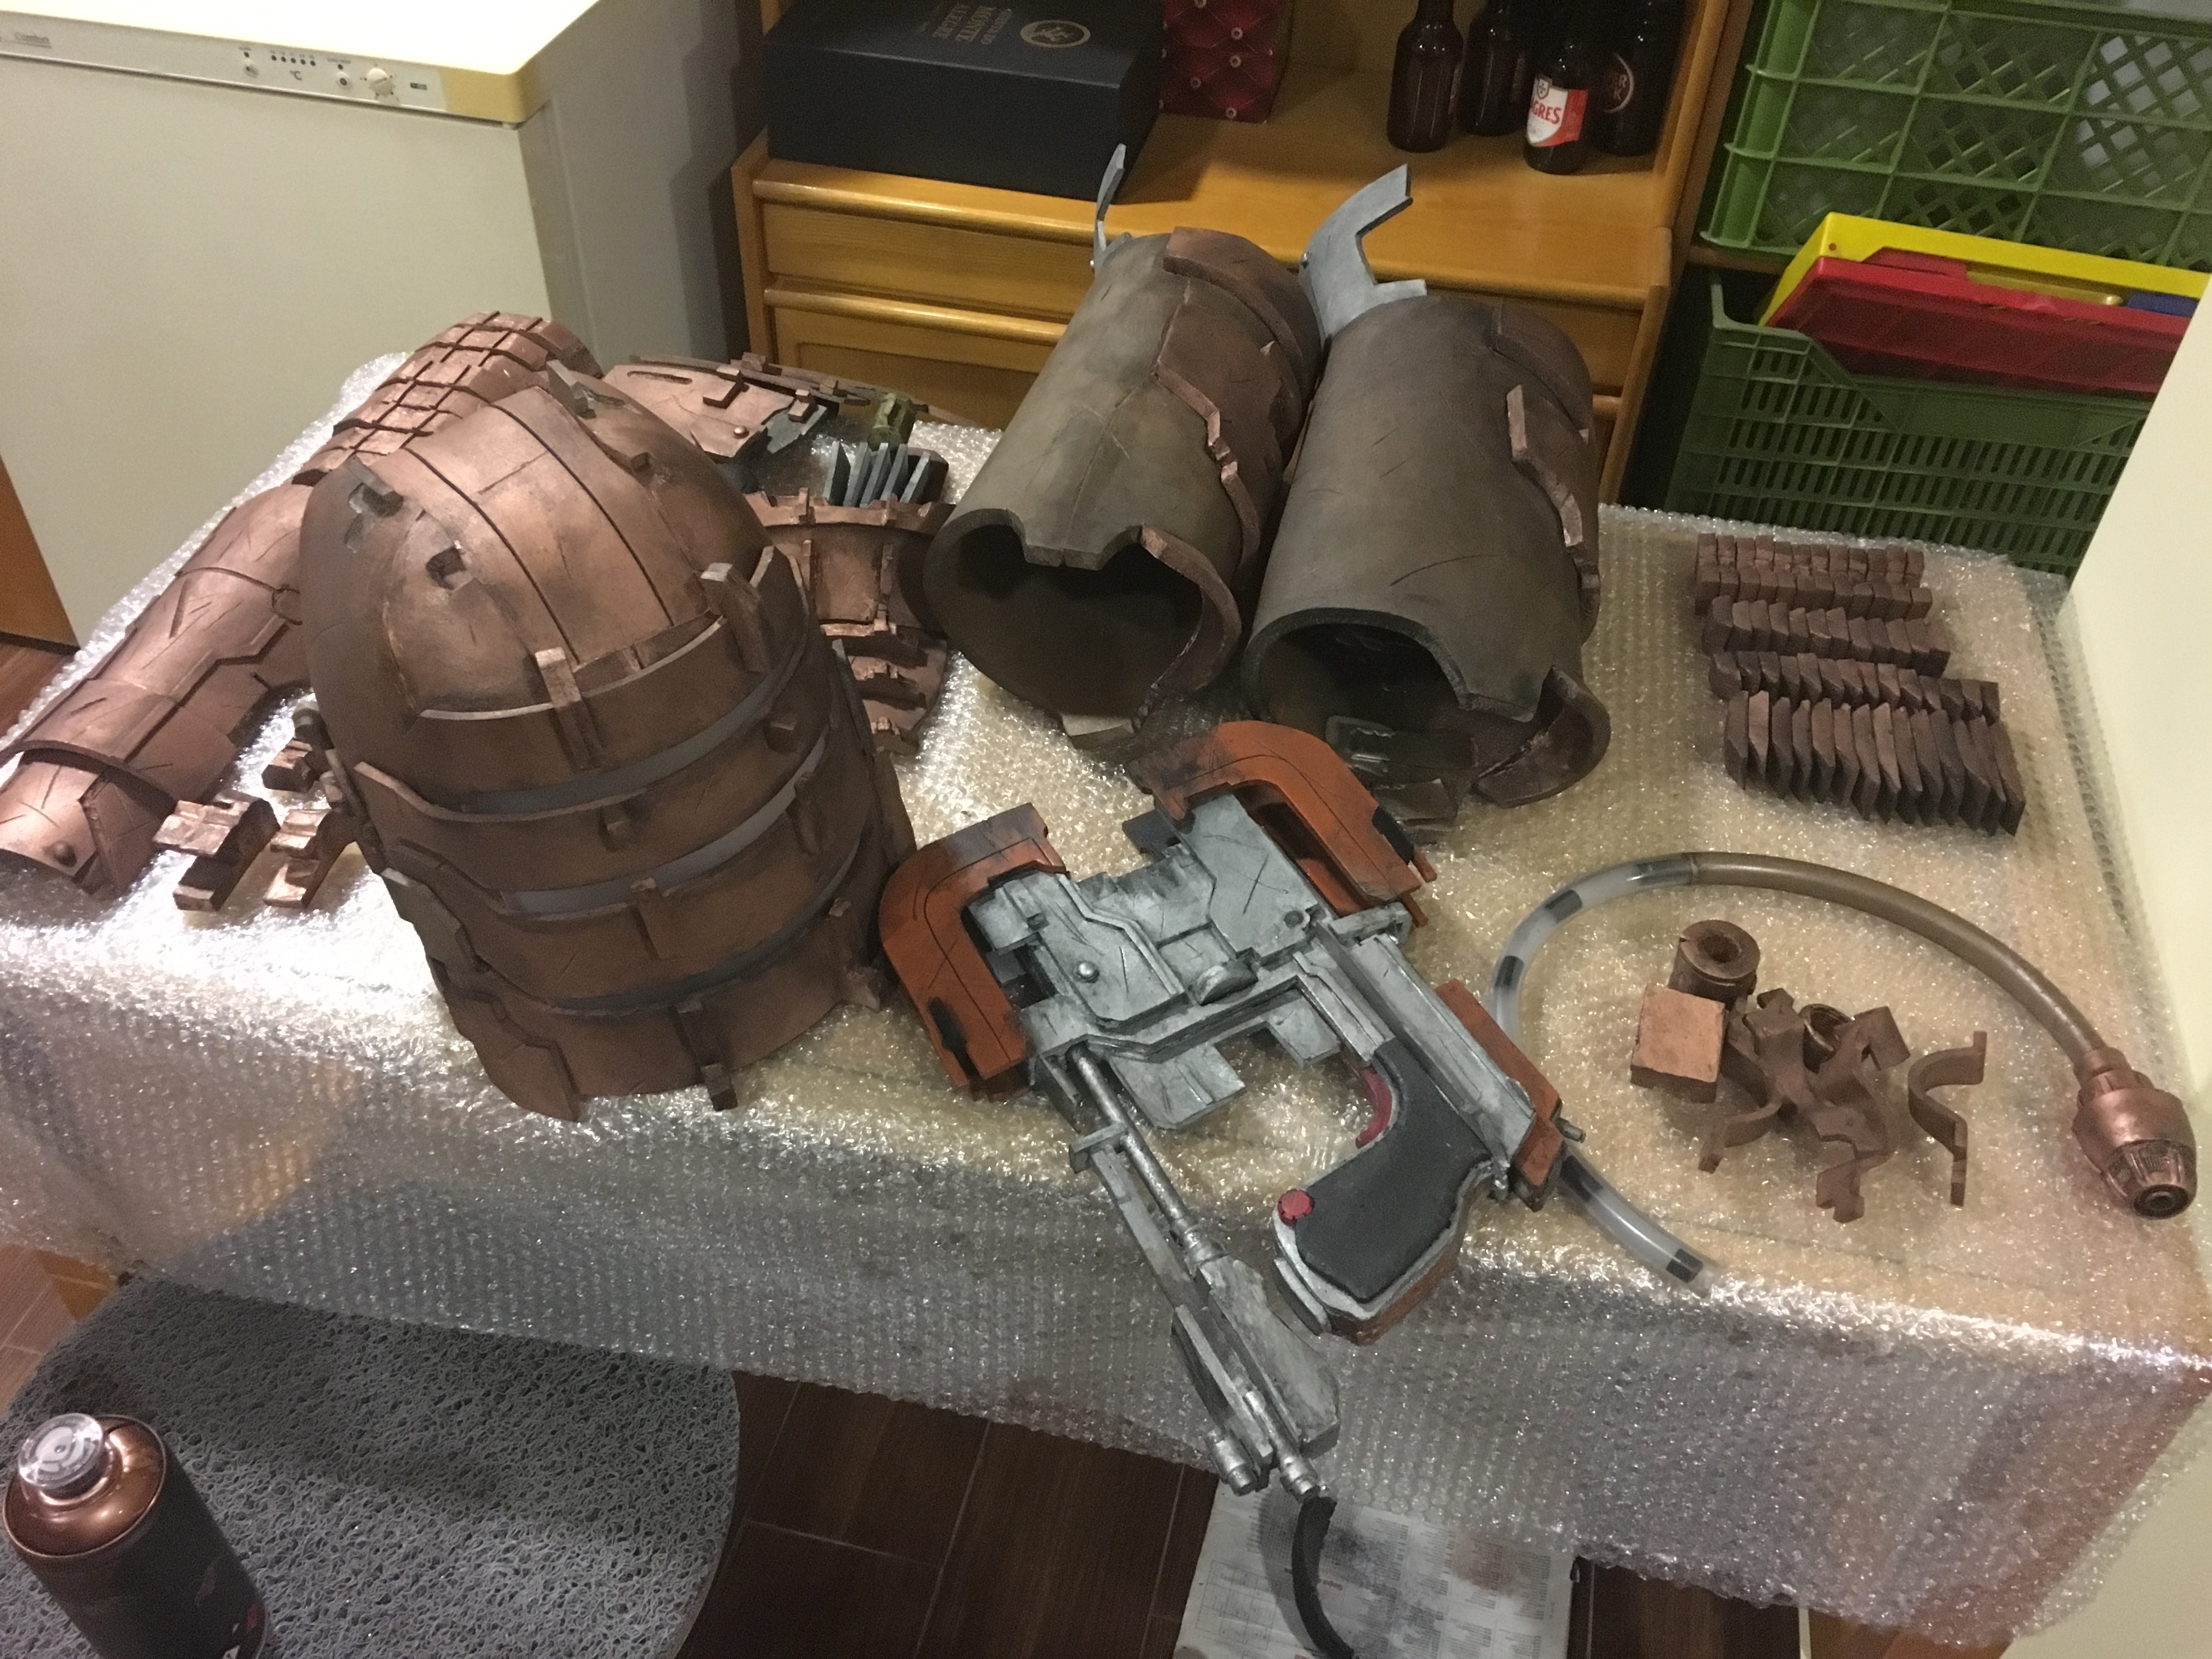
All the finished pieces, ready to be velcroed and/or glued to the final costume. Parts of the plasma cutter were painted by hand. I applied some dry brushing to the ends of the fins of the plasma cutter to make it look like it was fired a lot and the soot was building up.
For the helmet's visor, I used that foggy plastic that's used to bind the back of books. A very small gap was left on the second strip of plastic so that I could see with the helmet on (the plan was never to wear the helmet at all times anyway).

The circuit board designed by my friend João Santos which was used to control the RGB LED strip of my costume. Two of these circuit boards were used, one for the helmet and one for the RIG.

The vest was made with a sewing machine (I requested this piece to be made at a tailor, as I do not own a sewing machine). The black strips were sewn by hand onto the vest. and the little armor pieces were then hot glued onto it.

Almost all armor pieces were hot glued to the vest. The spine pieces were sewn in place to allow them to be somewhat flexible when the RIG is being worn. The shoulder armor was nailed to the vest to ensure it would stick despite all the movement in that zone.
The light grey fabric that makes up part of the left sleeve was sewn by hand.

Because the foam was too thin to fit LED's inside, I chose to use a blue piece of plastic from an old binder cut into shape to make the hologram. Glow paint was added to the back of it to provide luminescence when the costume is worn in darker places.
Originally, I was planning on having the blue plastic piece curve along with the shape of the TV, however when I was looking at the piece I realized that leaving it sticking out (as it is in this photo) would mimic Isaac's hologram, providing a cool effect.

And that's it! Hope you found this build log enjoyable!
AntiProtonBoy
Solid cosplay.
sphughDog
Well done, your hard work on this has really paid off.
adultWitKing
Really cool
warpspasm
Amazing work, I bought a PS3 to play this game years ago. PS. Fuck you! And fuck your Marker! :)
cadet4255772
This guy had the most violent stomp
racerkatt
I know this comment won't be seen because this post is already too old, this is cool as hell
buu342
DarkAsCoal
Bravo, very well done.
GamesDeen
I give you cosplayers props for making your own shit. That’s awesome.
Friendofwolves
Awesome! You got an Instagram of that?
buu342
Afraid not :(
Friendofwolves
Well get one!
DurendaI
K now shove a foot long needle through your pupil
Daetur
Game was a bit gory in general (NSFW, I guess)
SophieClockwise
buu342
I'd really rather not, thanks
tg2222222
Cosplayers these days have no dedication.
buu342
?
TheRealGoddamnLochNessMonster
Holy fuck. That part of the game was forever burned into my mind.
Nykidemus
I went back and failed it after having successfully completed the operation to see what happened. :(
DurendaI
Same.
Blkmagik12
Bought this game on sale on Xbox
Rayfasa
Love it! Great friggin job! I just restarted dead space one with headphones. God is that creepy!! Trying to finish this time
Praehanin
Be an Engineer they said..itll be fun they said... Help us fix this ship they said..you'll see your gf again they said..
Odyssey9
Awesome cosplay OP. Do you plan on doing Arthur C Asimov next?
buu342
I'm not sure who that is?
Odyssey9
Isaac Clarke is a mash of Isaac Asimov and Arthur C Clarke. I just reversed the names being used.
MissBoof
DwedPiwateWoberts
Dead space was sooooo good
darkninja2992
until 3 that is
DwedPiwateWoberts
Honestly didn’t realize there was a 3. Must be a reason.
darkninja2992
It tried to take the series into a more action based approach and ended up losing a large sense of the horror, plus there were a lot of >
darkninja2992
spark21868888
Fuckin awesome dude! Great Job!
Spookable
That is fucking cool
buu342
I wanted to include this post in #costumecontest2019, so I apologize for reposting and killing any favorite hotlinks to the original
graehall
It's such a fucking great costume @OP. Damn. I shared this around with friends. Awesome work.
Lurkerdraegon
Great job!!! I really like it despite not knowing who that is.
buu342
Thank you! It's the main character from the Dead Space franchise https://images-na.ssl-images-amazon.com/images/I/41Y8BrUHHXL._SX425_.jpg
overlythinky
Damn son, that is awesome!
Dragonsadvent
I want one
crimsonchain
That is an awesome costume and on my forever list of cosplays to redo.
TheDragonsHoard
https://www.youtube.com/watch?v=mYuOStPmYdQ
Clayman8
Its nice to see someone else who owns a RIG :D i made one years ago as well, congrats on pushing through
buu342
Send pics!
Clayman8
I have a few pics on my profile here, its been a while though. The rest of the build are on my FB page
buu342
Found it! Looks really awesome! I also really dig your classic Doomguy
Clayman8
Yeah i tend to work heavy on armors and the like, mostly on stuff i want to make over "flavor of the month" like everyone else :D
AtomicCarp
Are there laser pointers in the plasma cutter?
buu342
LEDs, blue lasers are dangerous for people's eyes without protection.
TheGlow
Nice. I always wanted to play Dead Space but its FoV gives me horrific motion sickness.
buu342
If you're on PC, there are mods to change that!
TheGlow
Yea, I tried a couple, it still wasnt feeling right. Mouse cursor issues, etc. Even tried on X360 and it was bad, where some pc on console /
TheGlow
helps because of the forced distance. Playing Outer Worlds now and 72 fov seems best which is an odd number.
buu342
Ah if that's what you're referring to. The mouse acceleration is really weird in DS1. In DS2 it feels infinitely more natural.