
usernamerelevantsoon

4023

29

5

Greeting folks! This my 3rd or so attempt at making homemade pastrami. If you've never made your own corn beef or pastrami it's worth a shot and way better than the store bought stuff. Progress pics and recipe below.

I forgot to take pictures of the joyous part of making my own curing solution and trimming my brisket as usual. You essentially mix curing salt with a bunch of spices (mentioned below) and let the meat cure for X many days depending on size, thickness and curing salt added. Pictured above is a 5 lb brisket after curing in brine for 4 days and then soaked overnight in fresh water for desalination.

The main difference between corn beef and pastrami is that while they're both cured meats, pastrami is smoked. I'm doing indirect heat with about a full chimney of unlit coals, and a half chimney of lit coals, using pecan and mesquite wood chunks @ 225F / 107C. Water pan added to help coal separation for heat zones and humidity.

Before throwing the meat on the grill and and getting my rub on, I decided to do a small cut test to see how the meat looked on the inside. According to amazingribs website, the meat should have a slight grey/pink appearance on the outside and look raw/slightly pinkish on the inside.
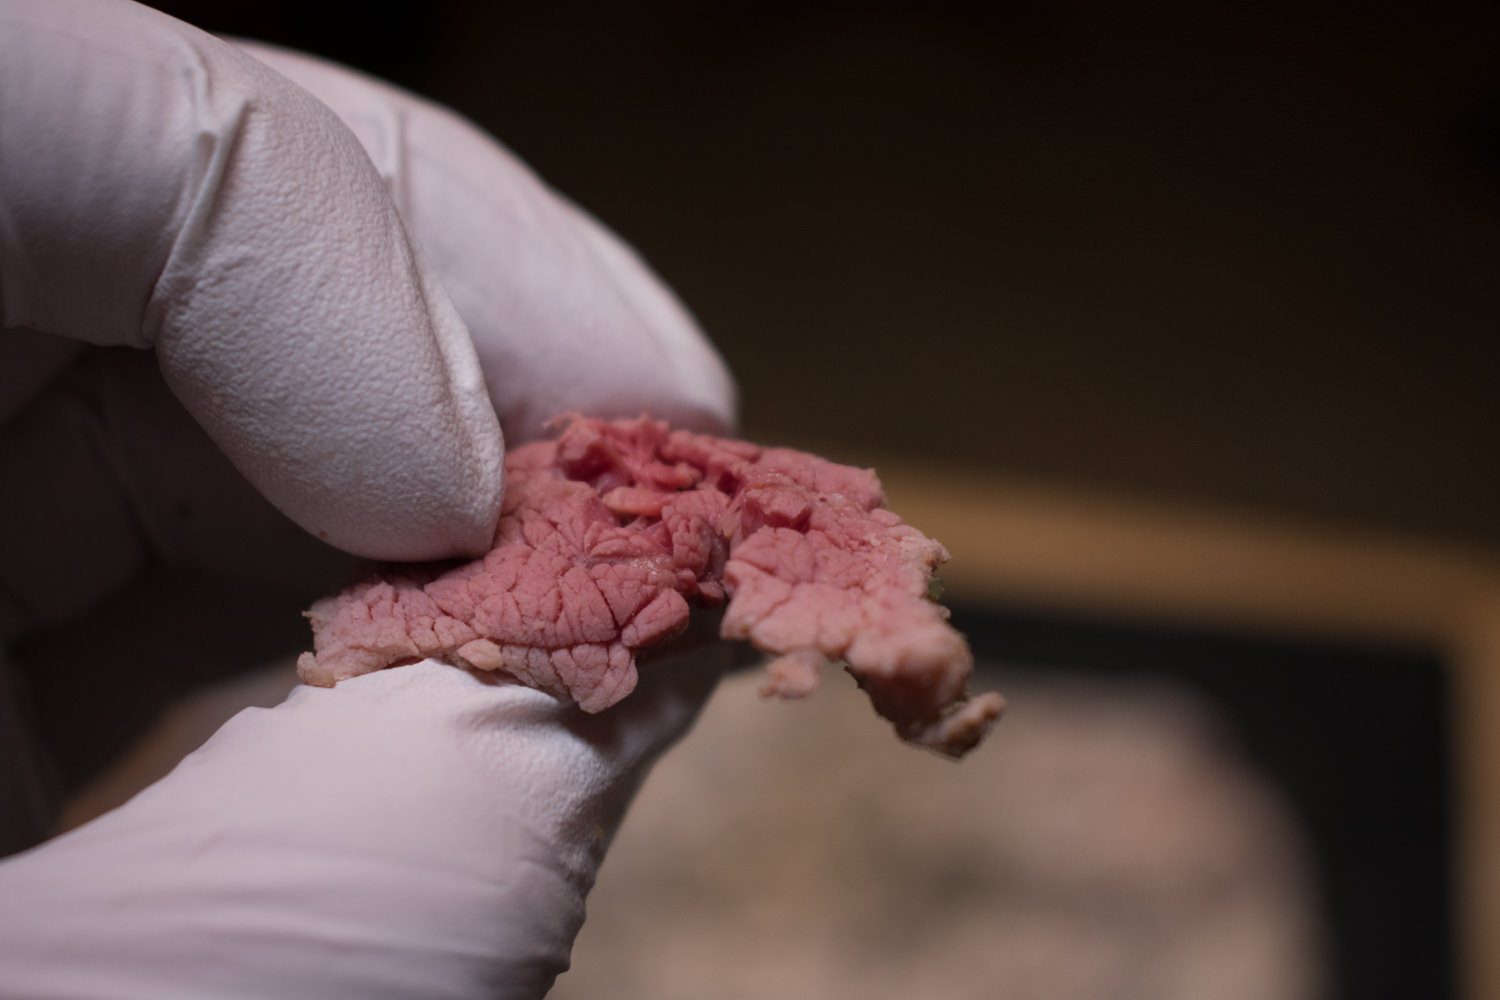
Just to be on the safe side, I decided to do a quick boil test with the same piece I cut off to make sure it cured properly all the way through. After doing a few corn beefs, I figured out that cured meat that hasn't reacted with nitrates will be brown in color instead of pink after being cooked. In this case the color was uniform so I could tell that the curing solution absorbed properly into the meat during the curing phase. I also did a taste test and it tasted like some good home made corn beef, so win win!

Now to turn this corn beef into pastrami! I've rubbed in equal parts garlic powder, fresh cracked pepper, onion powder with about half the amount in paprika and ground coriander. Protip - use a coffee grinder to fresh ground large amounts of spices from seed. Way easier.

Making the mop for basting the pastrami - about a 1/4 cup of apple cider vinegar, 1 cup of apple juice, 1 cup of beer, and a 1-2 tsp of garlic chili sauce (Sriracha's chunky cousin).

This is about 3 hours in, mopping / basting every hour. At hour 4 I went ahead and transferred the meat to my pellet smoker @ 225F / 107C for more even heating.

This is close to hour 8 @ 225F / 107C on my pellet smoker. The mop was transferred to the jars on the right for humidity / mopping. Internal temp of the pastrami was right @ 150F / 65.5 C when I pulled it for the sous vide.

The pastrami was already smelling good, but this is where I wanted to take it to the next level to further tenderize the meat. While vacuum sealing I placed stainless steel knives at the bottom to prevent the bag from floating. It also helps prop the pastrami up in my sous vide container.

Pictured above is the pastrami after about 10 hours. I went ahead and let it go for another 8-9 hours @ 180F /82.2C . By then the bag was super dark from all the smoke. The nice part about doing sous vide was that I was able to get everything else prepped for the sandwiches while not having to worry about overcooking it. The only draw back I found was monitoring the water levels ever so often and replenishing them. I'll try a cooler next time to see if it decreases water loss.

With the coals preheating for the quick sear, its time to get the sandwich fixings under way. Pictured above is some Hatch New Mexico Green chile sauerkraut (hatch referring to location, not brand) - if you haven't tried it, its amazing. Basically mix about a 8 oz of green chile with a small bag of sauerkraut. It brings a nice balance of spicy with tangy. Next time if I'm feeling ambitious I'll make my own kraut from scratch.
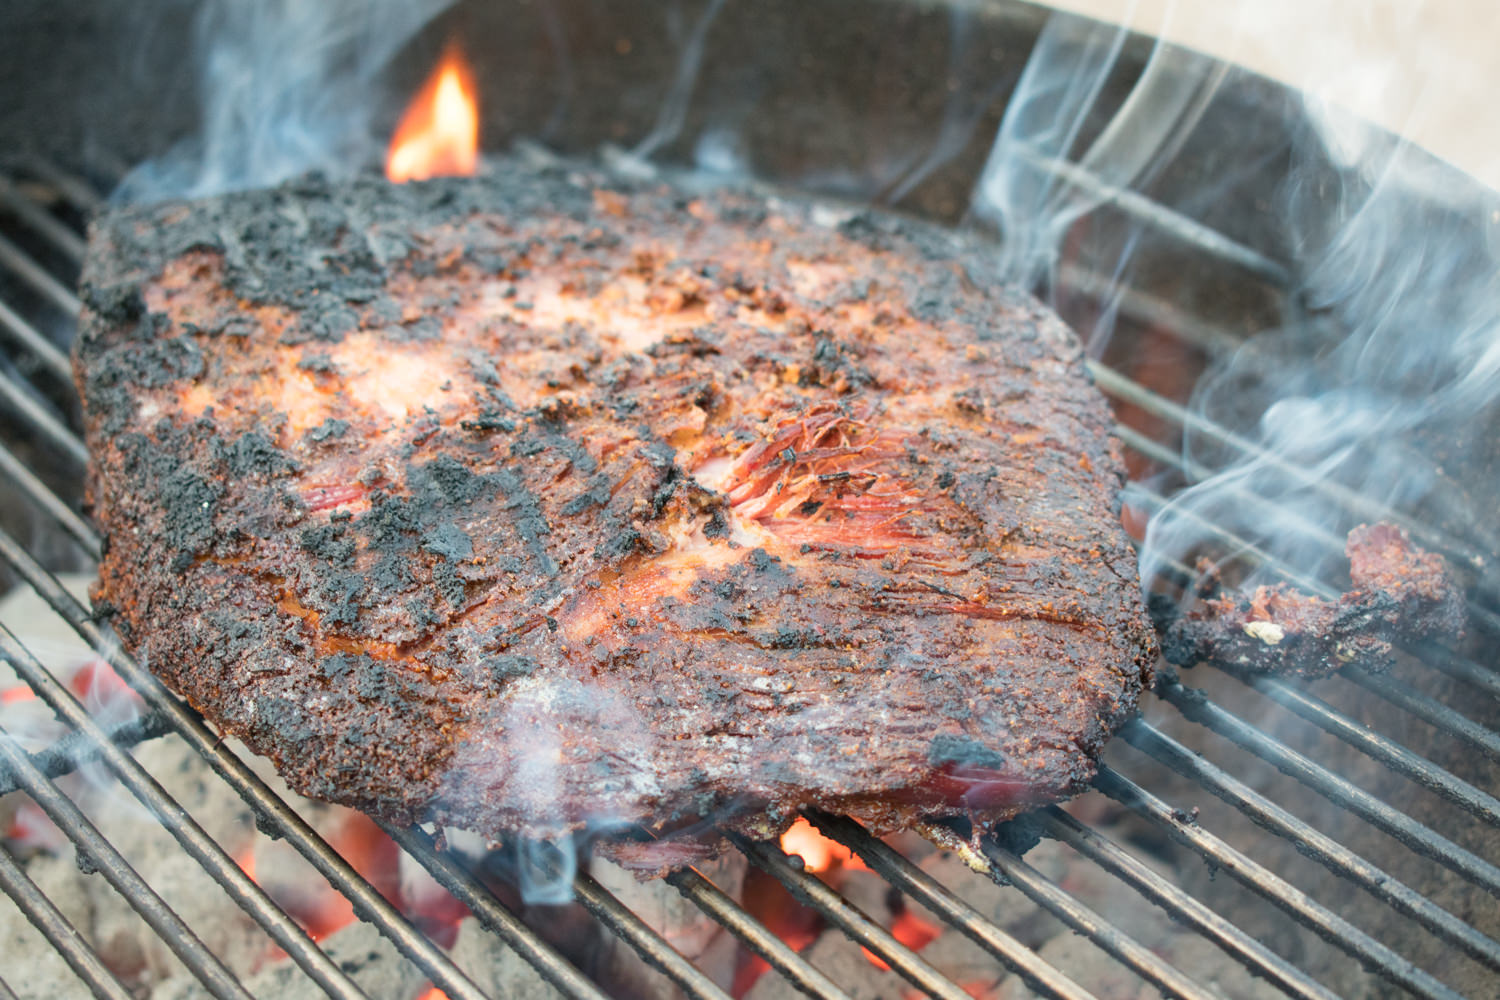
Now my favorite part - Getting the bark back. Everyone does it differently, but I like to get the coals white hot, then put the meat directly on for a quick sear. It doesn't take very long to heat it, since technically the meat is already fully cooked and up to temp from the sous vide unit.

After pulling the meat and wrapping in foil, it was time to toast the bread. I've got some home made marble rye bread going in the oven on low broil. I buttered both sides and placed on provolone and Gruyere (it's what we had on hand). Even after the cheese melted, the butter wasn't browned so I assembled the sandwiches with some homemade Russian dressing and did a quick browning of the bread on the stove.

Pastrami all cup and smelling good!

TWO TICKETS TO MEAT MOUNTAIN!!!

Nom. So far I would say this was the best pastrami I have made to date from scratch. The spices and smokiness were at the perfect amount. Not too spice heavy or overly smokey. Needless to say my friends want to do this again soon for one of our cookouts.

• Dirty Dog tax! Instructions / recipe below:
• 1 4-6 lb brisket, with all fat trim except for 1/8 inch layer on top. Silver looking skin removed as well from the bottom to speed up curing time.
• Curing solution / spices- modified recipe based on amazingribs corned beef recipe
1 gallon of cold distilled water ( I used filtered water from my Brita)
7/8 of a cup of Kosher Salt, or 8oz / 226 grams weighed
3 teaspoons Prague Powder / pink curing salt # 1. (Amount based on the amazingribs curing calculator).
1 cup of Belgian candi sugar or brown sugar
1-2 tablespoons of fresh cracked pepper – sub for whole peppercorns if you have it.
1 2-3 inch cinnamon stick smashed
1 tablespoon of yellow mustard seeds
1 tablespoon of coriander seeds
1 tablespoon of caraway seeds
2 bay leaves crushed
1 tablespoon of dried thyme leaves
1 tablespoon of ground ginger
1 teaspoon of whole allspice berries
1/2 teaspoon of whole cloves
1 tablespoon of ground mace
1/2 teaspoon cardamom seeds
2-3 cloves of garlic, smashed or pressed
•Curing instructions: After mixing all of your curing ingredients / spices together, place your brisket in a 2 gallon zip style bag. Then place your brisket/bag in an additional container that can support it. This way if it leaks it stays in the container - not all over your fridge. Next pour the curing solution in the bag. Displace as much air as possible as you seal the bag up. Place the bag / container in the fridge for the recommended curing time based on the amazingribs curing calculator (I'd do a direct link, but Imgur keeps auto flagging it). Rotate/flip the meat in the bag every day to ensure equal curing throughout the meat. Even if your doing this for corn beef, I'm promise it will be exponentially better than store bought and well worth it!
•Desalination: After your meat has met the allotted time (I went 25% further because i felt it was too soon - which is okay according to the website) you'll need to desalinate the meat. Soak the meat overnight in a new bag with fresh cold water (roughly a gallon, I'm not your supervisor).
•Smoking/cooking: preheat your charcoal grill for 225F / 107C and cook indirect heat for 8 hours or until 150F /65.5C with your favorite wood. I deviated a bit and put it on my pellet smoker after a while for more even heating, but nothing beats the good ol' charcoal flavor. Even after transferring after 4 hours, the flavor was definitely still there.
•Sous Vide step - this ones really extra and definitely into experimental territory, as I could've just smoked the pastrami for 12 or so hours. I wanted to see what effect the sous vide would have on the tenderness of the meat. I also didn't have time to babysit my grill for 12 hours so it worked out ( it was already pretty late).Preheat your water bin your sous vide tank/ pot to 180F /82.2C. For me it took about an hour or so, but i also have a cheap unit. Once the meat has been cooked to 150F/ 65.5 C on the smoker, vacuum pack and set the timer for 18 hours. Afterwards do a quick sear on the coals. Slice and serve!
• Marble rye was also baked from scratch by the mrs, let me know if you want the recipe for that too!
After reading Kenji's sous vide guide on corn beef at what time / temp combo I figured it would be a safe bet regardless in my experimentation attempts. It was both moist and super soft, but I'm curious to see what it would be like at less time / lower temp next time.
Overall, bitchin sandwiches. Hope you all enjoy!
thevortexmaster
You should try making your own lacto-fermented sauerkraut. Nothing beats it
Iouzip
Looks amazing, I love it all except for the grilling at the end. Can I make a suggestion? Cut thinner and pan heat with jus :)
ChinDripps
Did you roast the hatch Chile's or raw? In the kraut?
usernamerelevantsoon
They were already roasted, and de-seeded. I usually get a bunch roasted, prepped, and portioned a head of time