
WebMaka

94381

138

1

Our victim, the 1978 Chevrolet El Camino. This one sports a 350 smallblock engine that's been, shall we say, "performance enhanced." There's nothing quite like the sound of an engine with a lopey cam - smooth quiet idles are for the weak!

Since this was the non-SS El-C, it had the crappy basic minimally-useful instrument cluster. Just a speedo (which in this case didn't work), a fuel gauge, and a bunch of idiot lights. The car's owner had already added an aftermarket coolant temp gauge to it, but otherwise the poor thing didn't have much to offer along the lines of usable info on engine state.

As it turns out, nobody makes a drop-in digital gauge set for the non-SS El-C dash. So, we must build one.
Here are our replacement gauges: an Intellitronix create-a-dash kit to provide useful data, and a Lokar LED shift indicator conversion kit to replace the missing (and thus, totally useless) column-mounted shift position pointer. The gauge kit comes with some ABS plastic and smoke acrylic sheeting and mounting hardware, but it's up to you to turn it all into something usable.

After removing the cluster pod from the dash, and removing the gauges and printed circuit/bulbs, we're left with this, a basic bare pod.
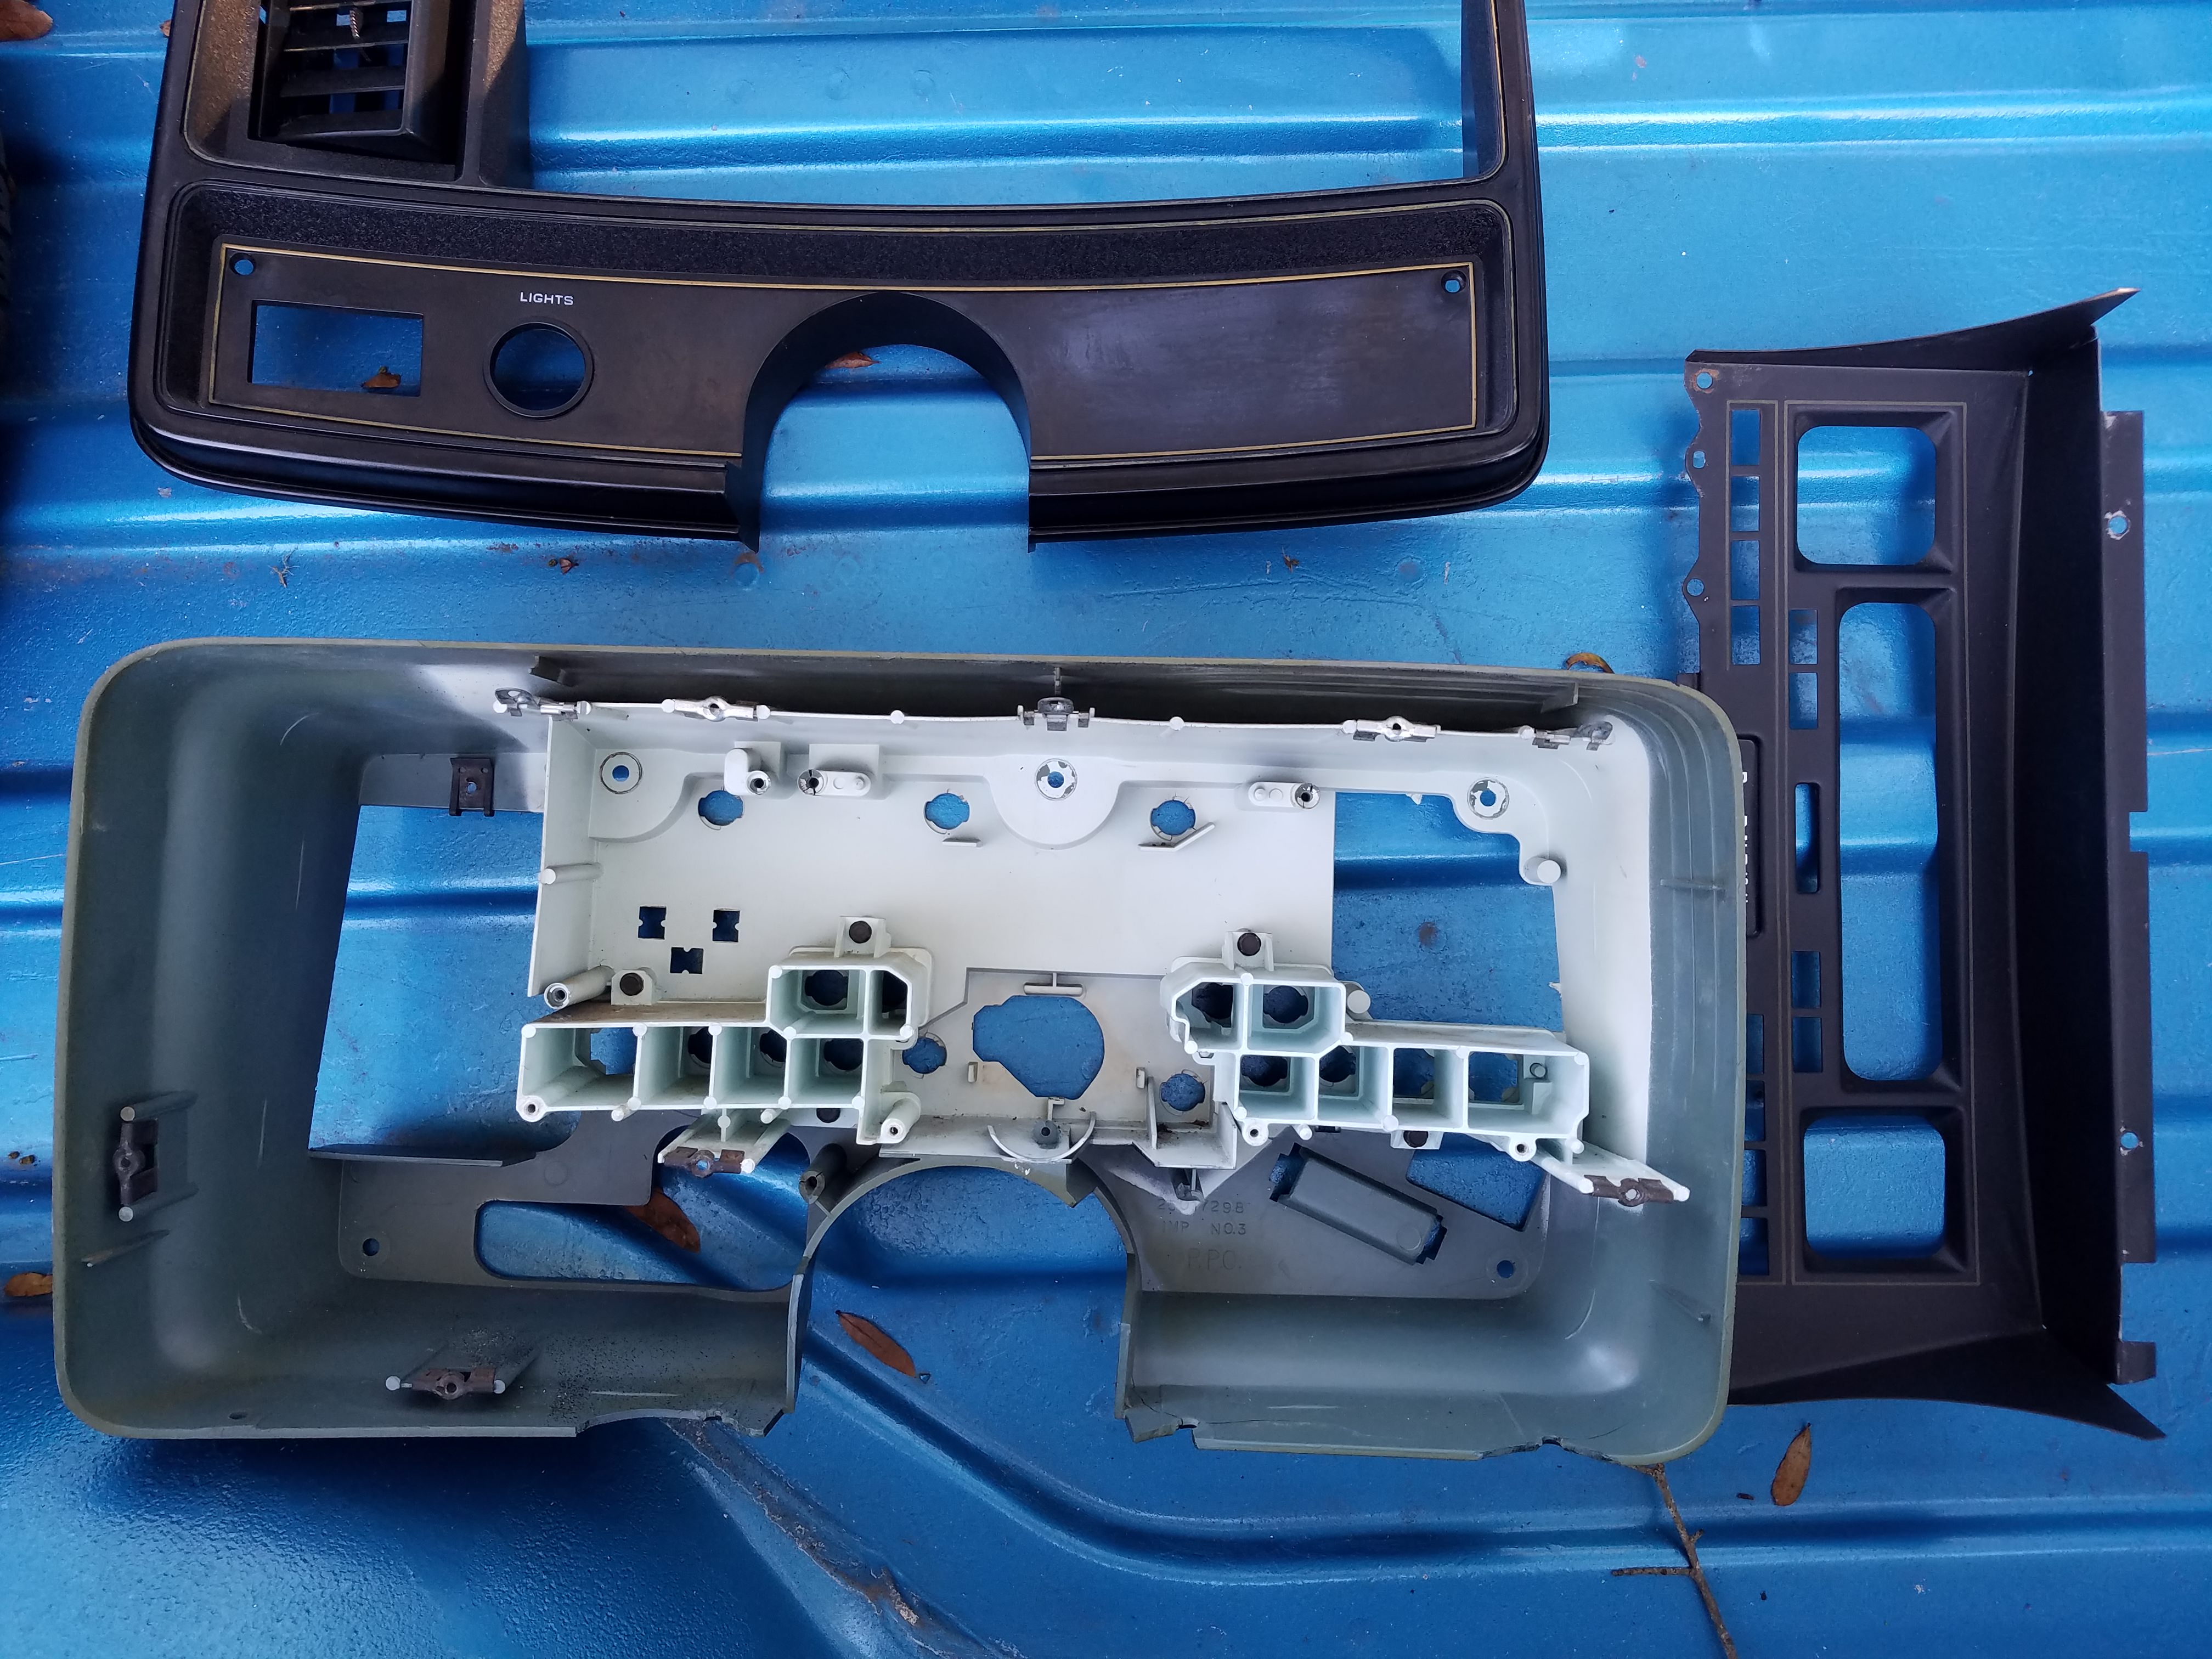
The pod itself disassembles into three major parts that are relevant to our task.

Of course, we have to show what the interior looked like with the pod removed. Hello gaping hole in dash!

This is where the cluster pod goes. The round thing in the middle is the speedo cable. We won't be needing that any more, as the create-a-dash kit included an electronic speed sensor that replaces the speedo cable. At left are the pigtails to the headlight and interior light switches, and at right is the contact set that presses against bare contacts on the printed circuit (copper foil laminated between plastic sheets, basically) that wires up the cluster proper. We won't be needing that any more either.

Time to get a closer look at that cluster. Since it has some depth and there's enough of a gap from the bezel to the metal trim plate that sits in front of the original gauges, the decision was made to attach the gauges to a piece of ABS plastic (which comes with the create-a-dash kit) that will in turn be attached to the trim plate.

And this is going to pose a problem. The trim plate is curved and the curve amount varies from top to bottom. Joy! Compound curves!

The easiest way to cut something out to fit it into something else is to make a template first. Since the trim plate has compound curves to it, the easiest way to pull this off is to press the trim plate against a piece of posterboard pressed into a pillow (so it can deform to match the curves) and then sketch the outside edges.

This effort was met with reasonable success. About three hours was spent converting the template here into a cutout template for the ABS. Lots and lots and LOTS of test-fitting, trimming, and expletives were involved.

Mounting holes were added to the trim plate. The ABS panel will be attached to the trim plate at eight points and gapped away from the trim plate via standoffs to allow space for wiring. The screw holes are also placed to line up with the gauges so that the ABS can curve without trying to force the individual gauge boards to do likewise.

After tons of fiddling and some time introducing an ABS sheet to a bandsaw and bench grinder and drill press, oh my, this is the result.
Button-head machine screws provide a cleaner look.

The ABS conforms nicely to the curves. This gap will be useful for the gauges' wiring.
(Aside: that one mount just right of bottom-center that looks like it's bent at a weird angle, isn't - this is a bit of an optical illusion from the angle of the picture. Compound curves are fun!)
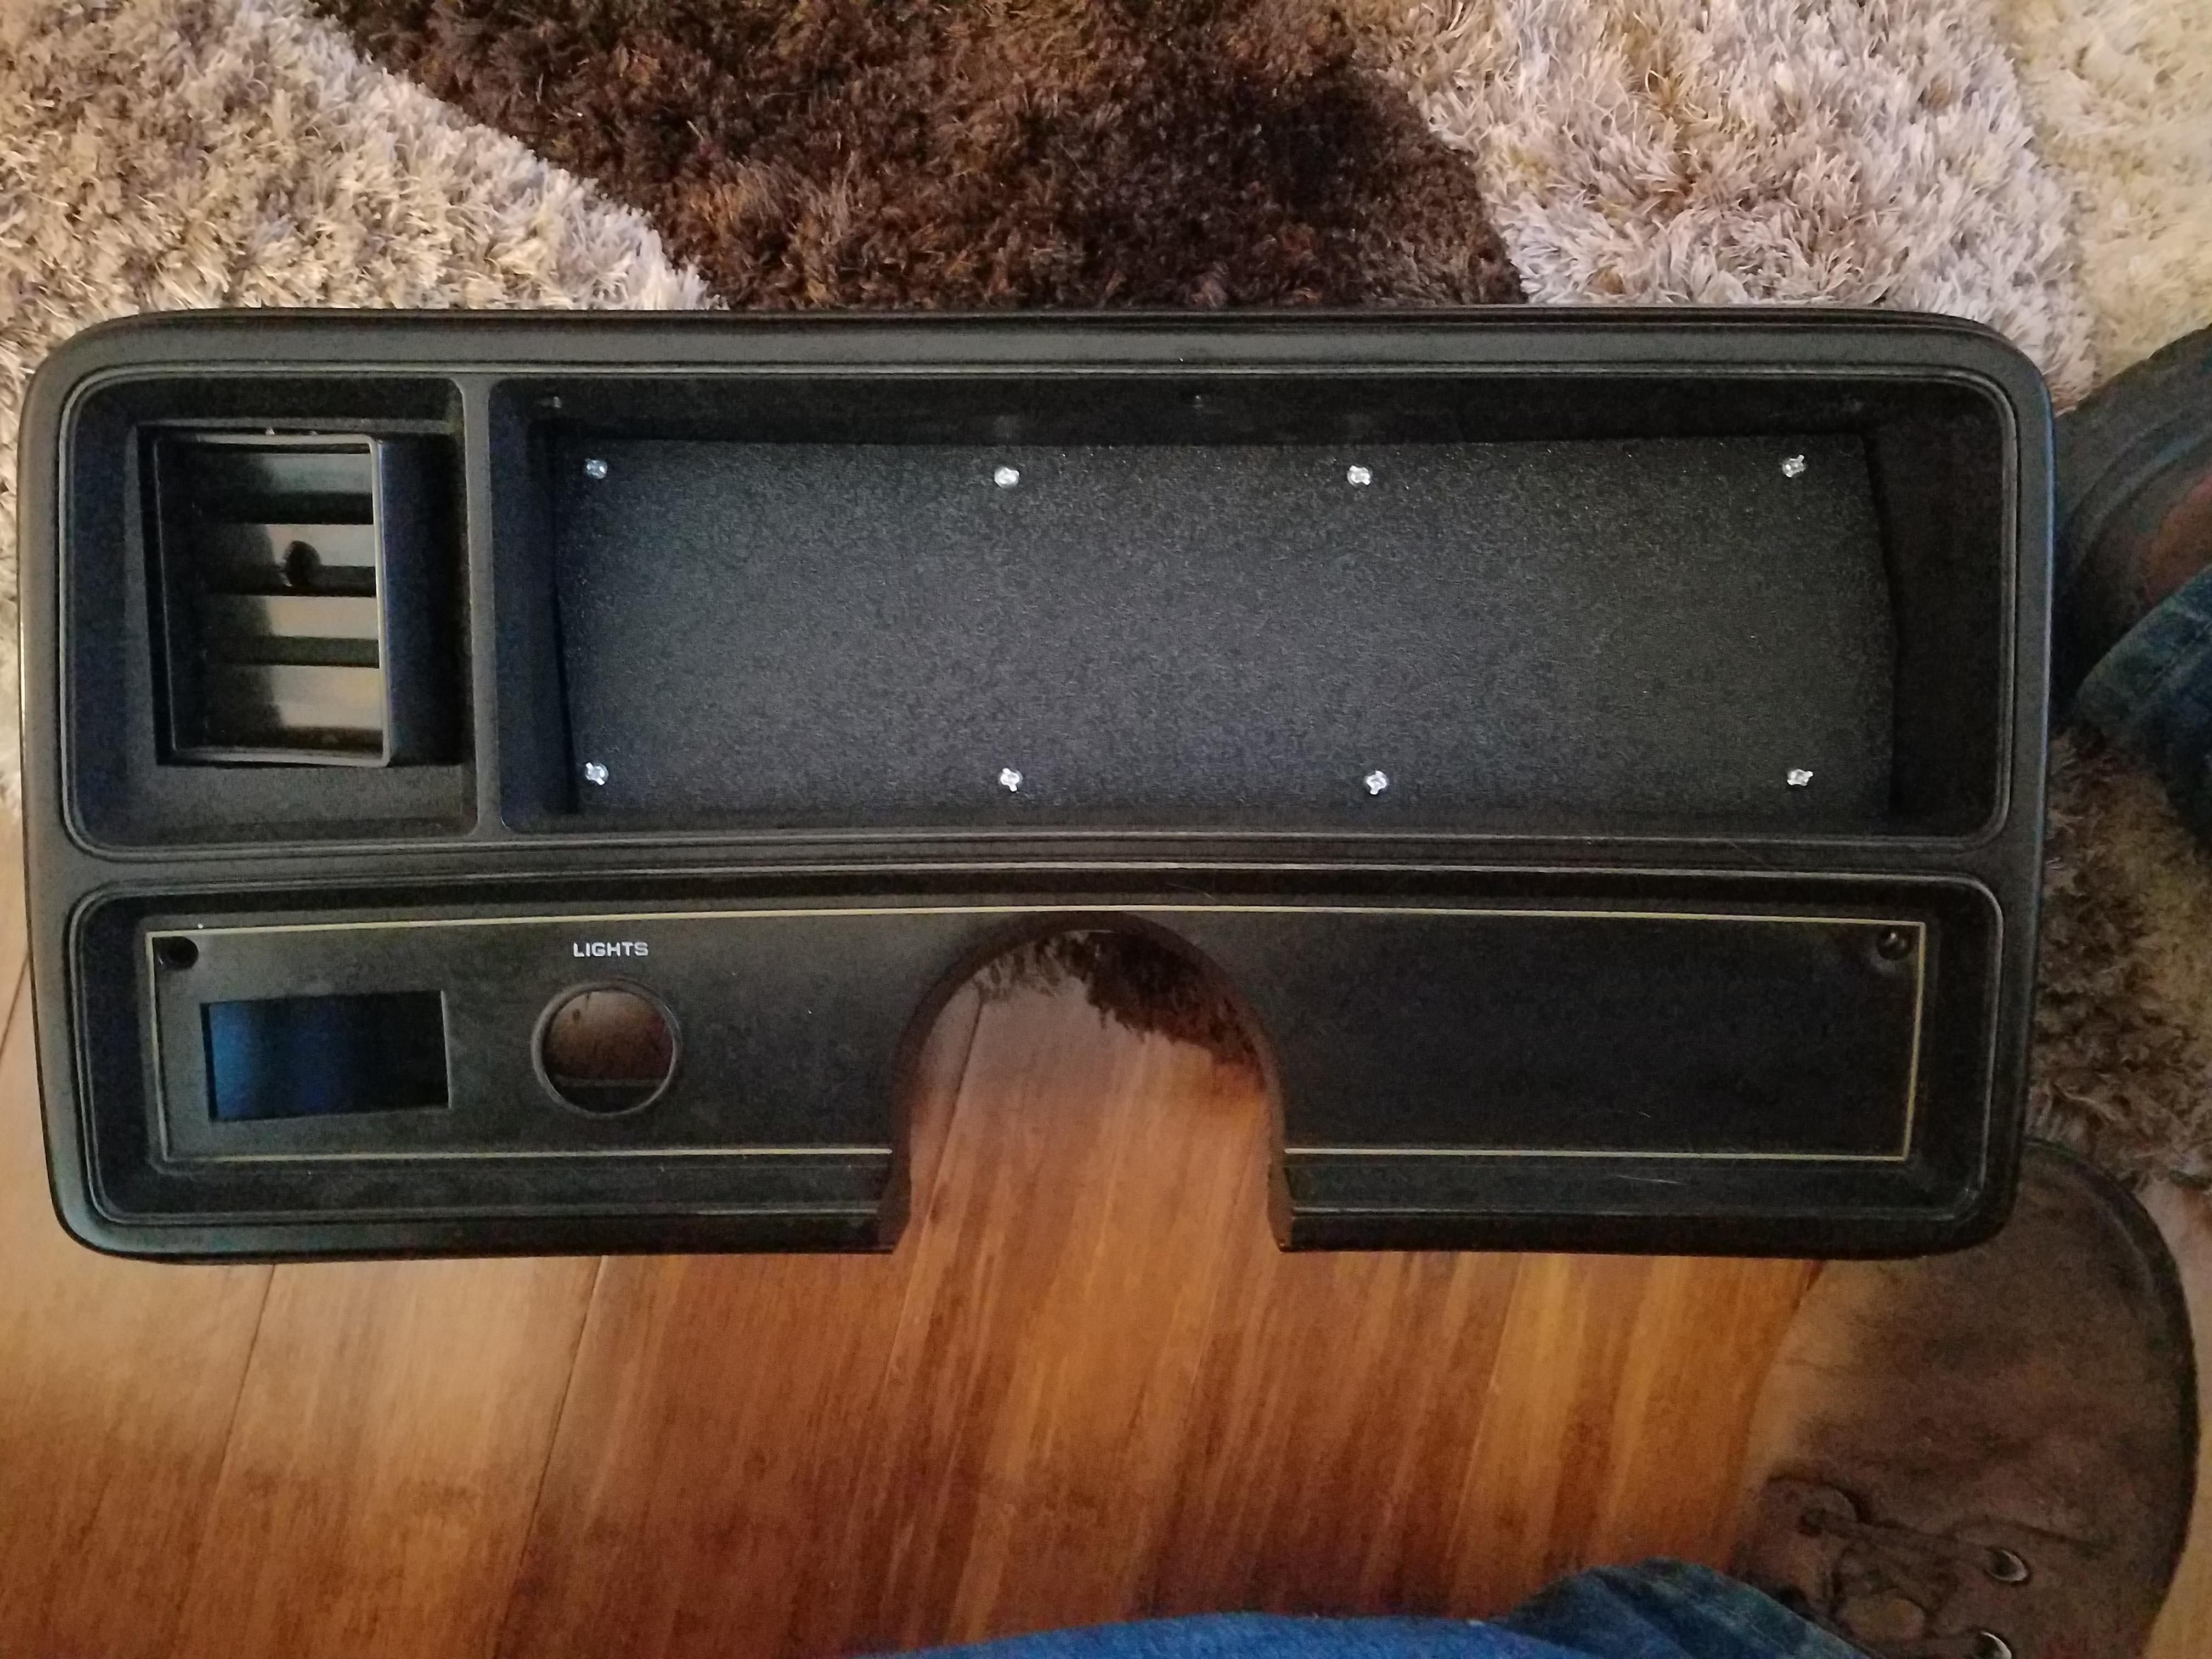
With the front bezel on, the look begins to take shape.
I'm sure the seeming misalignment of the screws on the right edge versus the left will bug some people, but it's unavoidable - the entire pod tapers front-to-back and because the cluster is not centered the trim plate is not symmetrically shaped. It narrows more, more quickly, and at different angles on the right side versus the left, so the screws on the right side are as far right as they can go.

The same posterboard-template tactic (only sans pillow) was used to cut out a piece of the acrylic sheet to act as a new front window. It rests against a small lip molded into the bezel, and is glued into place with trim adhesive and black RTV for a cleaner look.

Let's change subjects for a moment...
This is a lid from a basic little storage container. Nothing special, really, but it's about to become more useful.

We'll use the molded reinforcing ribs to add a guide line.

Horizontal guide line, check. Add a vertical. (Yeah, I know the pic above already had the vertical. Just showing how I aligned it.)

Since the lid is also molded all curvy, it's necessary to press it down flat to mark it.

Guide ticks on one-inch intervals on the X axis. (Or ~2.5cm for pretty much the rest of Earth.) The Y axis got guides at 1/4" (or roughly 6mm) intervals.

Playing connect-the-tickmarks results in a grid of rectangles.

A quick squeeze in a caliper to determine drill sizes...

Holes drilled! I freehanded these obviously, as this evolution does not require pinpoint accuracy.
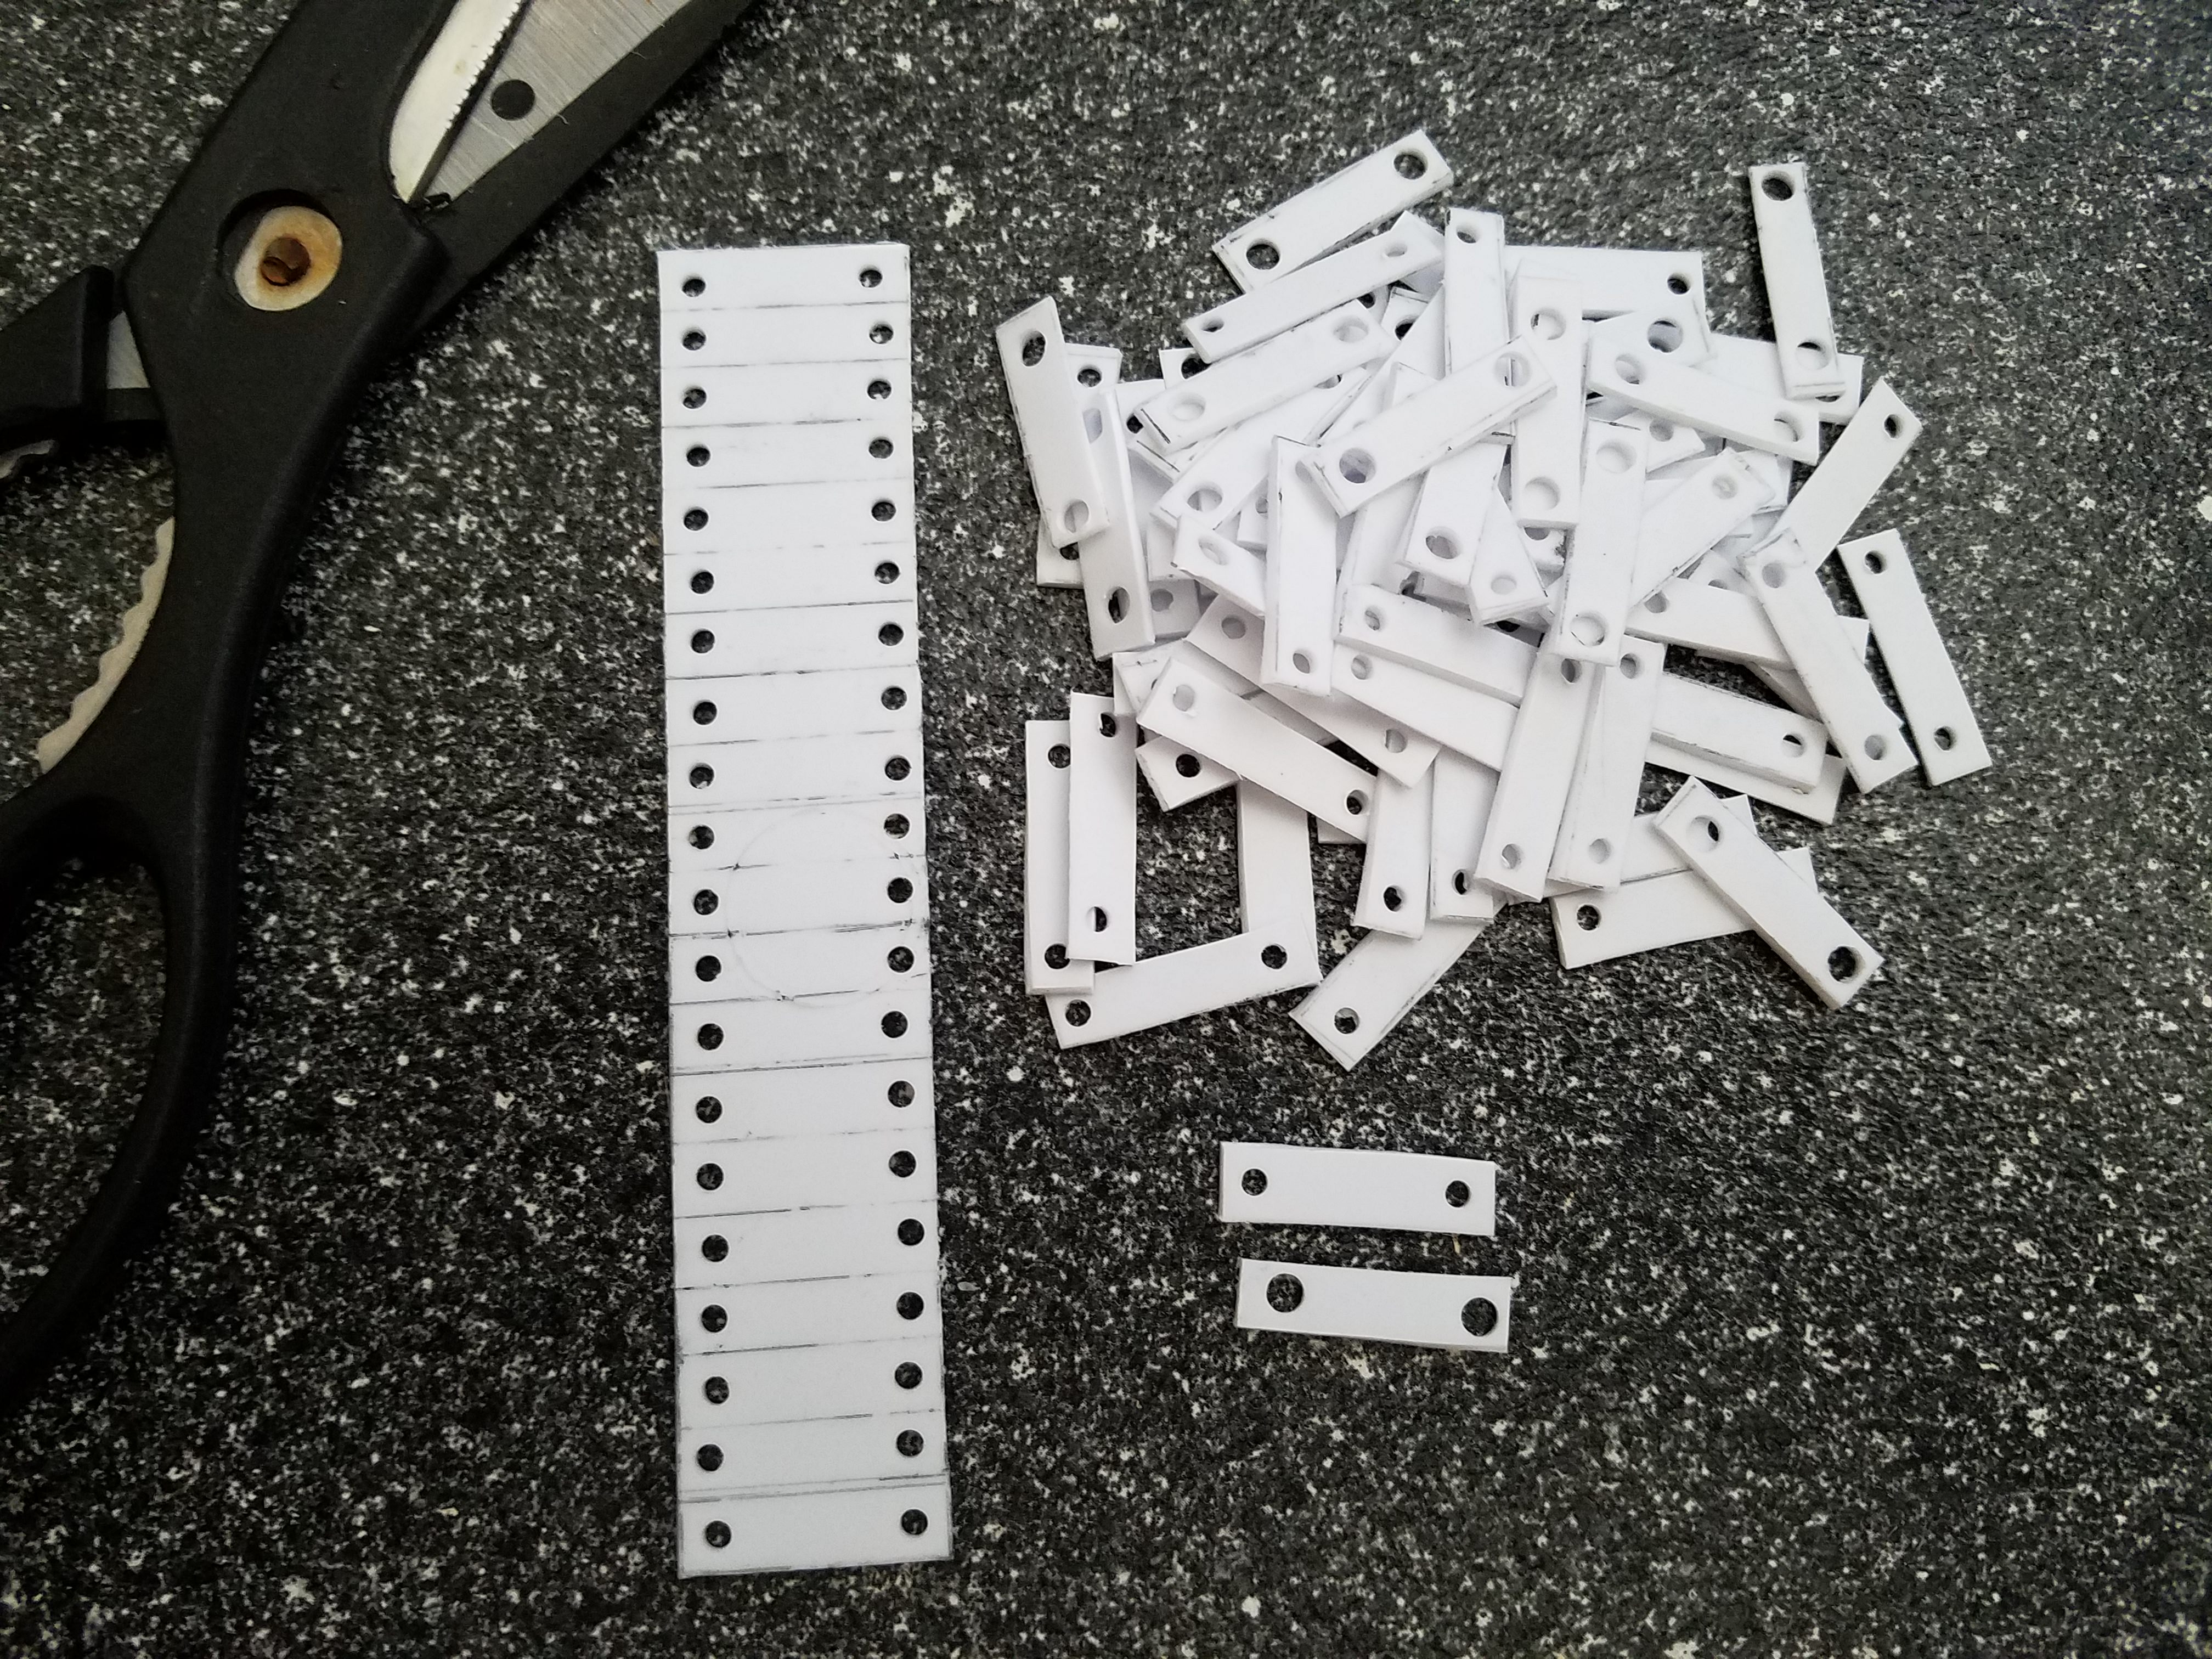
Cut my plastic into pieces, these are my wire tags...

Thread a wire through the holes, and boom, wire markers on the cheap. A fine-point Sharpie and a steady hand makes for the ability to label any wire we want. These won't fade, won't get brittle, they can be repositioned easily but stay put where you place them, and there's no adhesive to worry about.

The gauges and shift indicator mounted onto the ABS panel. At this point the gauges are actually slightly loose. They'll be tightened into place once the ABS is bolted to the trim plate so that everything can accommodate the curved mounting surface.

Another shot of the gauges on the panel. I didn't have a banana, so a leg has to stand in for size reference.
Also, note that although the ABS panel has an irregular shape the gauges are actually centered with respect to the outermost mounting screws, which are in turn spaced to fit into the corners of the trim plate. This is to compensate for the taper and asymmetric design/shape of the instrument cluster.

From behind, there's just a wee bit o' wiring to do. Each gauge has three wires for power, ground, and dimmer feed, and all but one also include wires for sensor inputs, e.g., there's a wire to the coolant temp sensor, another to the oil pressure sender, etc. The speedo gauge has the most leads as it also handles turn signals and high-beam indicators along with a speed sensor input. The fat gray cable is for the shift indicator.
The wires all received wire tags (scroll up) to indicate their function, and all power, ground, and dimmer leads were tied together to a single line each to simplify that mess.

Gauge panel mounted onto trim panel mounted into pod remounted back onto dash. (The box behind the shifter at bottom-right is the control box for the shift indicator.)
Although it's not visible here, the wiring to the original cluster printed circuit was disconnected from its contact strip, given wire tags (scroll up) and marked, and given fully-insulated spade terminals. Every wire to the new dash is marked on both sides of fully-insulated spade connections so if it ever has to come out and apart, the wiring can be disconnected and reconnected easily. Also, for safety, the spade connector polarity for power inputs was reversed so nobody can accidentally plug a power line into a sensor input or ground.

Reinstall trim, apply power, and OMGyay it works!
First test drive - the response rate on the gauges seems fast enough to be useful, and the tach actually shows short transient changes in engine speed. (Also, you can see the oil pressure and alternator charge voltage change with engine speed.)
blasphemousBreakfastBurrito
Awh yeah now this is some of that good good
jenesasquatch
@op right now v
v
ArchchancellorRidcully
At 1st I was "I love the old instruments", but then... "That new cluster's as cool AF." Excellent job.
HibachiMishima
Nice! Kinda brings me back to the days of my old '87 Z24. Except this dash has a lot more going on.
kamkor1
About how much did this cost?
WebMaka
If paying a shop, $1,500-2,500 depending on the vehicle and extent of modifications needed, assuming there's not a drop-in kit available.
sindawe
I like this, it has the look of the old electroluminecent displays that some calculators of late '70s had.
Dorsk84
With all this work. It better also talk to you.
steve1378
What gauge kit is this? Part number? I have an 83 Carlo that this would look sweet in.
AlphaKill
https://www.intellitronix.com/product-page/create-a-dash-universal-gauge-kit
smoothpassion
All I can think, is how blindingly bright all those blue LEDs will be at night.
WebMaka
They're all tied to the dimmer circuit - when the headlights are on the brightness drops by 50%.
KnownSecretCarrot
What's with the 99 on the fuel? How is it's sensitivity?
WebMaka
99% - it calculates % based on the expected resistance range of the fuel level sender.
Greyeyes1973
NICE!!!! That's a sexy dash
CrazyZonie
The only thing missing that I can see is the Odometer. Makes it fun to keep track of routine maintenance, and may be a problem when selling.
CrazyZonie
Otherwise, not a bad conversion.
WebMaka
The lone "0" at the bottom of the speedo is the odo. Since the previous speedo hadn't worked in years there's no mileage to transfer over.
thatguyfromny
I'm curious why you went with a 5 digit odo and not 6.
CrazyZonie
So, either way, you're going to have fun if you decide to sell it.
WebMaka
Eh, customer won't have much of a problem with that if he decides to sell - late-70s El-C odos are not exactly reliable and the car's a toy.
CrazyZonie
Well, there is that. And I'm not making fun of you. Heck, I have a 66 Corvair rusting on my dad's place. Mostly a time and money thing.
WebMaka
Hey, no big. And yeah, time and money are the bane of many a classic car owner.