
thegraindoctor

27006

73

0

The finished product - a utility sink for my basement workshop.

Another view of the finished product!
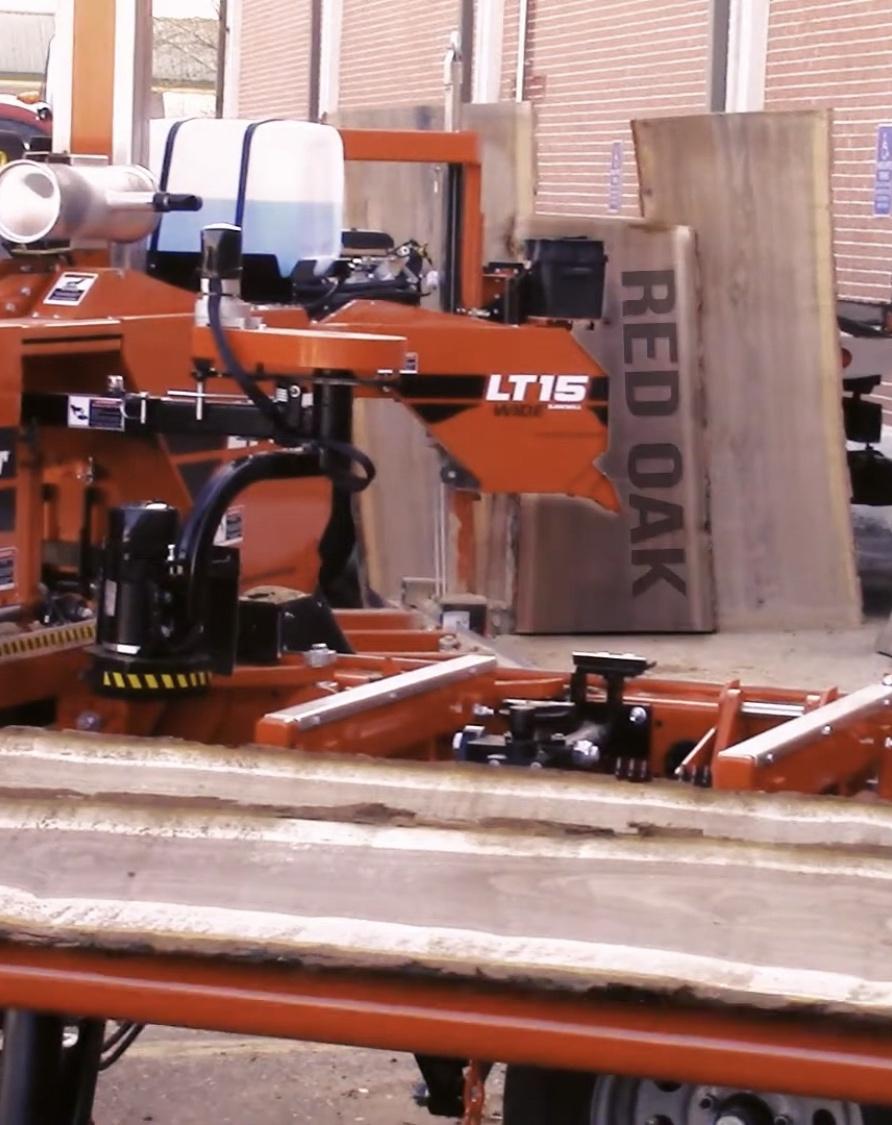
I bought this piece fresh cut off a Woodmizer mill somewhere around 2017 and dried it in my basement for several years. I incorrectly identified it as red oak initially, when it is in fact white oak.

The 8/4 white oak slab makes my 1957 27” Northfield bandsaw look small!

I have a router sled setup to flatten wide slabs, but there was such a bow in this piece that I would have been left with almost no thickness if I flattened it as one piece.

Ready to rip!

Ripping the slab on the bandsaw into widths that I can pass over the jointer.

Feeding my 1966 Northfield 12” jointer! This flattens one side and squares one edge of the rough sawn slab.

Grain starting to pop after a few passes on the jointer.

My planer handled these wide, heavy pieces well, so long as I took light passes. The planer gets you a flat and parallel face.

There was an interesting transition in the ray flecks between the rough sawn area and the planed area. #harrypotter

I don’t have dust/chip collection on the jointer yet. I should probably dig out and correct that.

Planed and jointed! I got a parallel edge on the middle piece by running it through the table saw (not shown).

I glued the two larger pieces back together with the assistance of some Dominoes.

I squared the edges using my tracksaw.

Using the back live edge as a backsplash.

Cutting the hole for the sink basin. I used the track saw for this.

I routed recesses for the edge flange pieces on the sink.

Test fitting! The sink was from the scratch and dent section at IKEA, the faucet came off of Amazon.

I selected a piece of black birch for the front legs and a sycamore offcut for the apron. I got the offcut for free from the same bandsaw mill guy that I got the slab from.

A piece of cedar 4x4 that I salvaged from my deck renovation project a few years ago. I lag bolted it to the concrete to serve as the rear support for the sink top. Artwork by my daughters.

Filling the knot holes and cracks with tinted epoxy.

Filling knot holes on the apron with epoxy.

One of the knot holes looked to me like a cross between a hummingbird and a bumblebee.

Attaching the leg and apron assembly with Dominoes (machine made by Festool, kind of like a biscuit joiner on steroids).

Legs and apron glued in place.

First coat of TotalBoat Halcyon Clear finish.

Getting closer - I also painted over the artwork. ?

The sink is below the level of any existing drain I have in the house, so I needed to plumb in a utility pump to get drainage up to an appropriate level. Everything came from my local blue and orange box stores. I’m familiar with copper, this was my first foray in to pex.

Plumbing in the dual basin, including a vent, which according to the pump instructions was not entirely necessary. Due to vertical space constraints, the P trap output is higher than it should be. Only issue with this setup so far is that one basin will back up into the other as you fill it. (n.b. - this was a dry fit, nothing has been glued together yet, and I haven’t removed the plastic cover off the vent)

The drain goes straight up to the ceiling (with a check valve at the bottom), then slopes down to join the existing drain from our kitchen island.

Another view of the drainage setup.

Supply side: My first time using Pex - I soldered in tees with Pex adapters.

My first go at tying in to the drain was not good. I didn’t have any lateral slack to just pop in the weye, so I tried sliding and gluing repair unions, but it leaked. I temporarily wrapped the joints with Flex seal tape.
Part of my problem was that I wasn’t making square cuts on the 3” PVC. I came up with this method to help, and made a video about it. Full version can be seen here: https://youtu.be/OCpzkzEHdw0
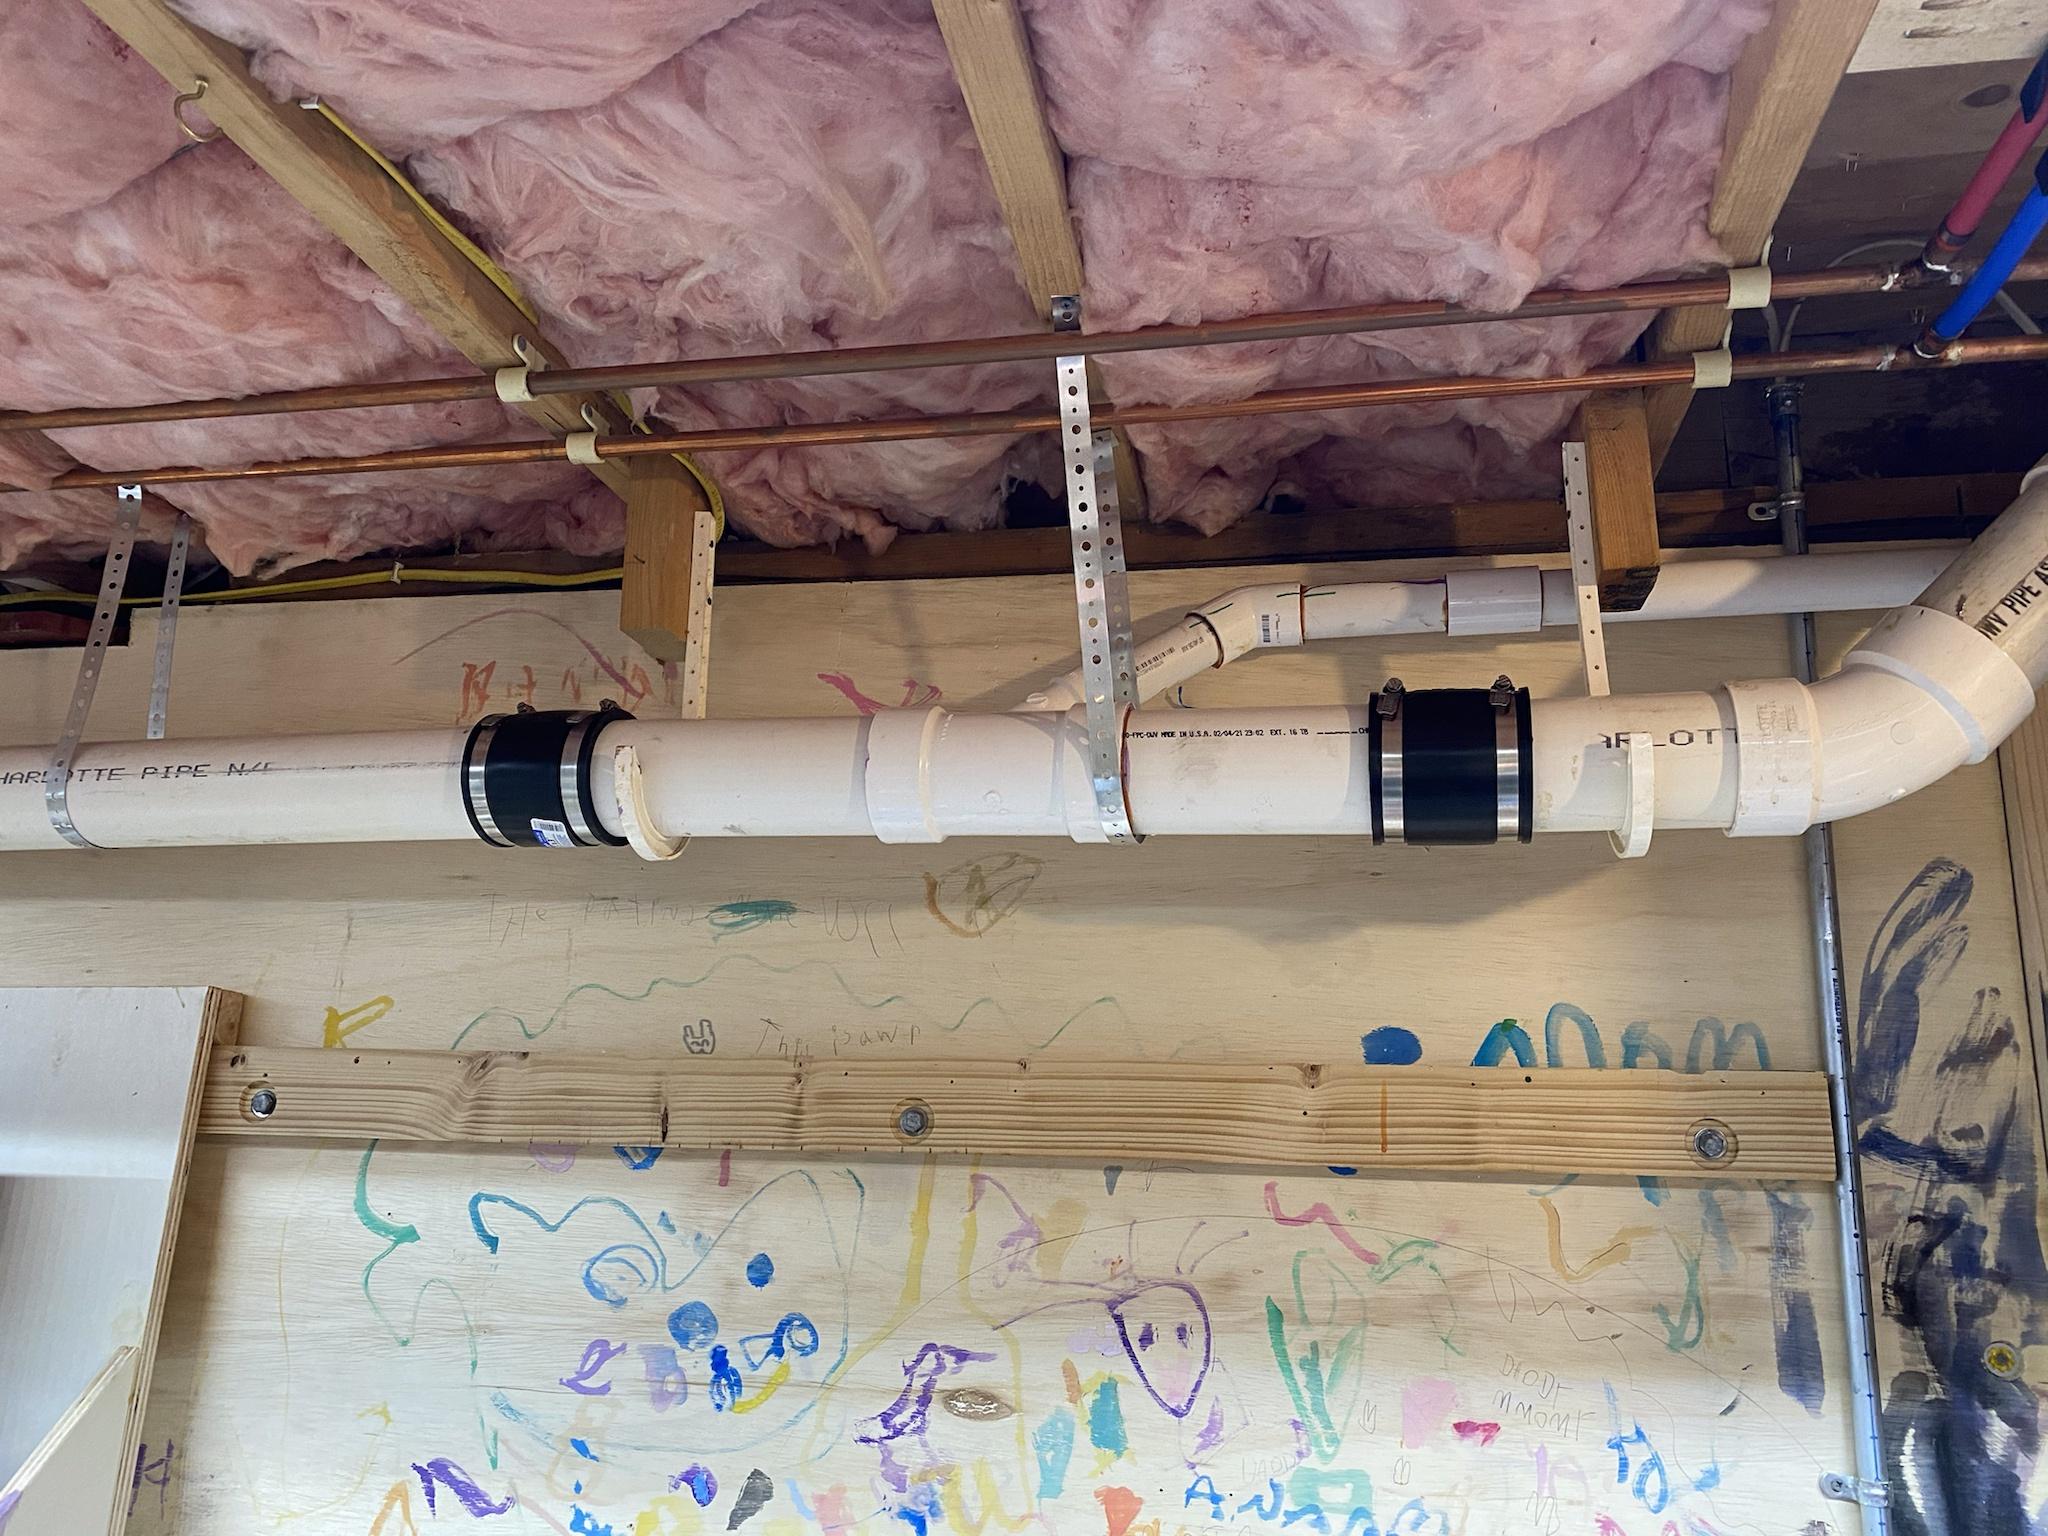
I redid the drain tie in using standard rubber repair unions - works like a charm!

The finished product again. It is so nice to not have to run upstairs every time I need a sink!
gr8snd
Festool. Must be nice to be rich! Nice work.
edwardm835360
How that would work. Best of luck and really nice work
edwardm835360
It's either level with the drain in front of it or higher. The drain behind said p-trap should be at least 1" lower. With pump set-up unsure
thegraindoctor
Thank you! Yes, that section should be lower, but I was limited in vertical space below the sink. Maybe I can fix it in the future.
incorrecthorsestapler
Let that sink in.
thegraindoctor
?
spooktree
backsplash is a little low on the faucet side. looks really cool, but could cause problems
thegraindoctor
Good point - I will watch out for any leakage there.
thegraindoctor
If there is an issue, I can unscrew the top from the sill 4x4 and slide in a silicone secondary backsplash.
edwardm835360
Apprentice plumber here, read the problem about your sink backing up and looked at your pictures. The problem is the drain behind the p-trap
thegraindoctor
Thank you! I thought that might be the issue. I was limited in vertical space because of the pump, hence the pipe height beyond the P trap.
edwardm835360
Remove the lower union. That will give you the space. Replace with repair coupling. If you ever need to service the pump cut above coupling.
Manse84
Nice shop. I don't think I could even find, let alone afford, a 12" jointer. Back to skimming ebay for hand planes I go
thegraindoctor
I got it at auction for a steal, then spent two years restoring it. I recommend setting up Craigslist alerts for your area.
thegraindoctor
That’s how I found the bandsaw! https://youtu.be/THLYXR2HXZs
thewhifflingtit
Thanks for the tip!